Semtech's LoRa Cloud™ Flow Guide
The main goal of this guide is to describe the complete flow of Semtech’s LoRa Cloud™ account setup with further launch of the HTTP server and integration between it and the TEKTELIC Network Server.
1.The TEKTELIC LoRaWAN® gateway that is onboarded on the TEKTELIC Network Server and is online.
2.The TEKTELIC LoRaWAN® device, STORK or CHICKADEE, that is onboarded on the TEKTELIC Network Server and is online.
3.The user’s HTTP server is available via a public network.
4.The Docker application is installed on the user’s HTTP server.
5.“key.pem” file with the public key of the user’s HTTP server is available.
Please use this this link to manually download the service`s docker image: https://hub.docker.com/r/tektelicdocker/stork-payload-decoder

1.Open Semtech’s LoRa Cloud™ instance: https://www.loracloud.com/
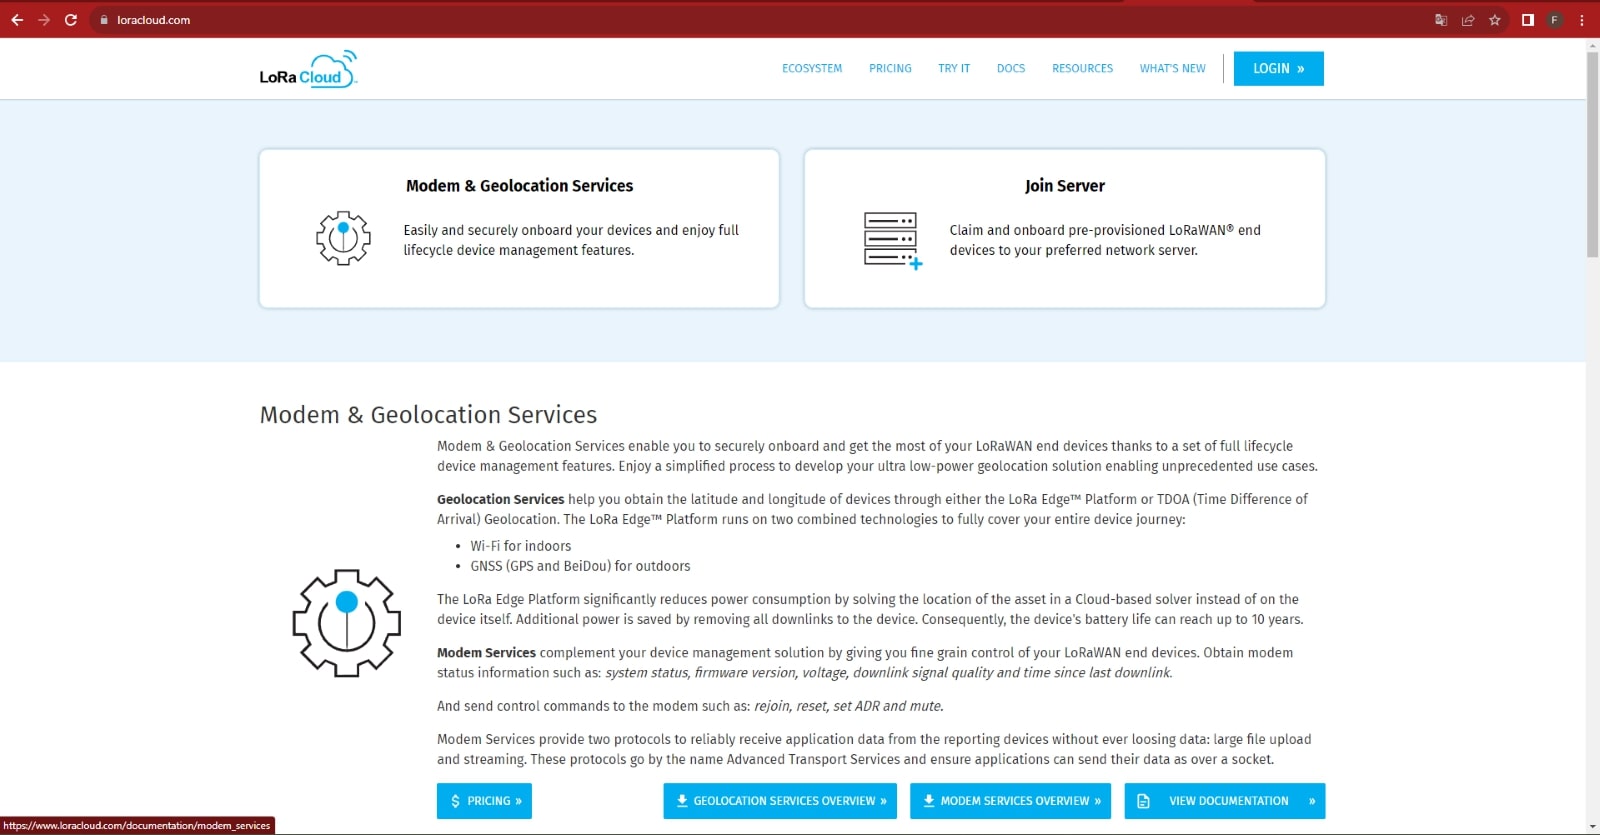
2.Click on the “Login” button.
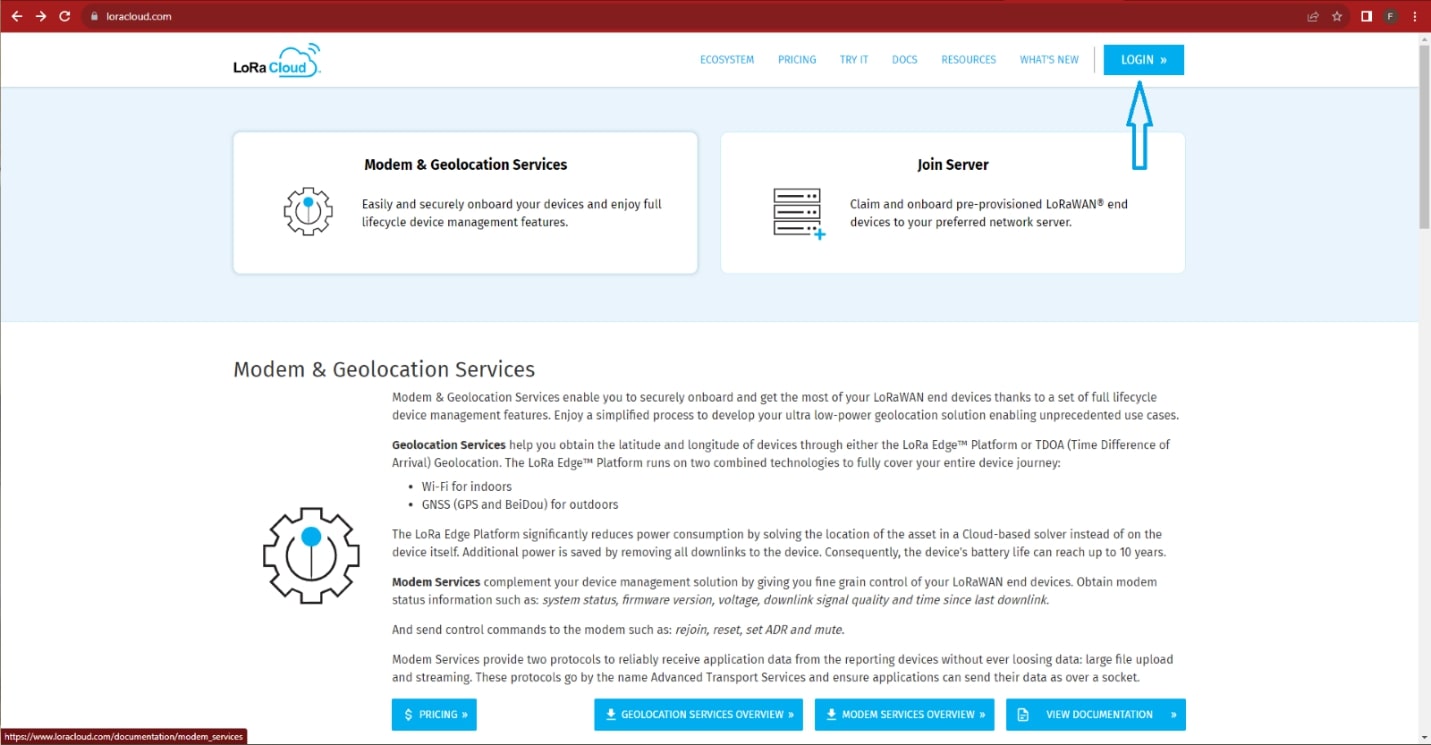
3.For users that already have a Semtech’s LoRa Cloud™ account, please choose the “Log In” option and fill out the fields with the account credentials. Click on the “Log In” button to enter your Semtech’s LoRa Cloud™ account.
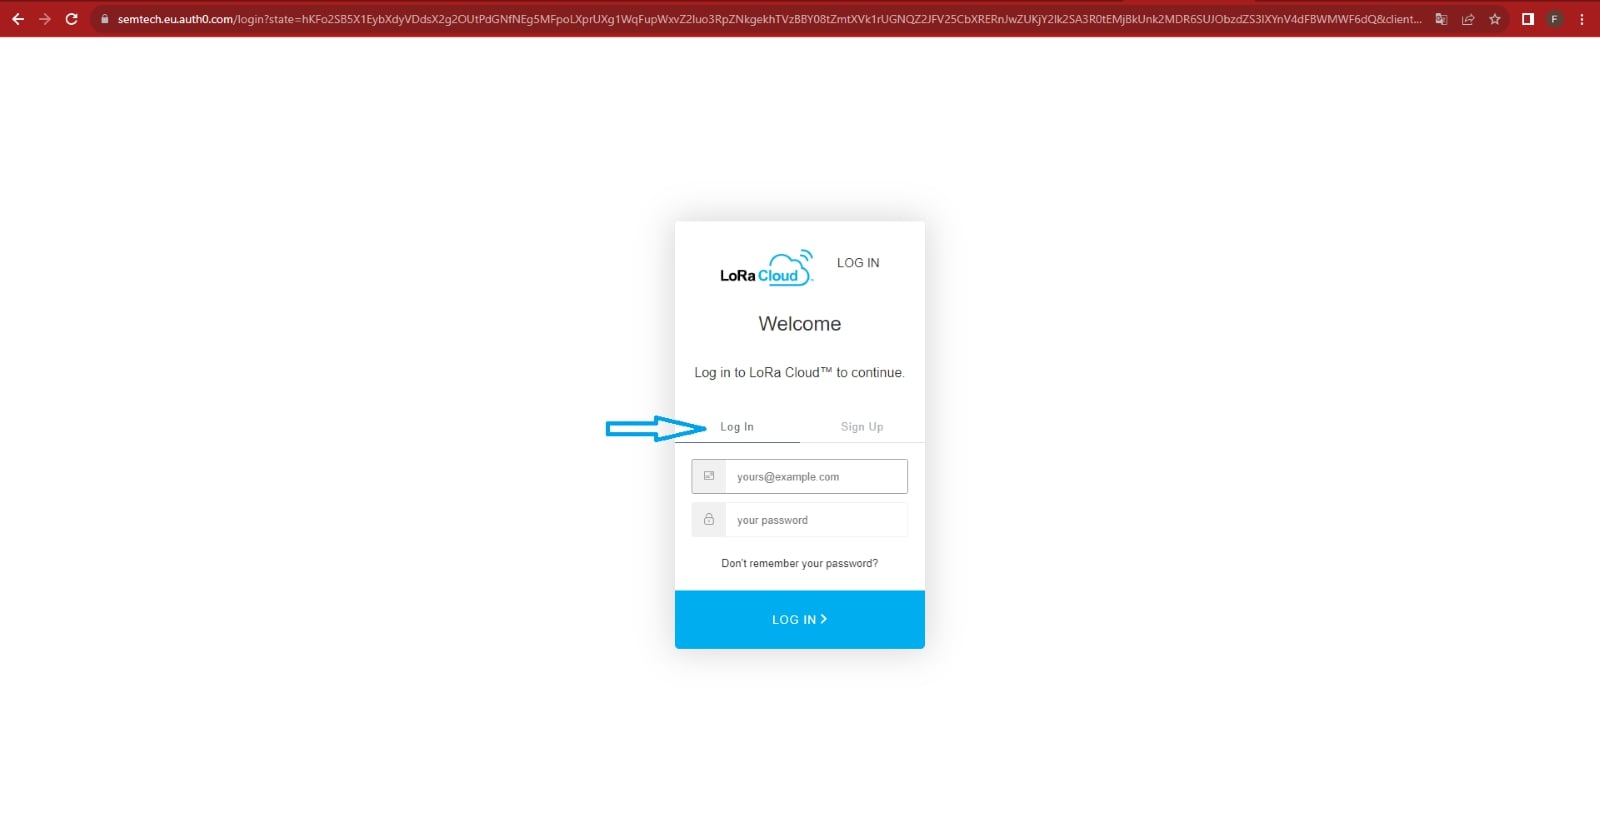
4.For new users of Semtech’s LoRa Cloud™, please choose the “Sign Up” option and fill out the fields with the credentials that will be used for the account. Click on the “Sign Up” button to proceed with the account registration.

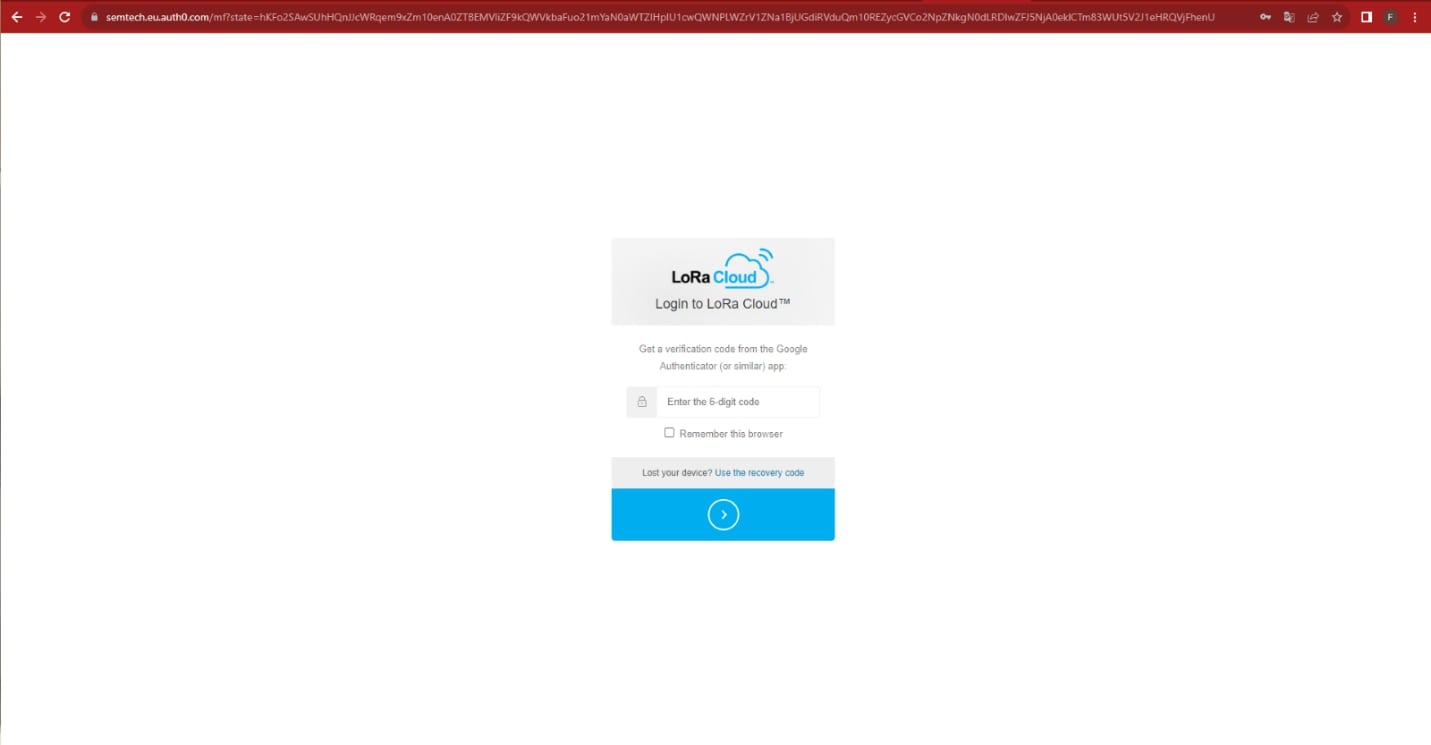
5.After the registration part has been successfully finished/the user has successfully entered the existing Semtech’s LoRa Cloud™ account, please complete the 2FA verification using either Google Authenticator or the SMS message sent to the user’s mobile number mentioned during the registration part.
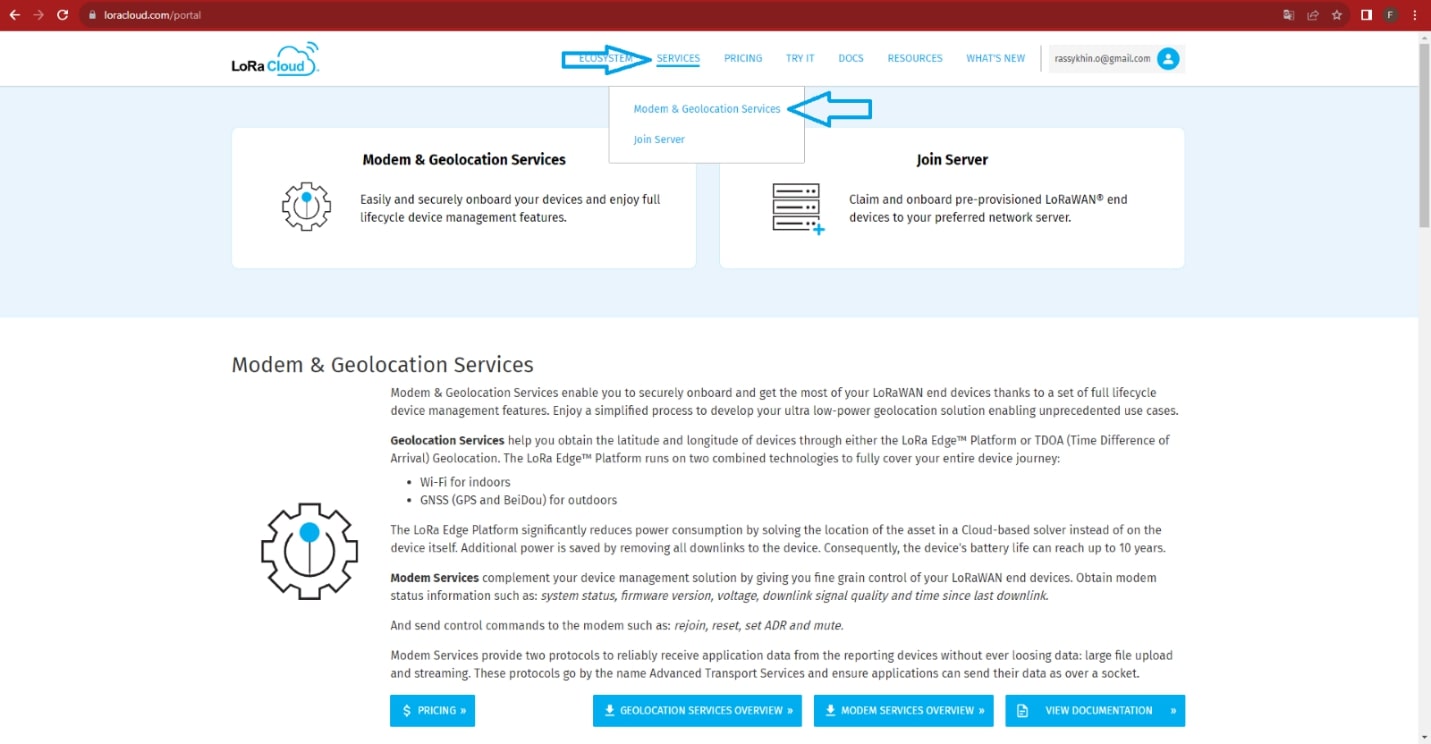
6.After the user has successfully entered their Semtech’s LoRa Cloud™ account, click on the “Services” section and choose the “Modem & Geolocation Services” option.
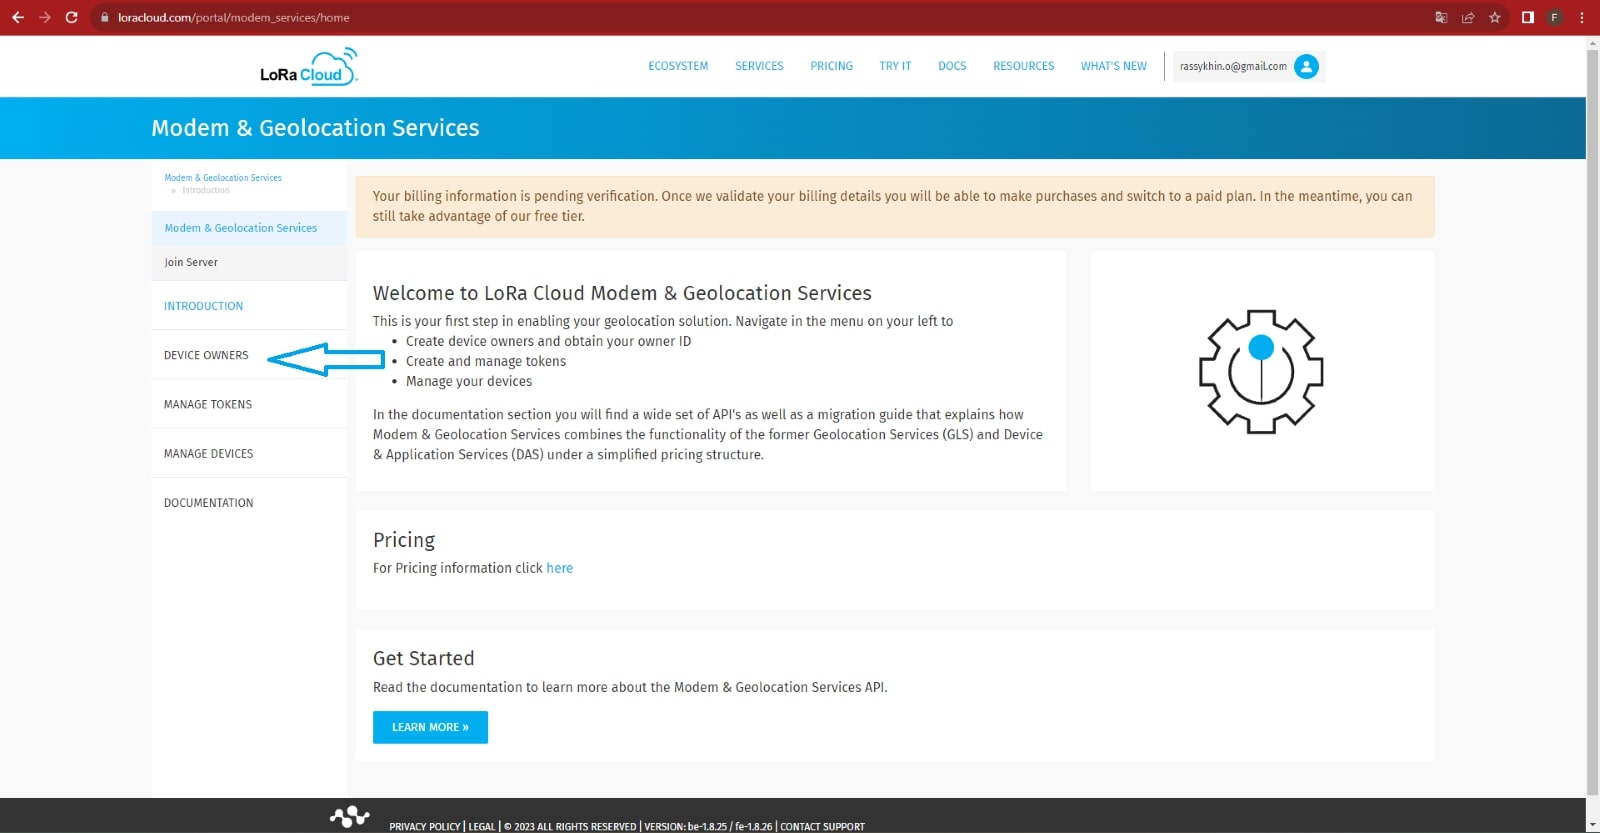
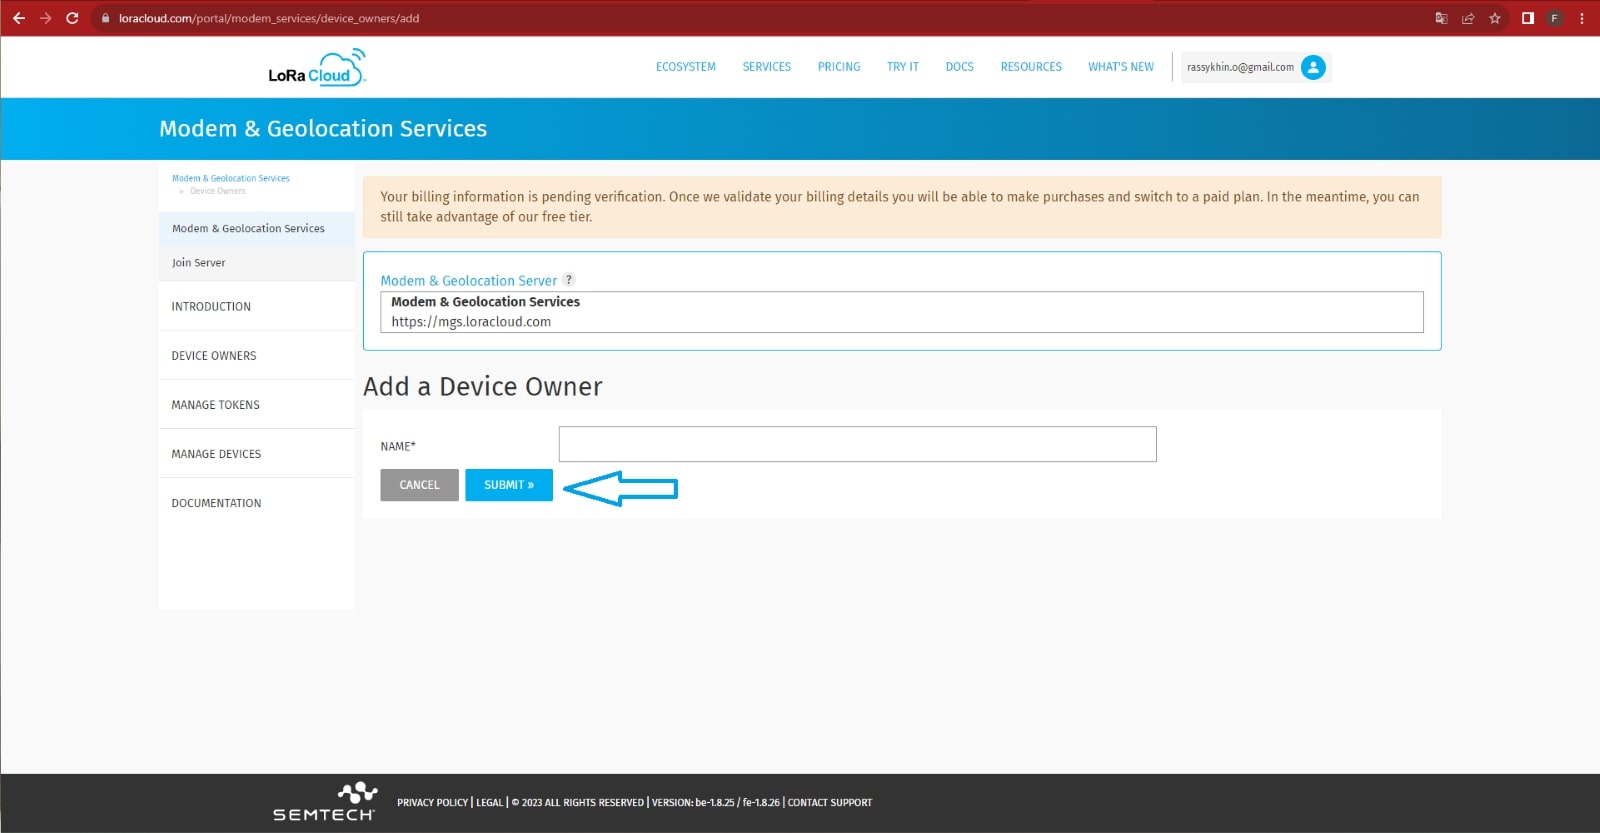
7.On the “Modem & Geolocation Services” page, choose the “Device Owners” section.
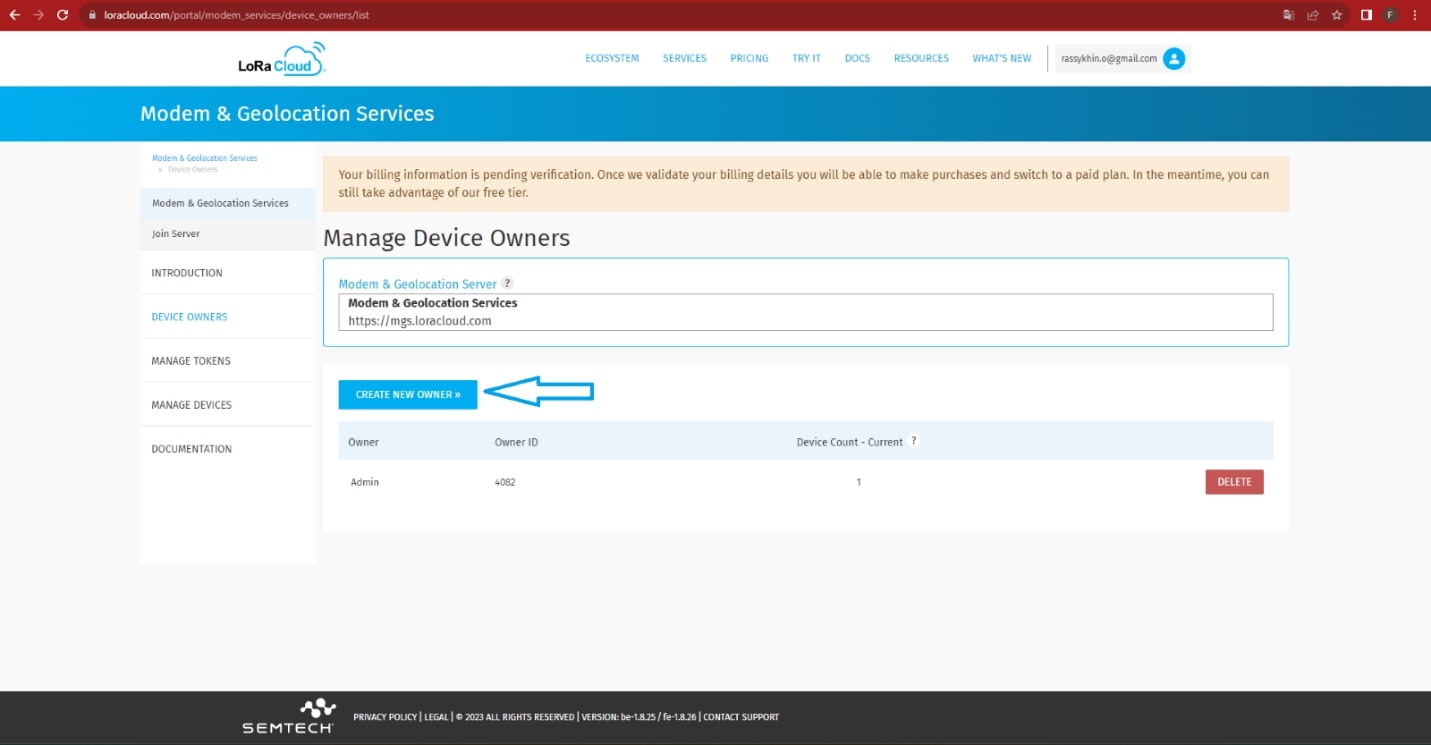
8.On the “Manage Device Owners” screen, click on the “Create New Owner” button.
9.Enter the name that will be used for the “Device Owner."
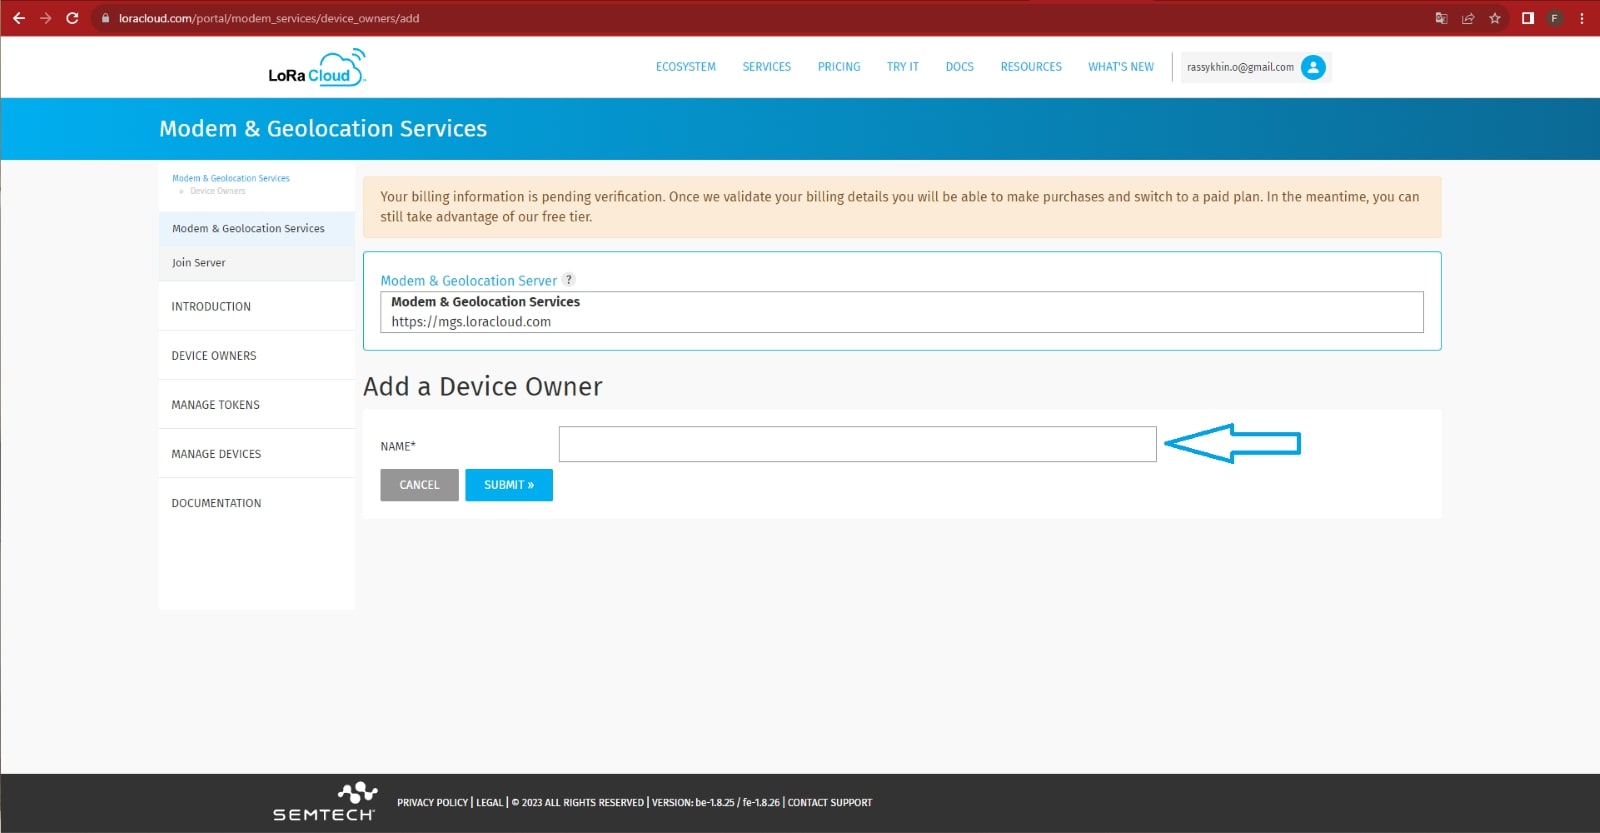
10.Click on the “Submit” button to save the “Device Owner” entity.
11.After the new device owner entity has been successfully created, choose the “Manage Tokens” section.
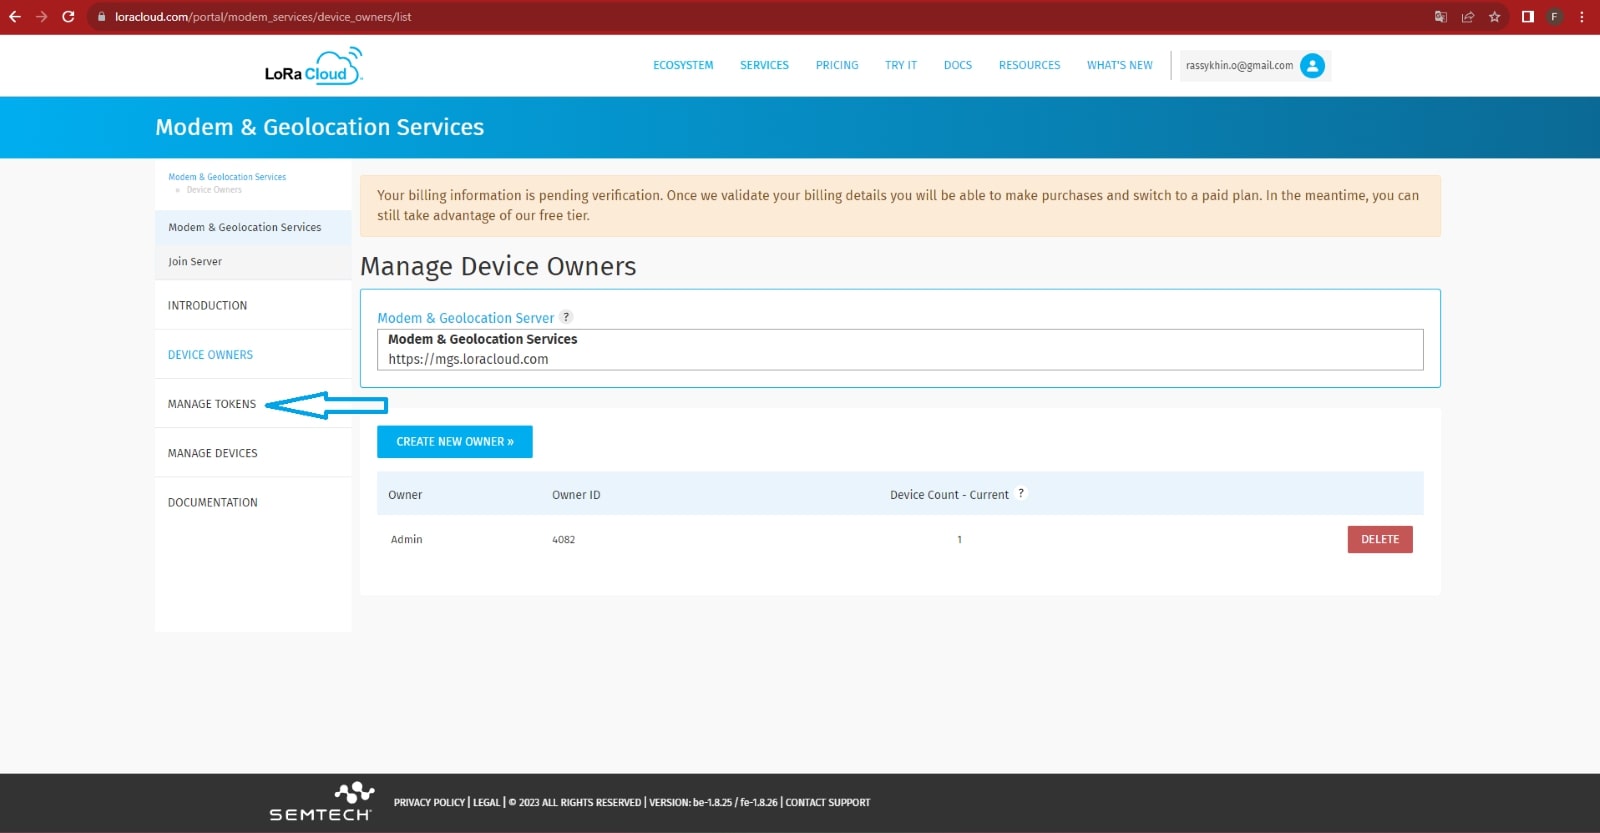
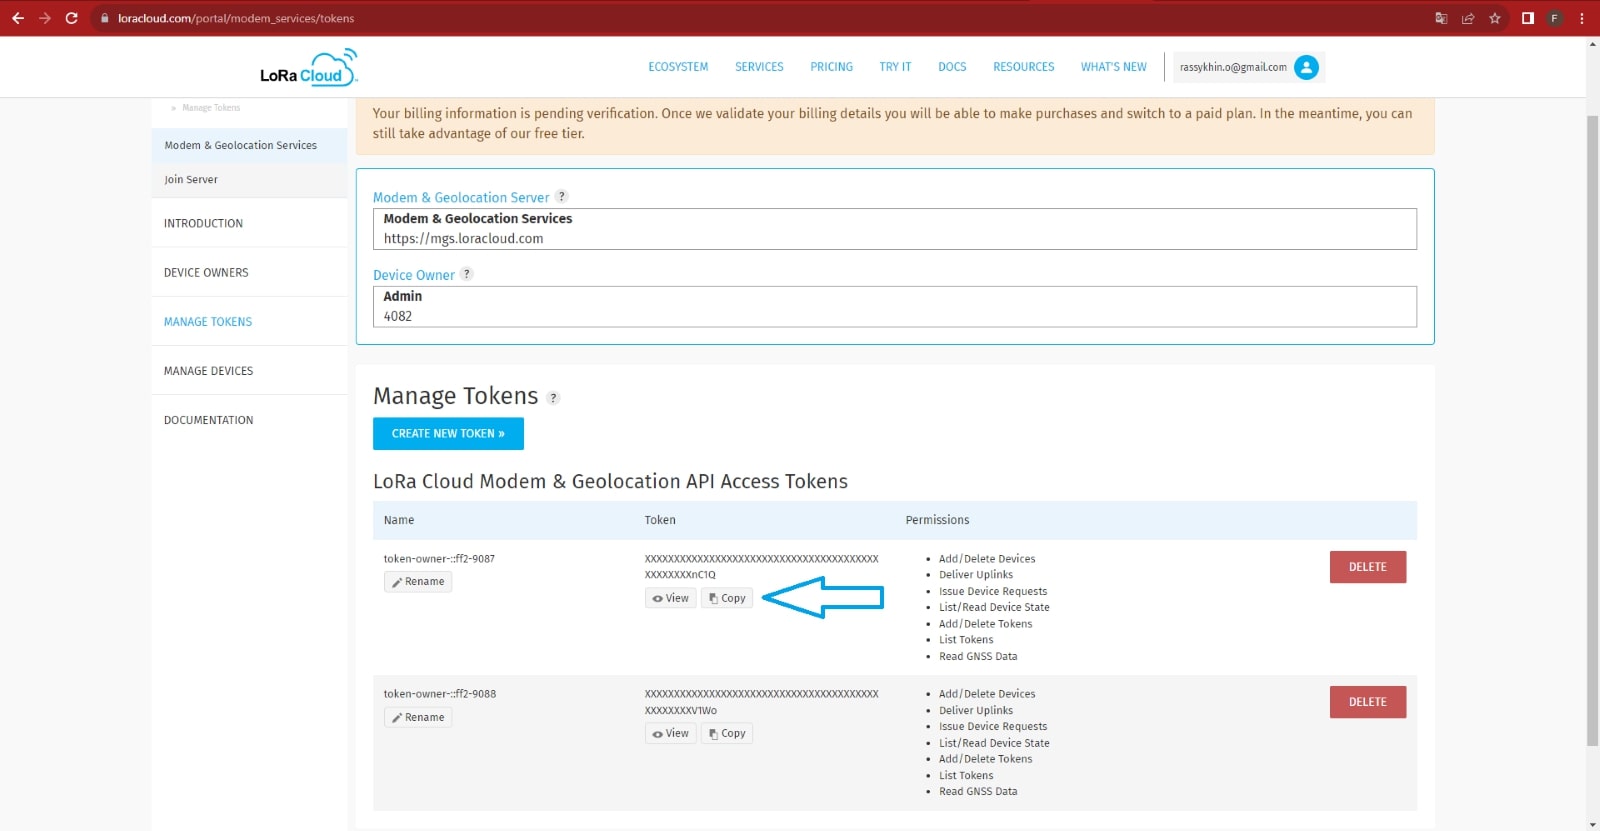
12.On the “Manage Tokens” page, find the first generated token on the list and click on the “Copy” button to save the token. This token will be used in the future.
1.Log in to the user’s HTTP server using the terminal.
2.Execute the following command to run the server:
‘docker run -d -p 80:8080 –env LORACLOUD_TOKEN=AQEAfTwSSelucVYY2bTbTJ4bQJWz5+Yhxd+C0LuaKWcf74TZnC1Q –env NS_URL=https://lorawan-ns-eu.tektelic.com –env NS_USERNAME=xxx@tek.com –env NS_PASSWORD=1111111@A –env APP_URL=https://simple-integration.tektelic-dev.com –env AUTHORIZATION_HEADER=auth_header tektelicdocker/stork-payload-decoder:1.0.1’
where:
LORACLOUD_TOKEN=AQEAfTwSSelucVYY2bTbTJ4bQJWz5+Yhxd+C0LuaKWcf74TZnC1Q” - Semtech’s LoRa Cloud™ token.
NS_URL=https://lorawan-ns-eu.tektelic.com" - the URL of the TEKTELIC Network Server instance.
NS_USERNAME=xxx@tek.com –env - the TEKTELIC Network Server account username.
NS_PASSWORD=1111111@A - the TEKTELIC Network Server account password.
APP_URL=https://simple-integration.tektelic-dev.com - the URL of the user’s HTTP integration.
AUTHORIZATION_HEADER=auth_header tektelicdocker/stork-payload-decoder:1.0.1 - value for the Authorization HTTP header sent to integration from the STORK decoder service.
tektelicdocker/stork-payload-decoder:1.0.1 - the Docker image for the STORK decoder service.
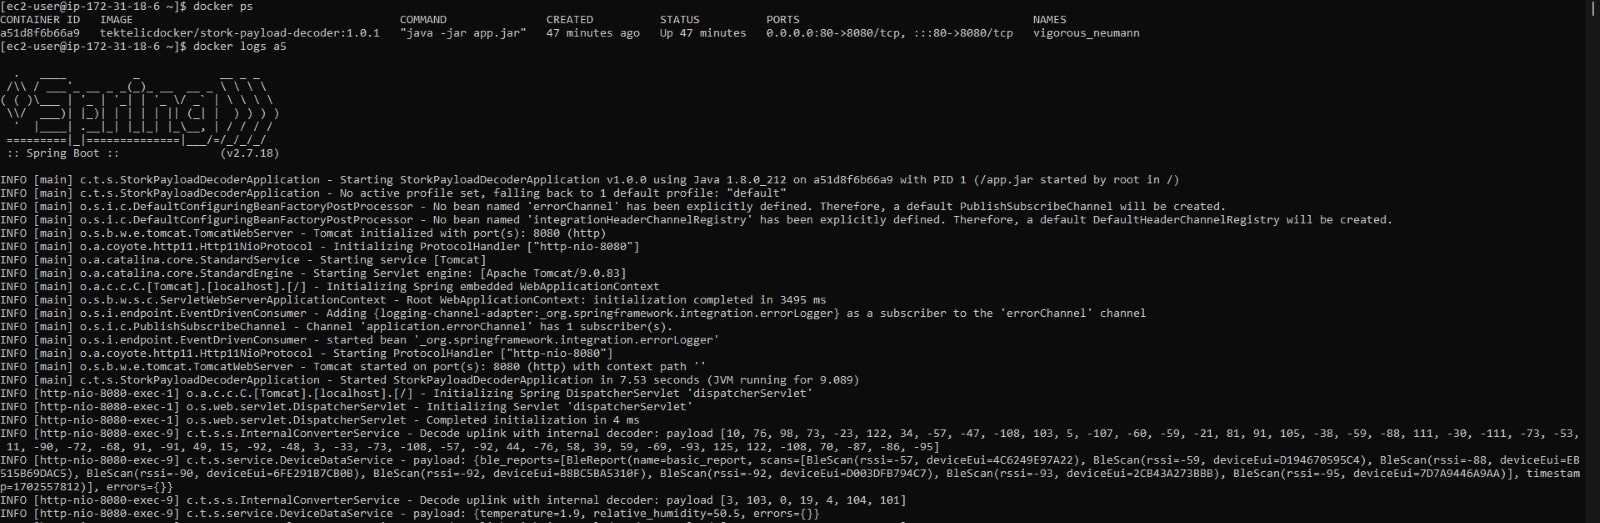
To validate that the server has been successfully booted, execute the following command: docker ps

3.To check the logs from the server, execute the following command:
docker logs XX
where “XX” is the first two ID numbers of the created Docker container
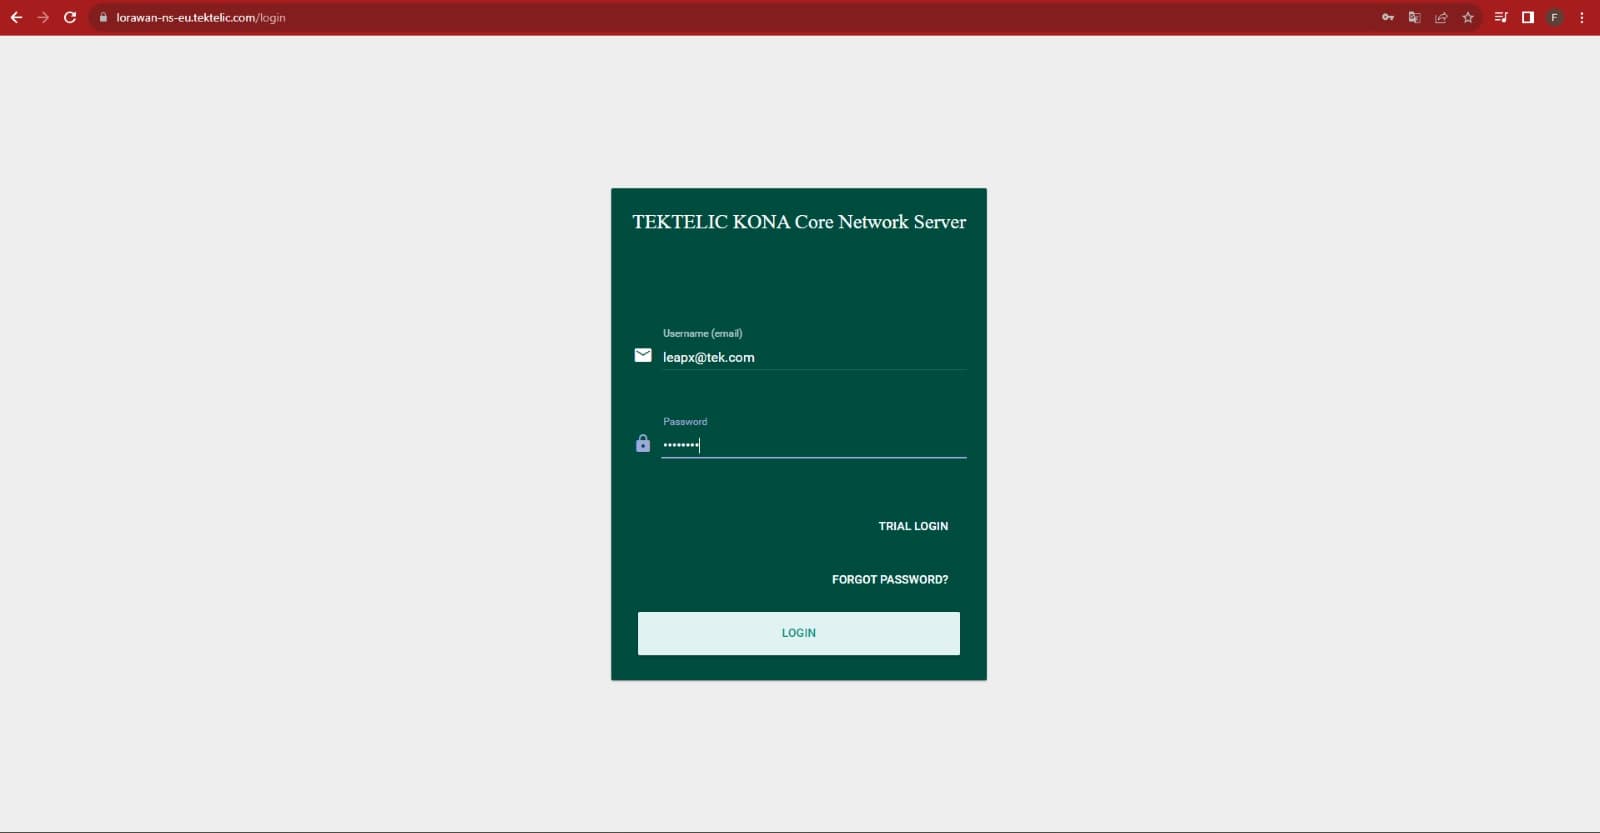
1.Open the TEKTELIC Network Server instance.

2.Log in using the TEKTELIC Network Server credentials.
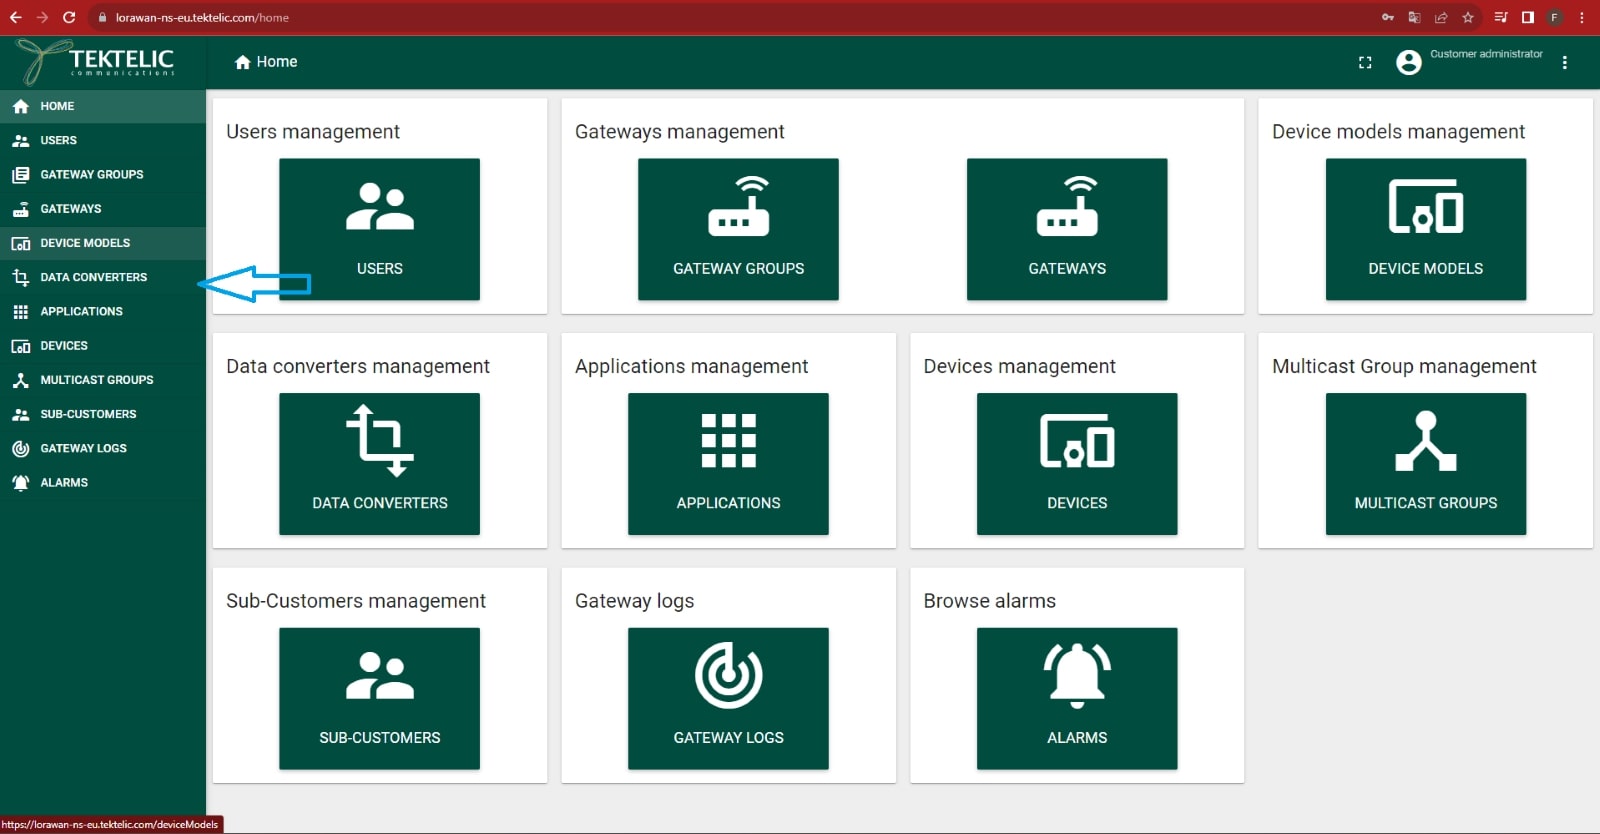
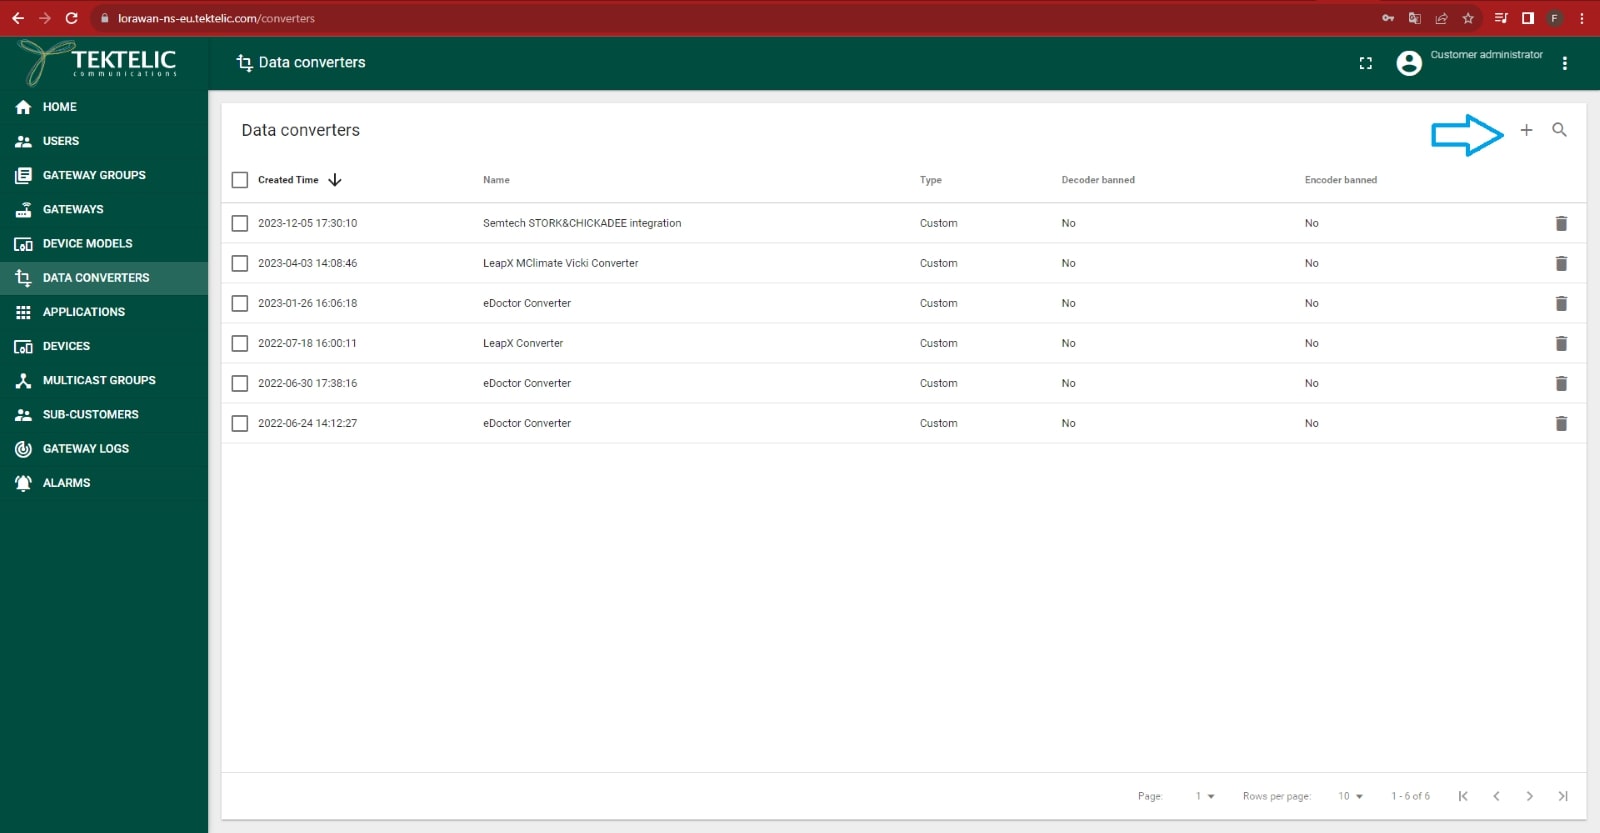
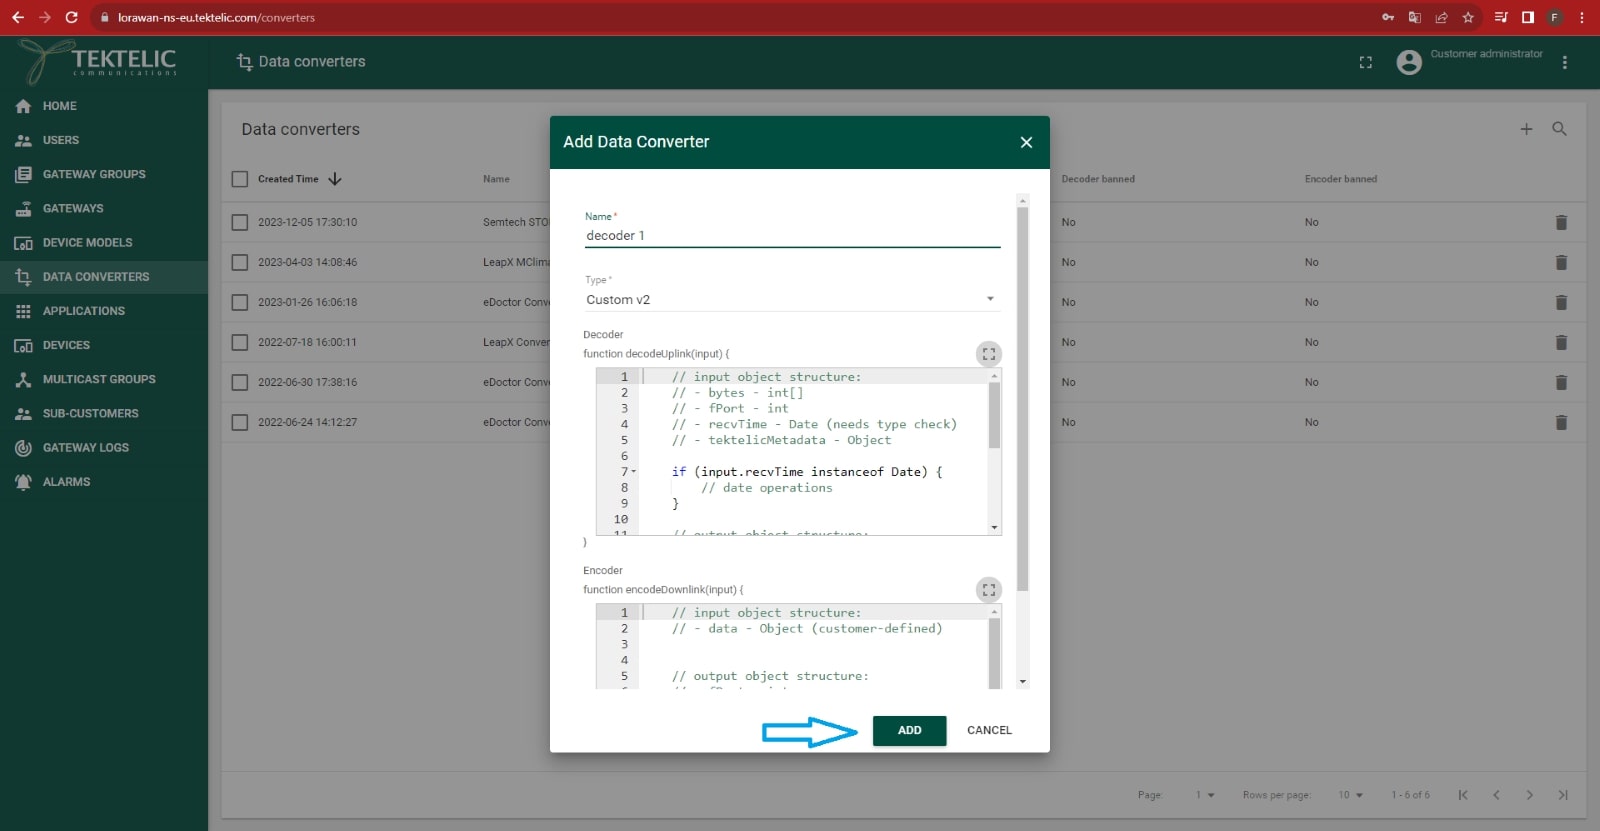
3.Choose the “Data Converters” section.
4.Click on the “+” button to add a new data converter.
5.Click on the “Type” drop-down list and choose “Custom v2”. Replace values in the decoder/encoder fields with the values from the “Data converter” guide section.
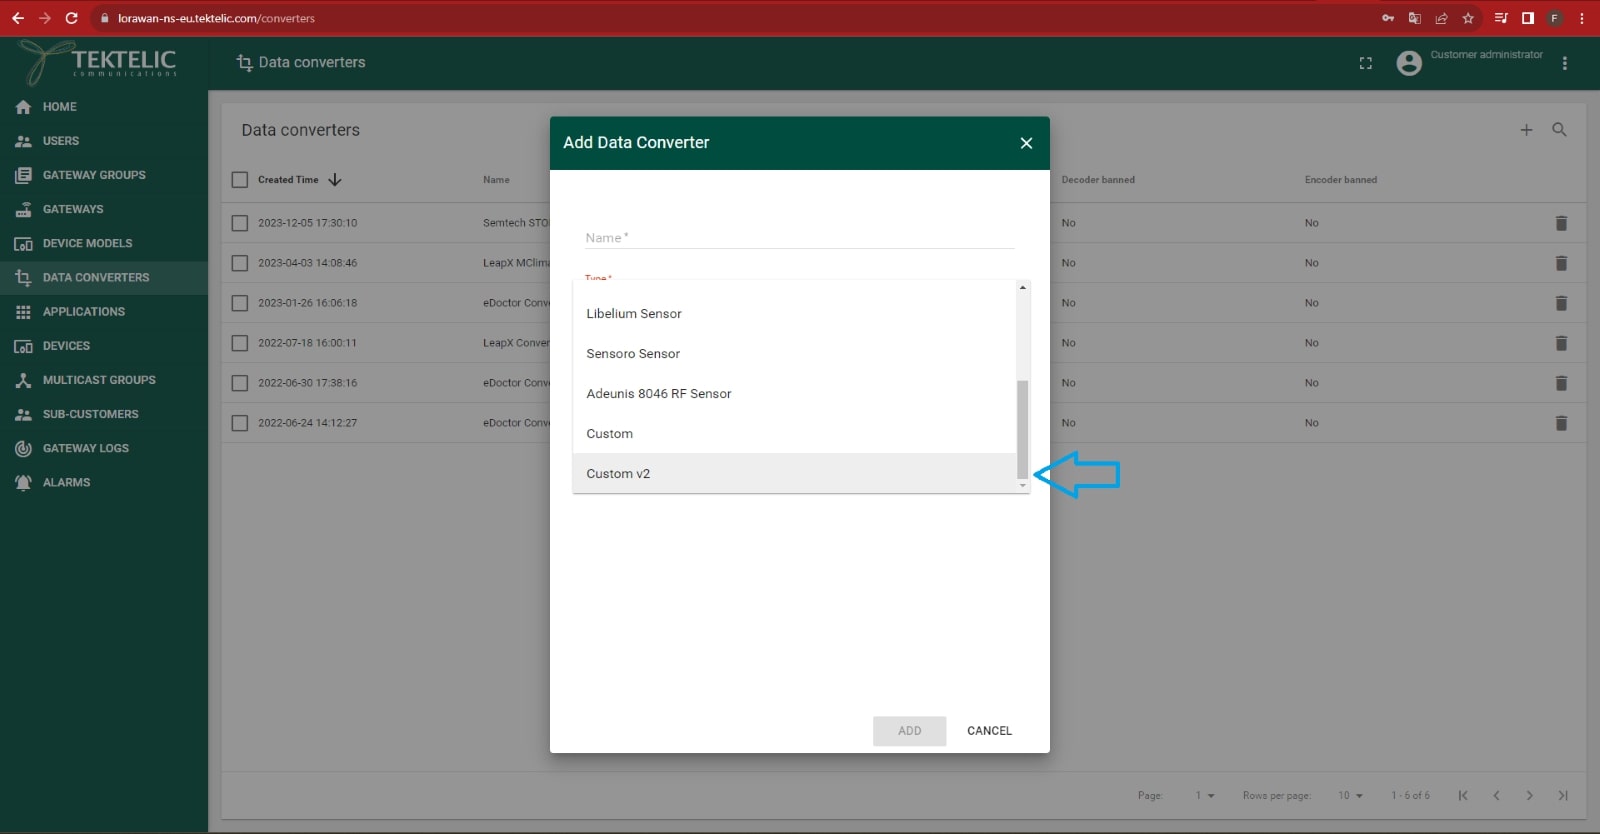
6.Choose the name for this data decoder and further click on the “Add” button.
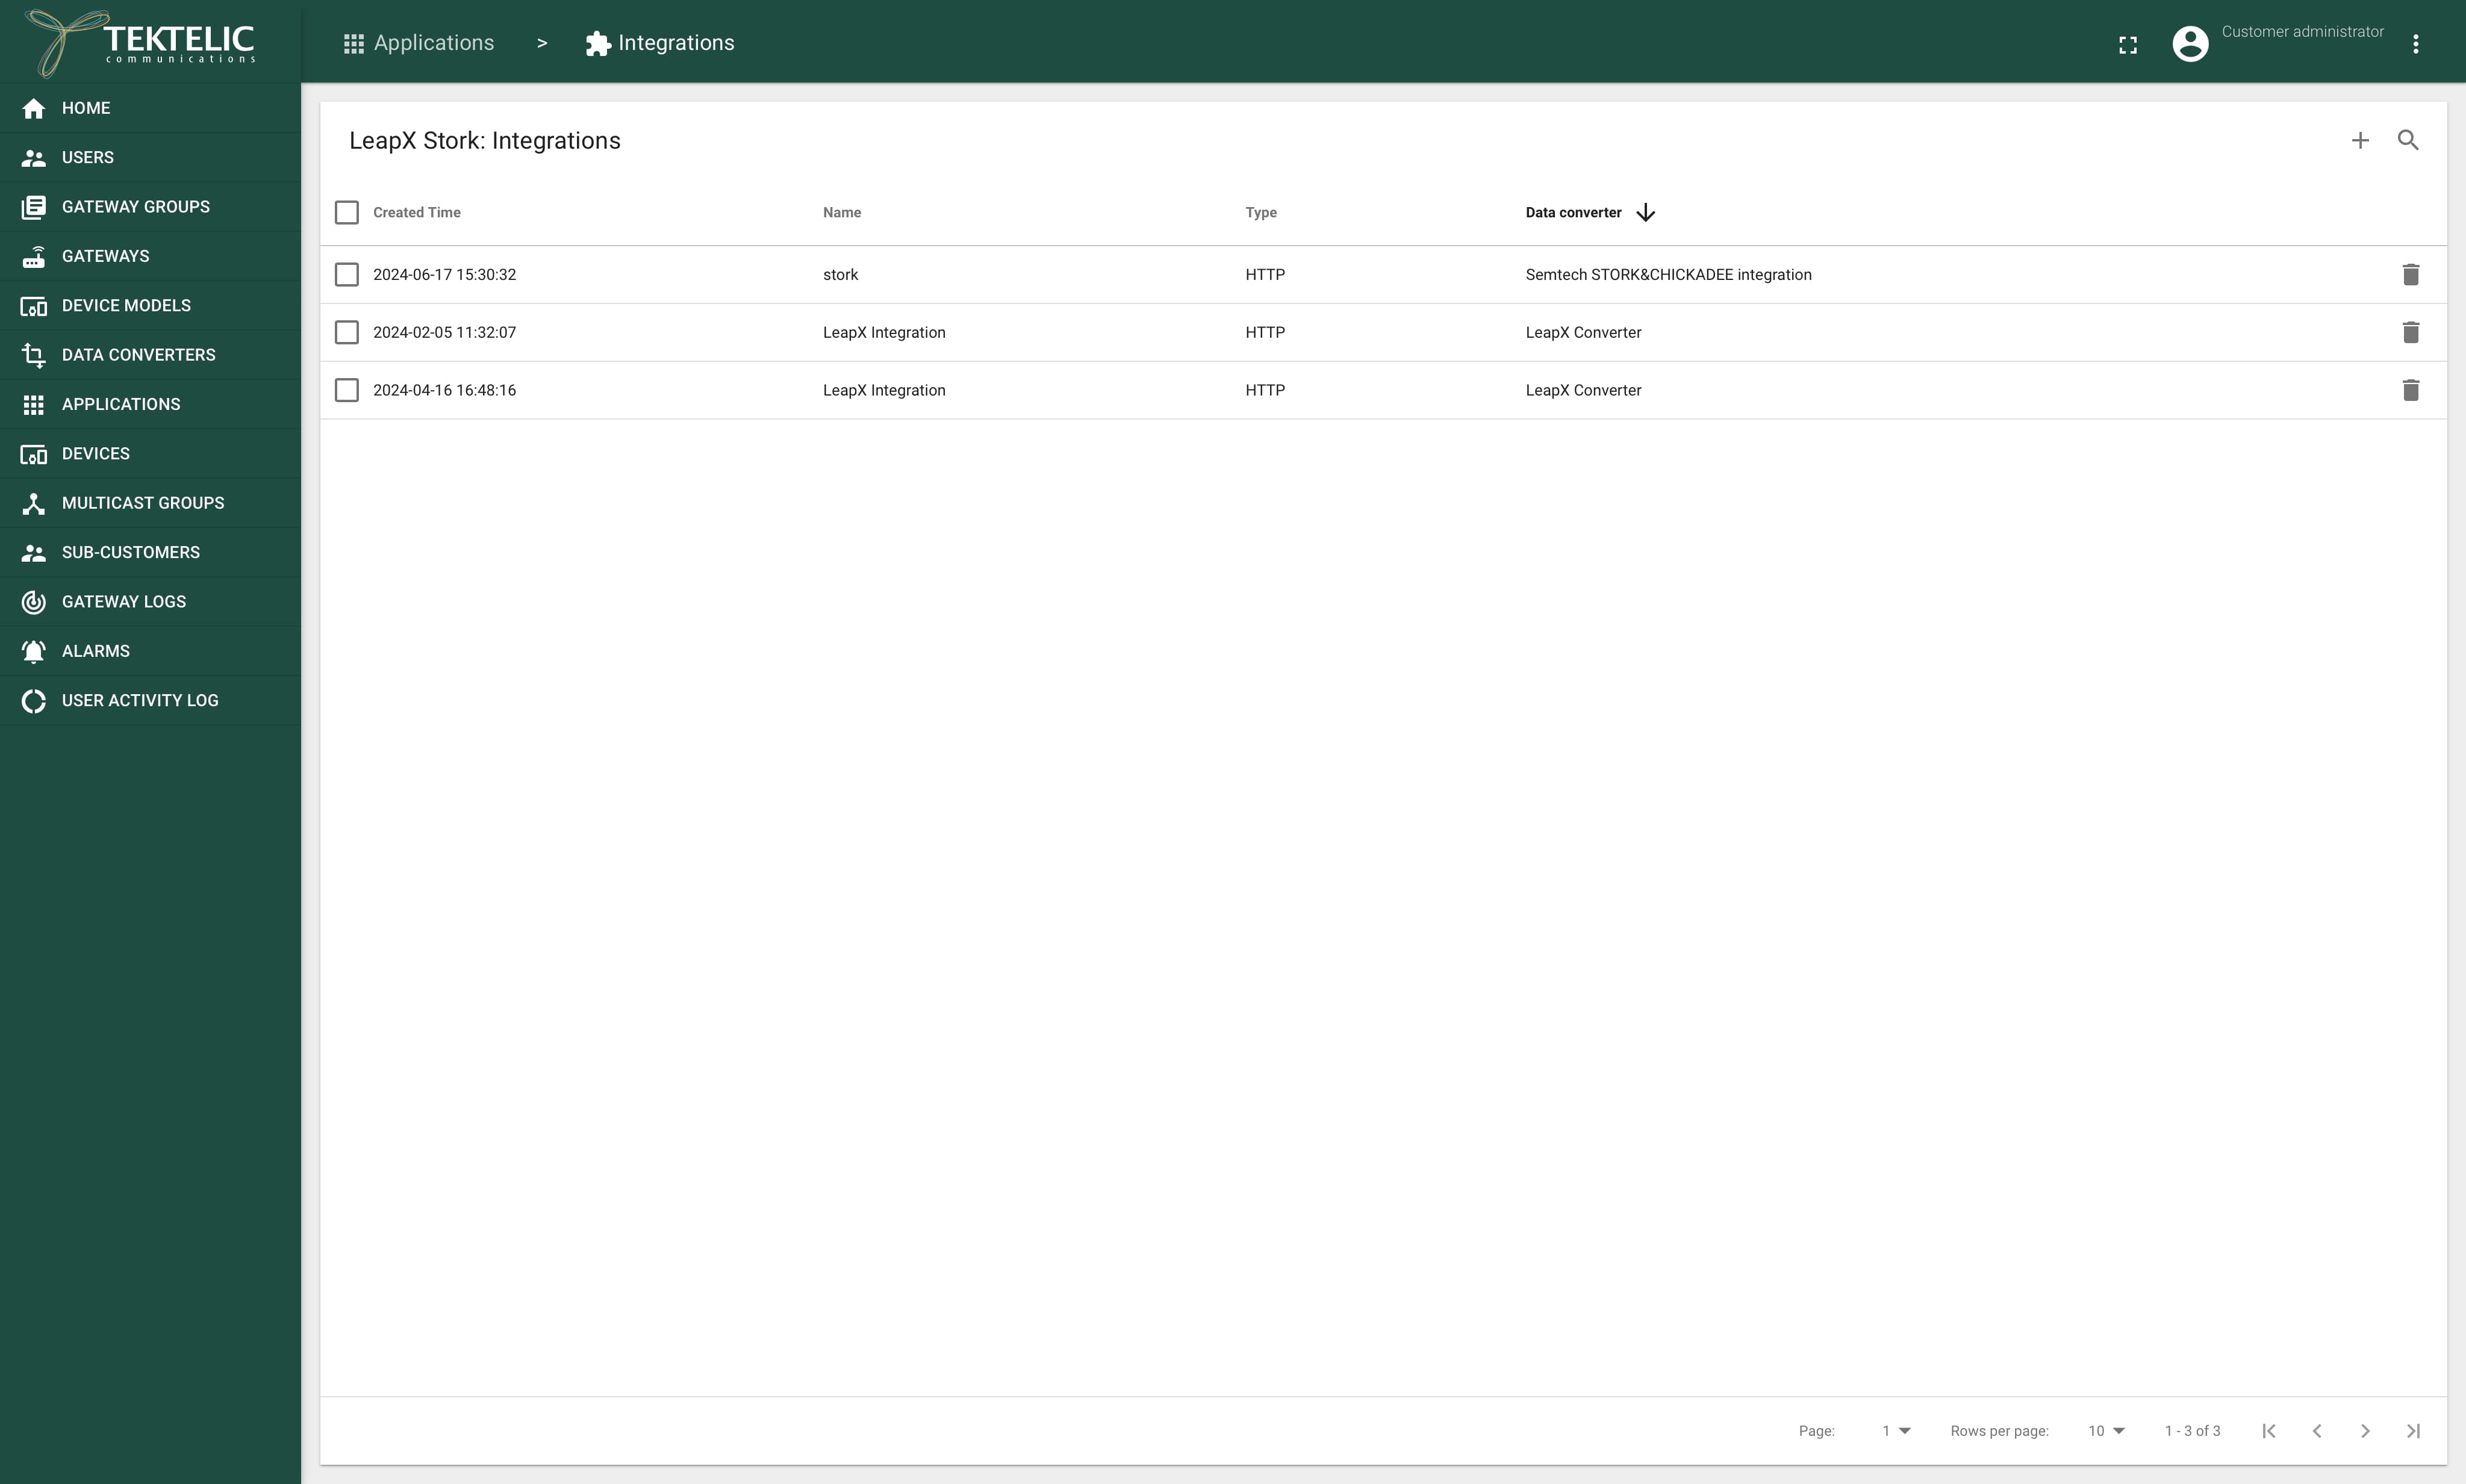
7.Choose the “Applications” section.
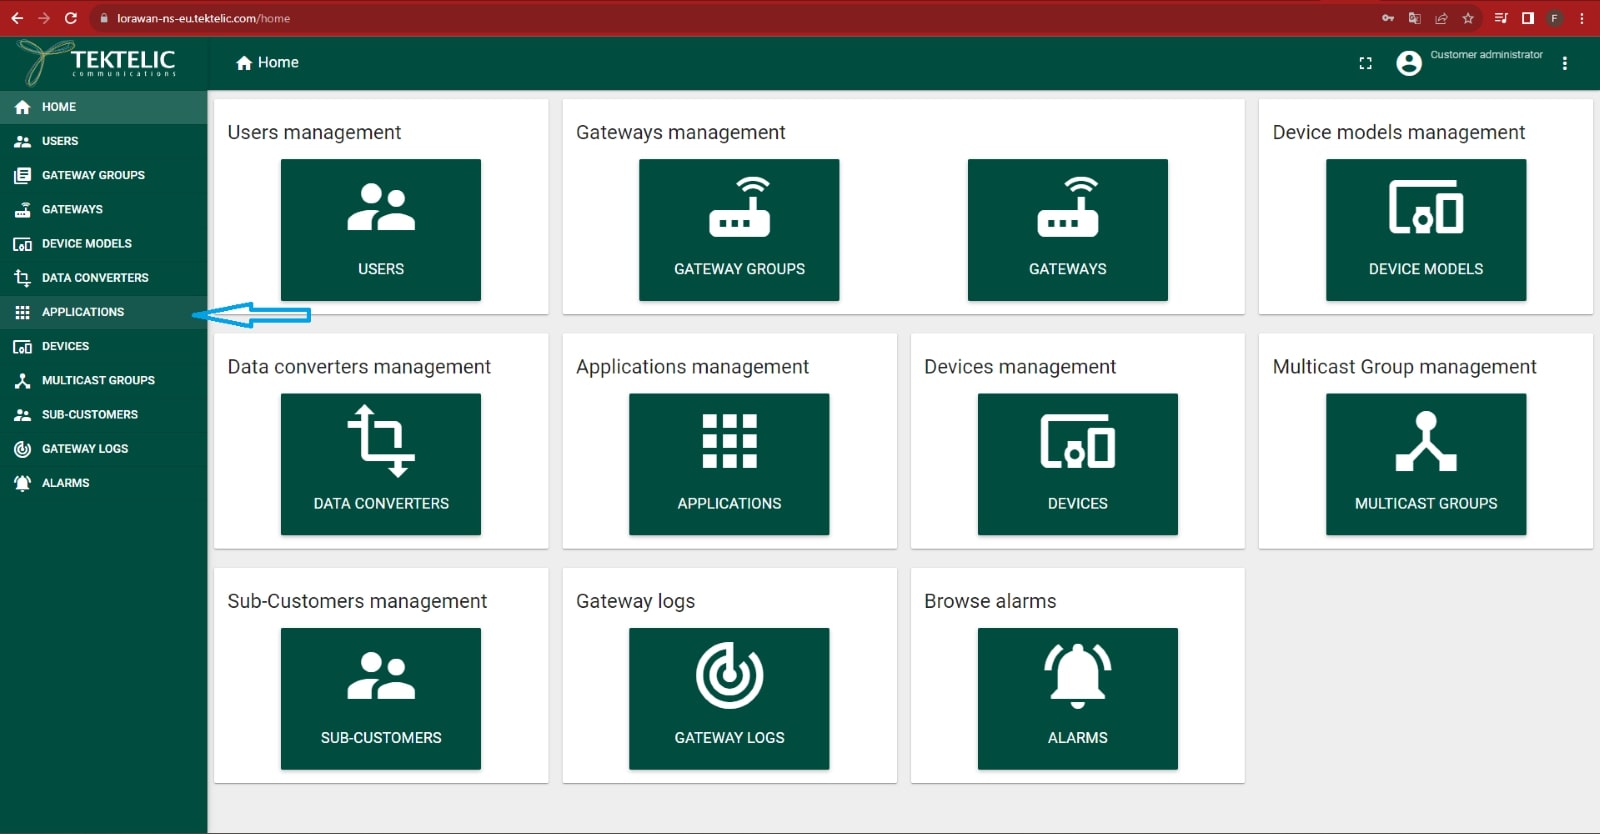
8.Click on the application where your STORK or CHICKADEE device is located to open the pop-up menu. Choose “Manage Integrations."

9.Click on the “+” button to add a new integration.
10.Set up the name for the integration;
“Type”: “HTTPv2”;
“Data Converter”: choose the data converter created beforehand;
“Application Address”: use the address of the HTTP server with the Docker container;
“Port”: 443;
“Base Path”: /;
“Enable HTTPS”: checked.
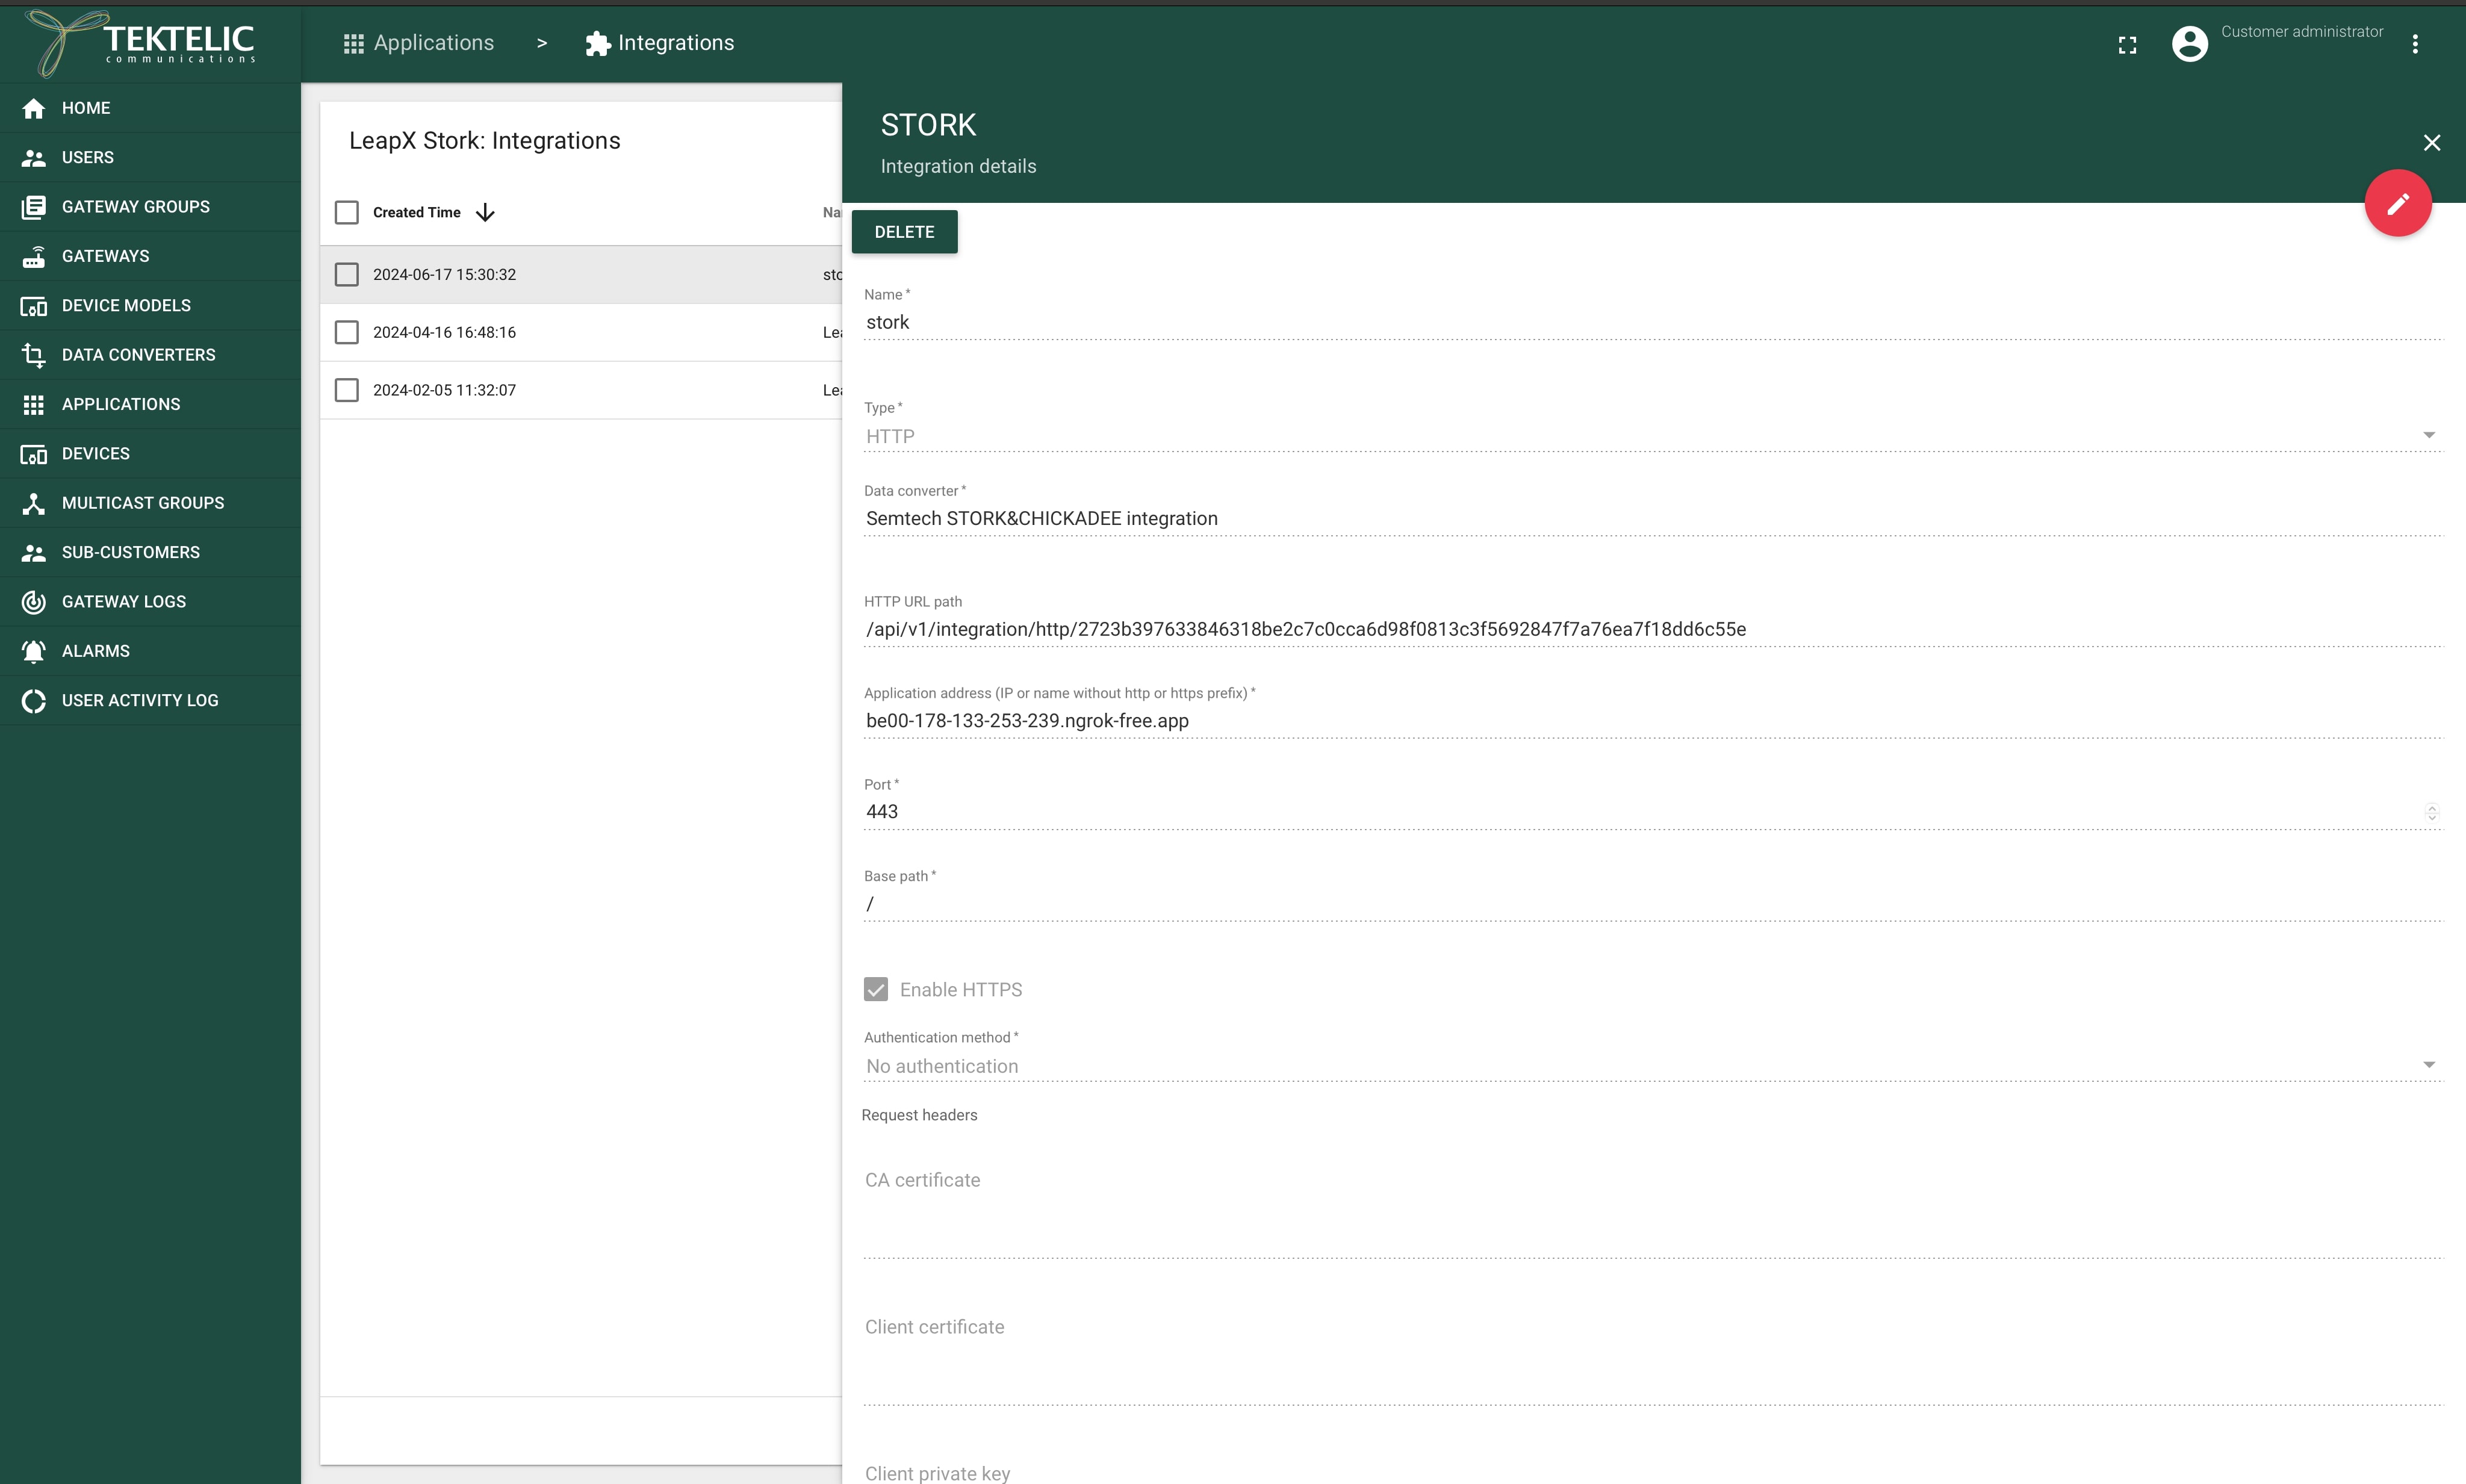
11.Click on the “Add” button to create an integration.
Decoder:
var arr = [];
for (var i = 0; i < bytes.length; ++i) {
arr.push(bytes[i]);
}
return {"bytes": JSON.stringify(arr), "port": port, "payload length": bytes.length};
Encoder:
// Encode downlink messages sent in
// Base64 format as an array or buffer of bytes.
function atob(input) {
var chars = 'ABCDEFGHIJKLMNOPQRSTUVWXYZabcdefghijklmnopqrstuvwxyz0123456789+/=';
var str = String(input).replace(/[=]+$/, ''); // #31: ExtendScript bad parse of /=
if (str.length % 4 === 1) {
throw new InvalidCharacterError("'atob' failed: The string to be decoded is not correctly encoded.");
}
for (
var bc = 0, bs, buffer, idx = 0, output = '';
buffer = str.charAt(idx++);
~buffer && (bs = bc % 4 ? bs * 64 + buffer : buffer, bc++ % 4) ? output += String.fromCharCode(255 & bs >> (-2 * bc & 6)) : 0
) {
buffer = chars.indexOf(buffer);
}
return output;
}

'function base64ToArray(base64) {
var binary_string = atob(base64);
var len = binary_string.length;
var result = [];
for (var i = 0; i < len; i++) {
result.push(binary_string.charCodeAt(i));
}
return result;
}

if (data.params) {
var bytes = base64ToArray(data.params.data);
return {"port": data.params.port, "bytes": bytes};
}

return {"port": 0, "bytes": [0x00]};