1. Manage Indoor Maps
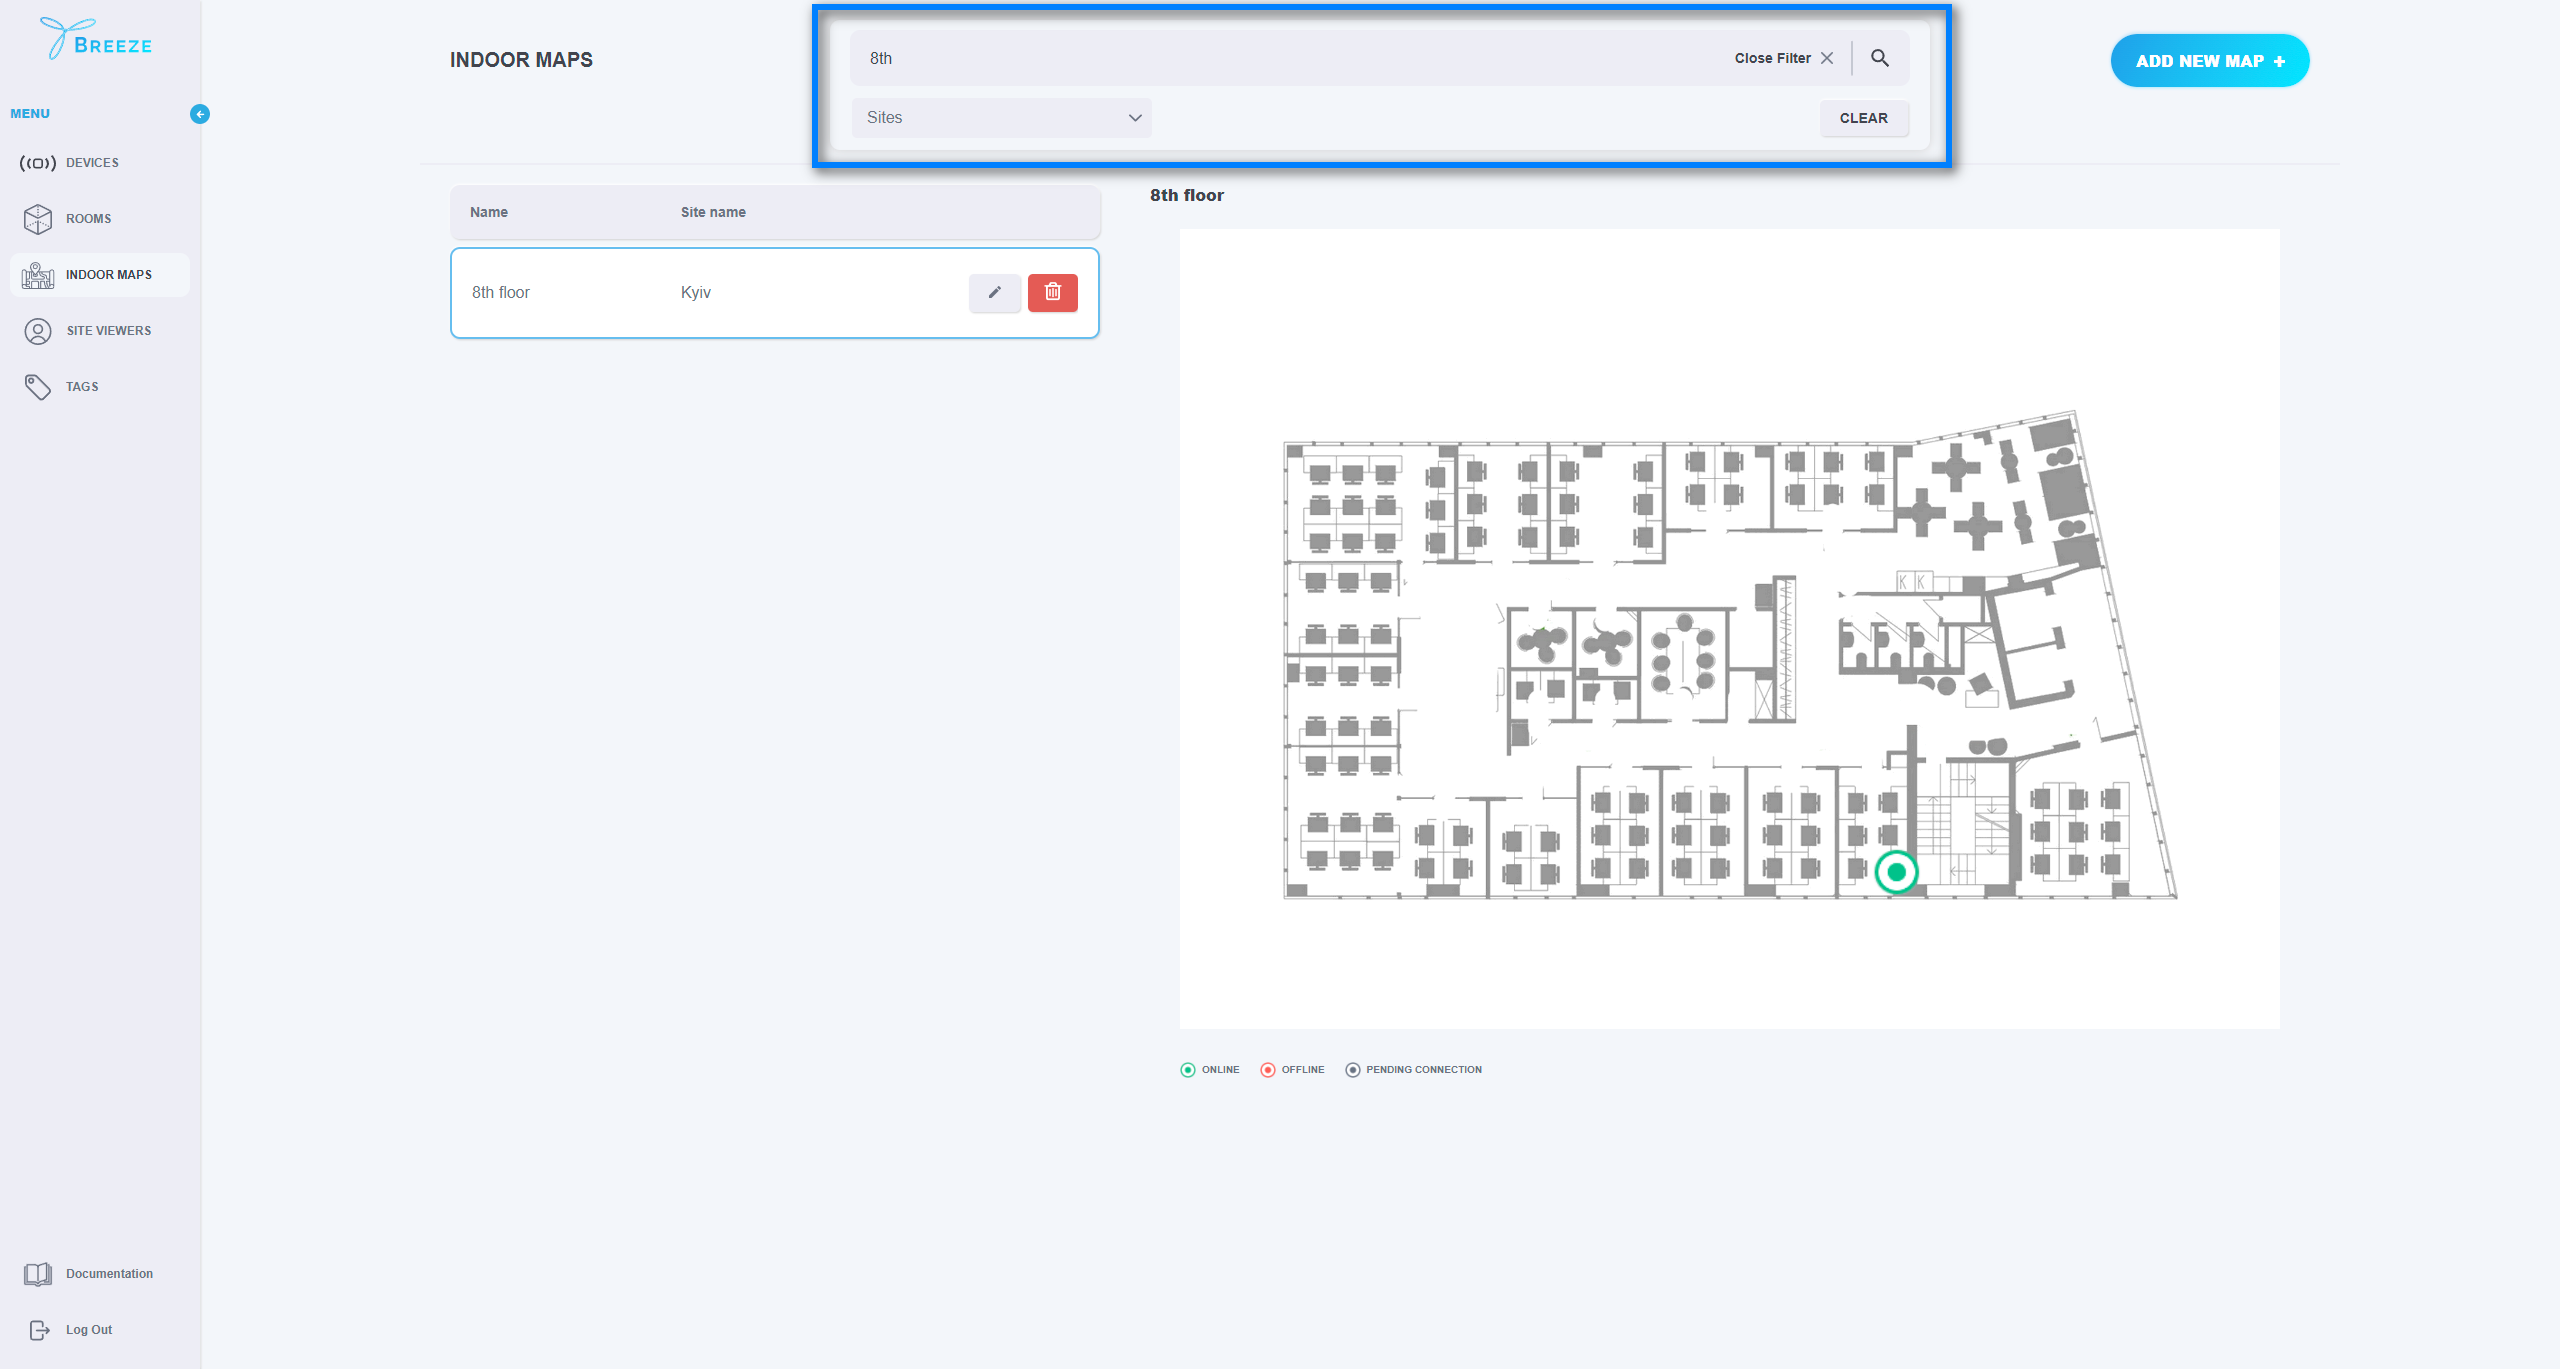
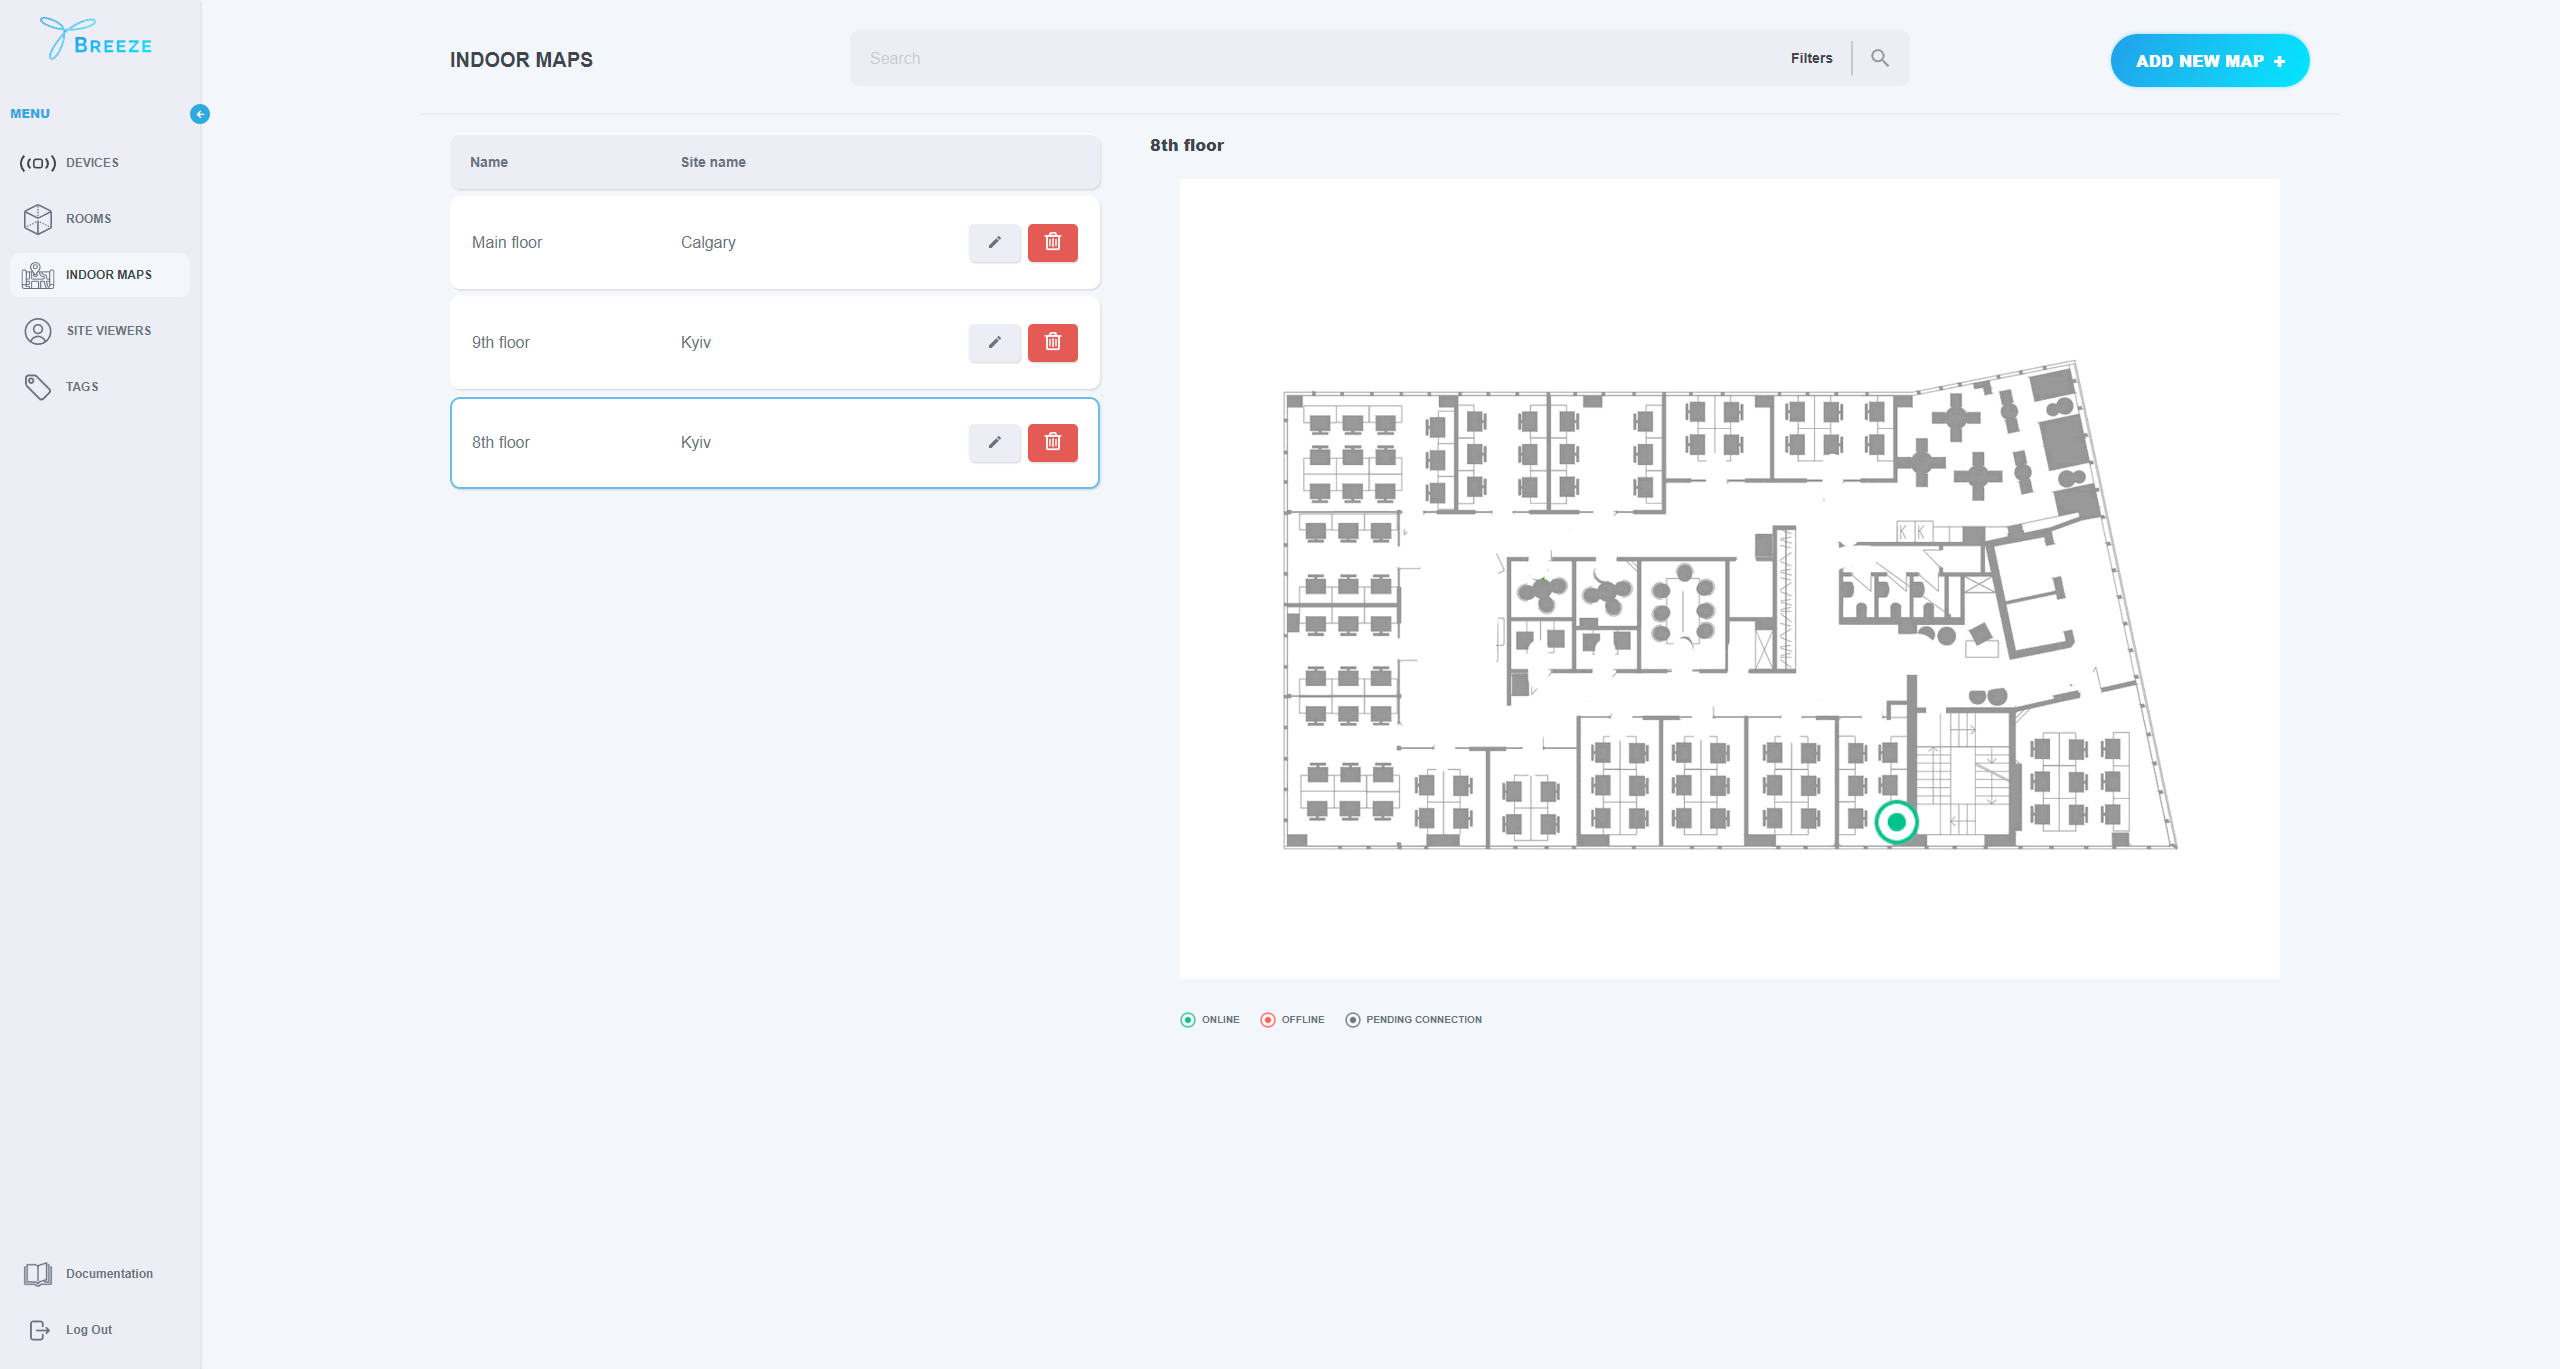
The “INDOOR MAP” page contains the list of floor plans, where all rooms and devices are located. On this page, the user can add new indoor maps, update or delete the existing ones as well as check the location of their devices on a map.
The user can open the “INDOOR MAP” page by selecting the corresponding option from the left-side menu.
If the map is assigned to rooms and device pins are set on the map, the user will see the location of all the devices upon clicking a map in the list and a floor plan will appear on the right side.
To add a new map, click “ADD NEW MAP +":
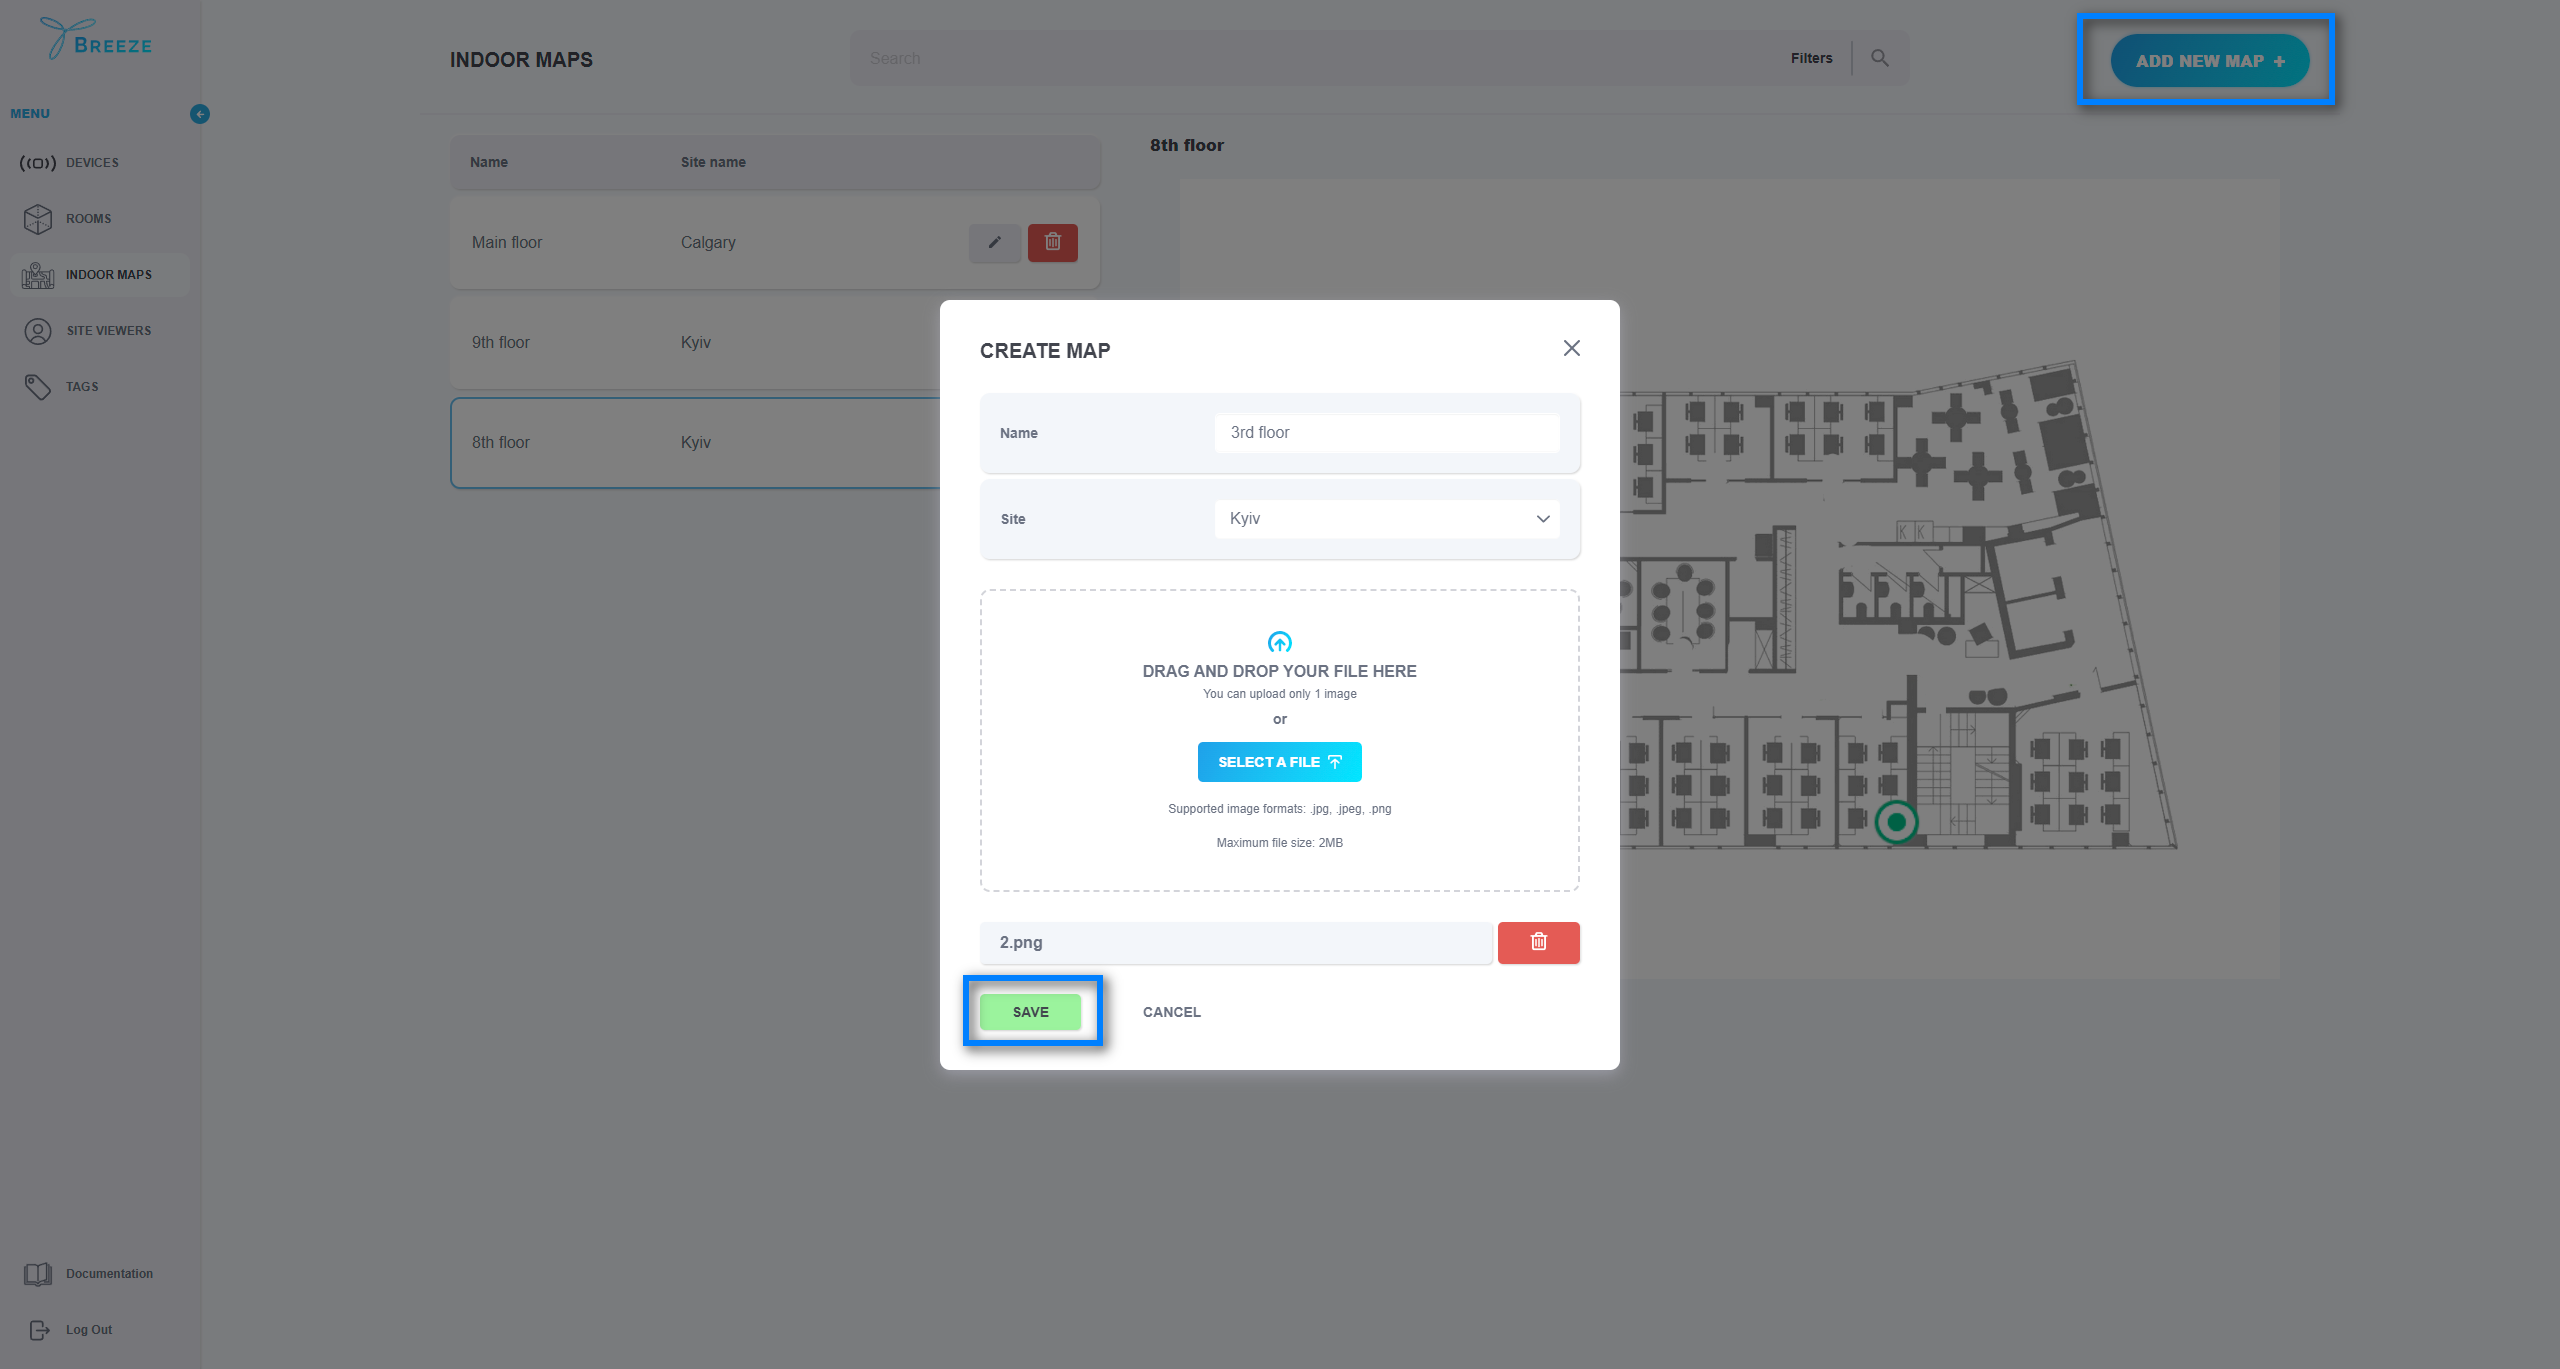
In the new window, fill in the map name and site to which your map belongs. In this window, you should add an image with your floor plan as well.
- The Indoor map name should be unique within the Site.
- The Indoor map name should be minimum 3 characters long.
- Supported image formats: .jpg, .jpeg, .png.
- Maximum image size: 2Mb.
Once you fill in the mandatory information about your map, click “SAVE” and the new map will appear in the list of indoor maps.
To update or delete an indoor map that already exists, simply select the corresponding option next to the item you would like to edit or delete.
Before deleting an indoor map, you should remove assigned rooms and device pins from the map first.
Once Indoor maps have been added to the application, they can be searched by map name or site name. Also, they can be filtered by site name.