2. Manage Rooms
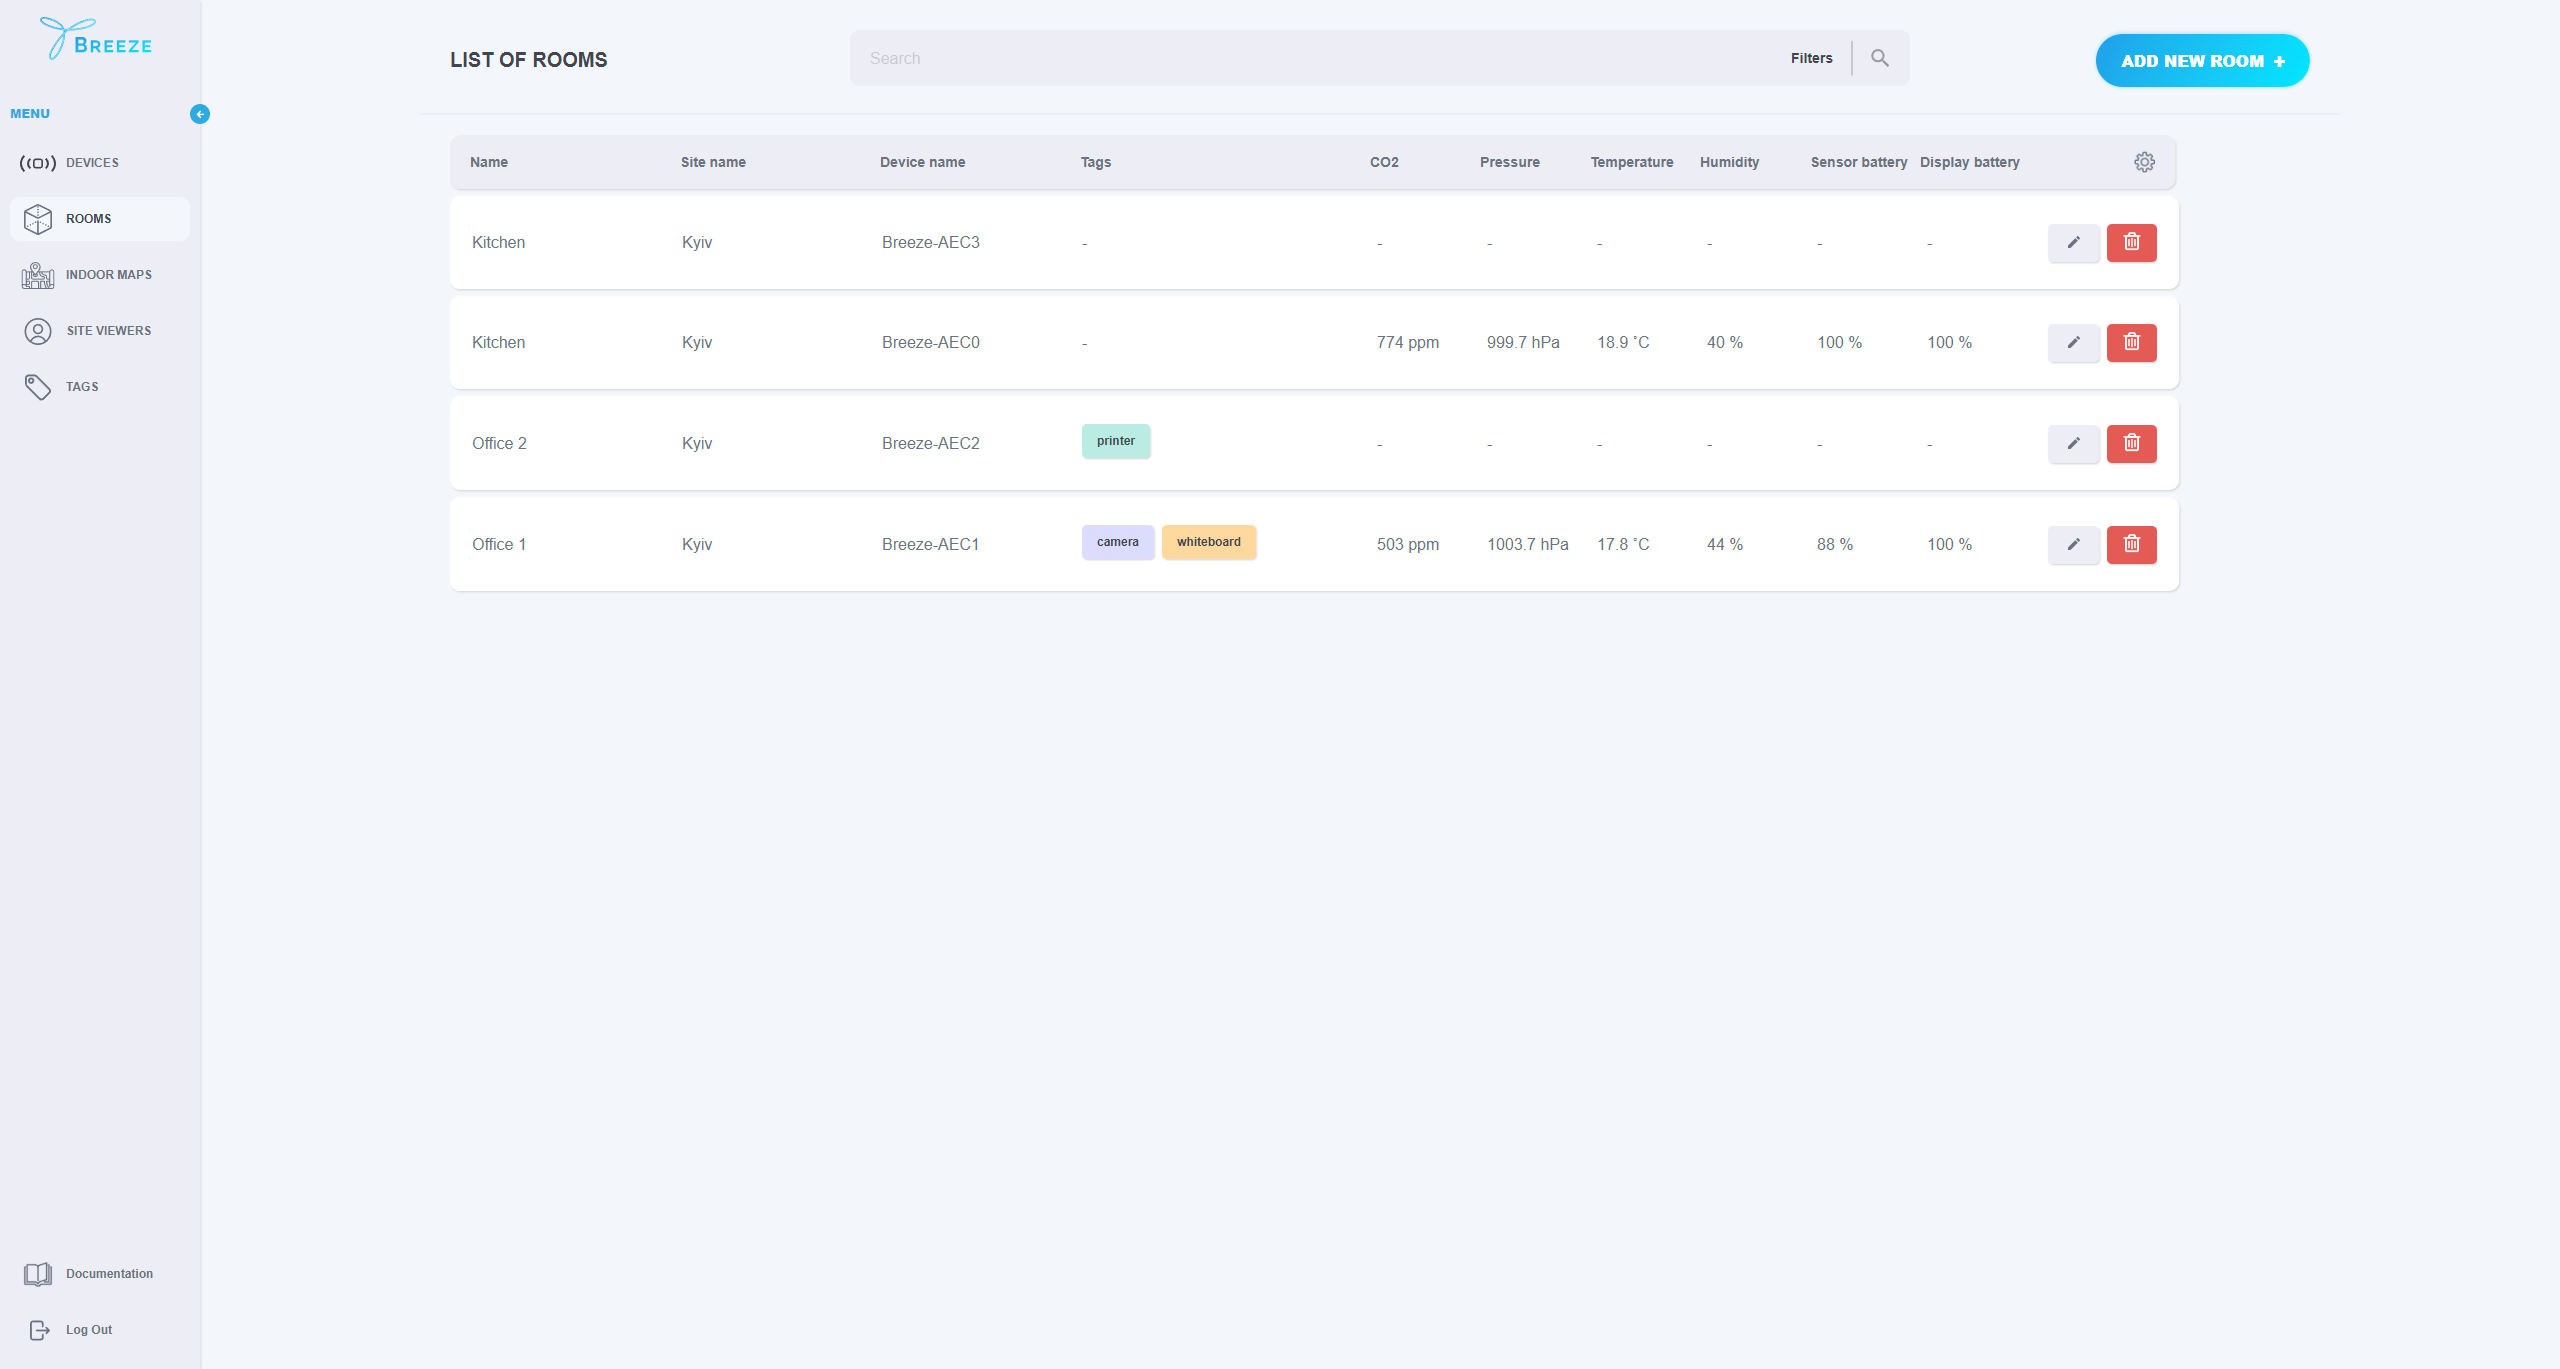
The “ROOMS” page allows the user to manage their rooms as well as monitor the data received from the sensors.
You can open the “ROOMS” page by clicking the corresponding option in the left-side menu.
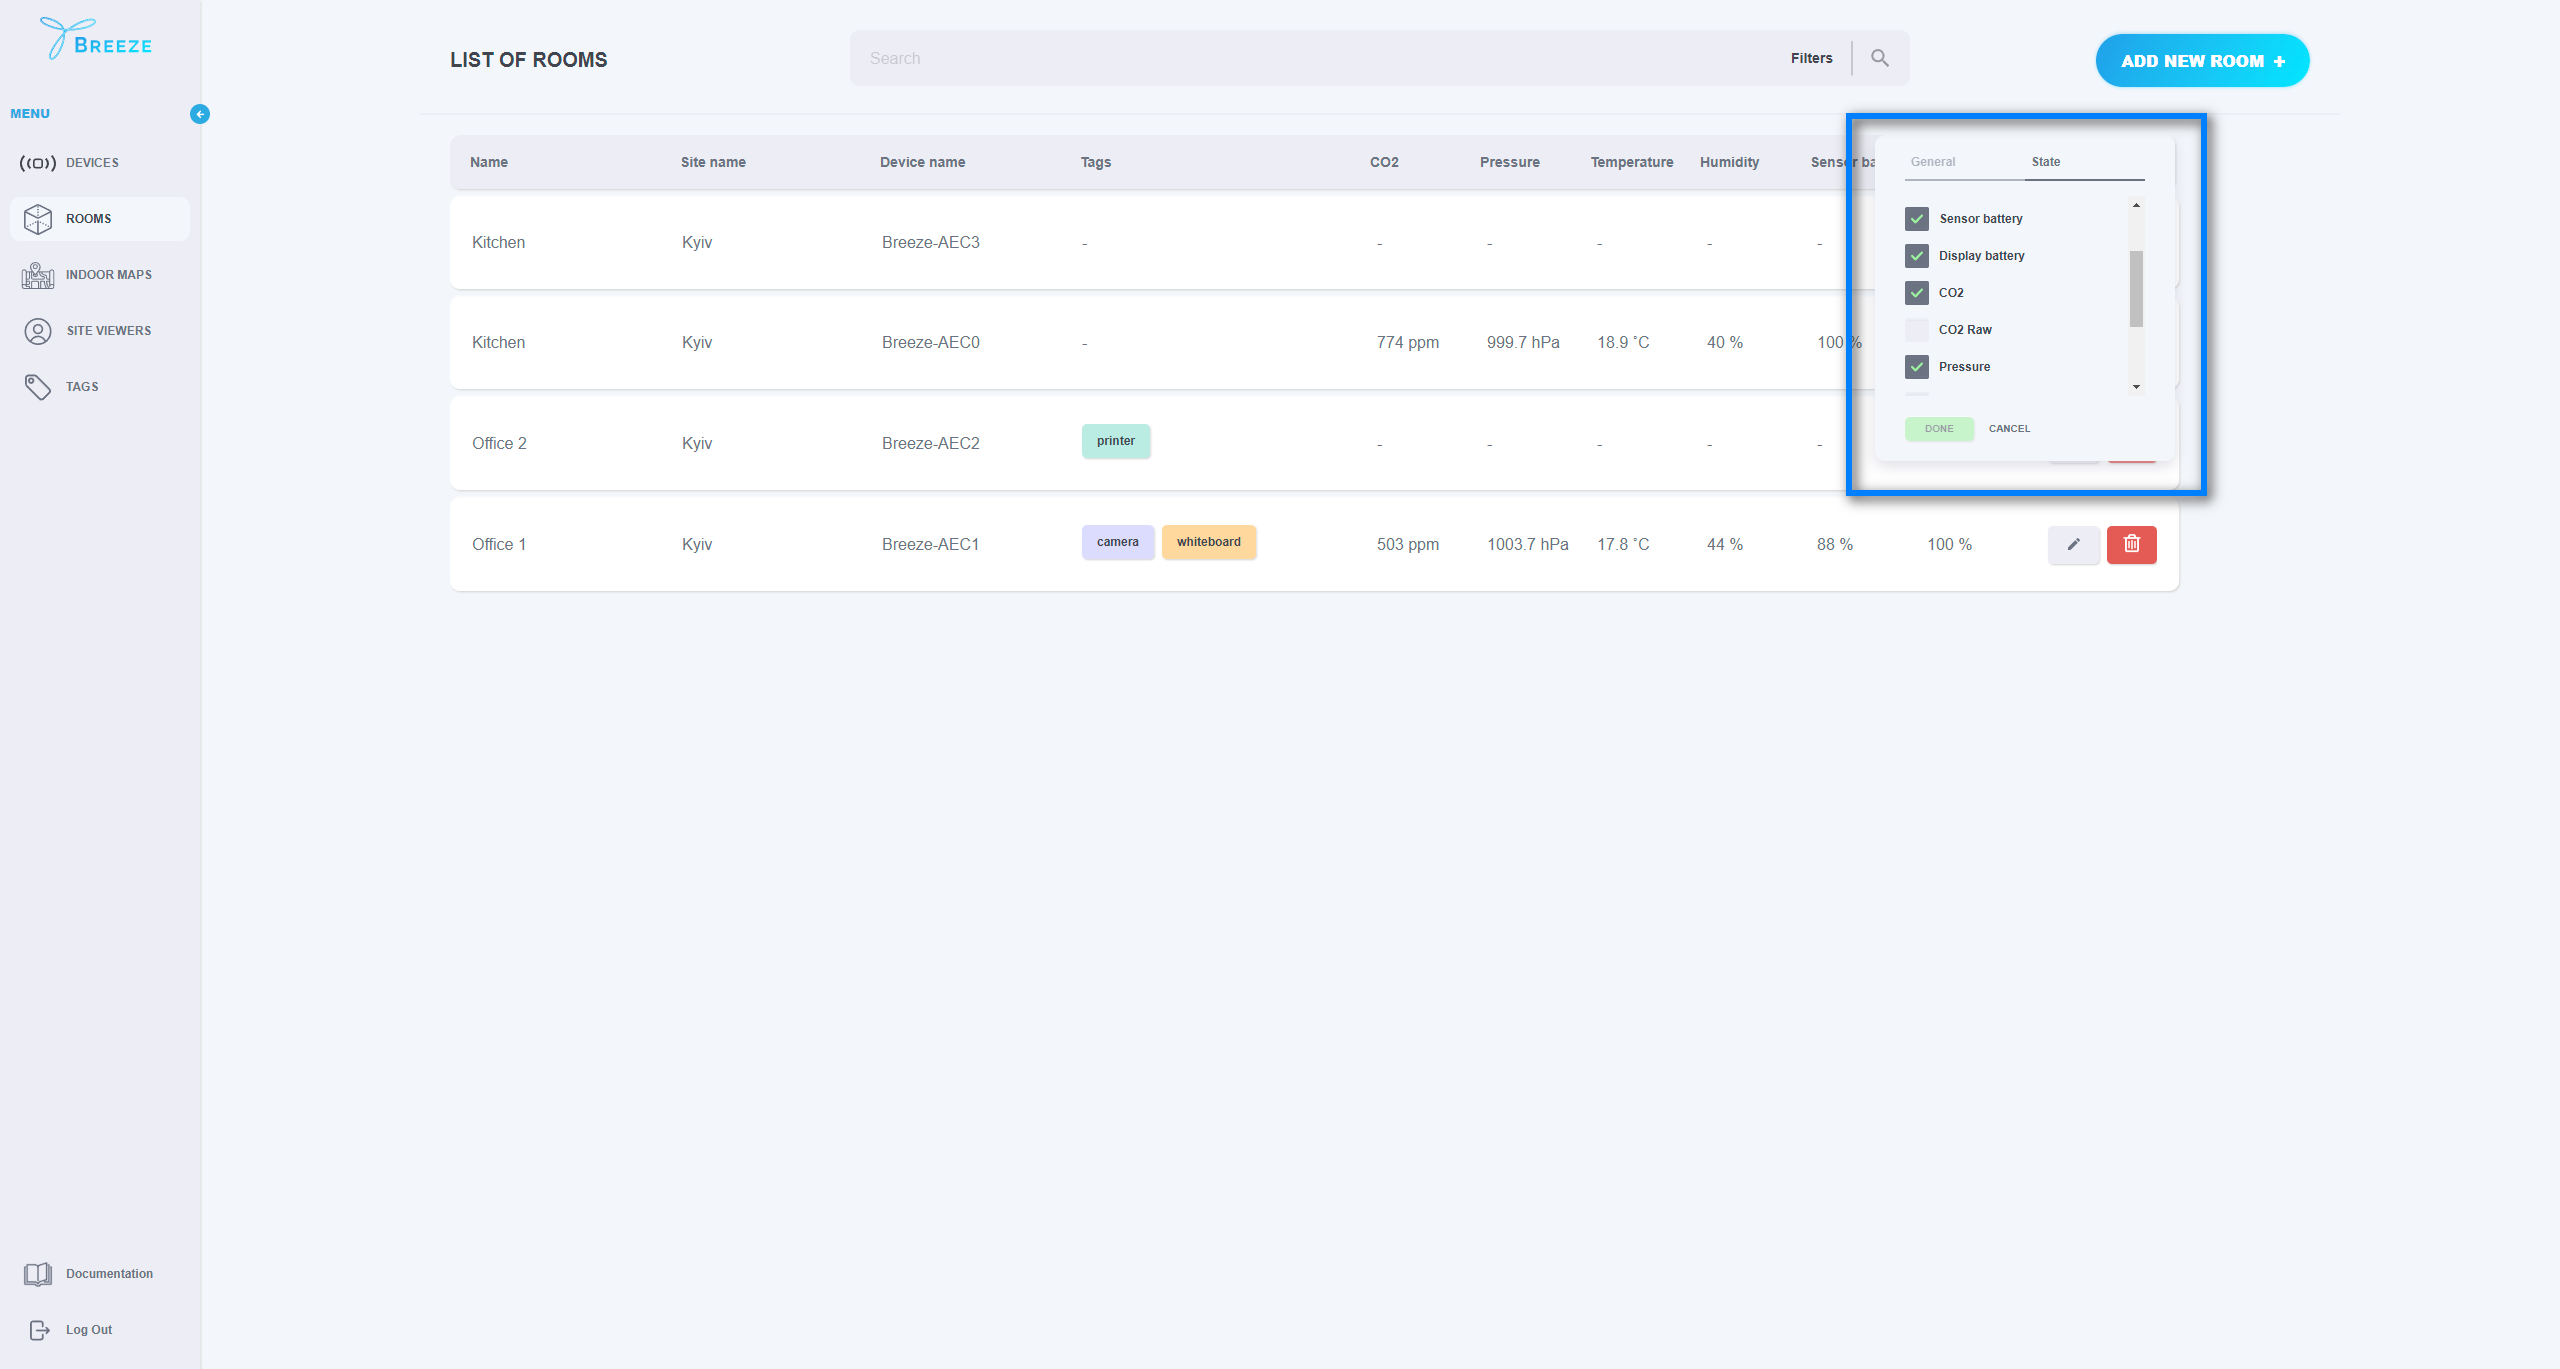
For monitoring purposes, you can also configure the display of the table to see the relevant data only. To do this, open the settings menu as displayed below:
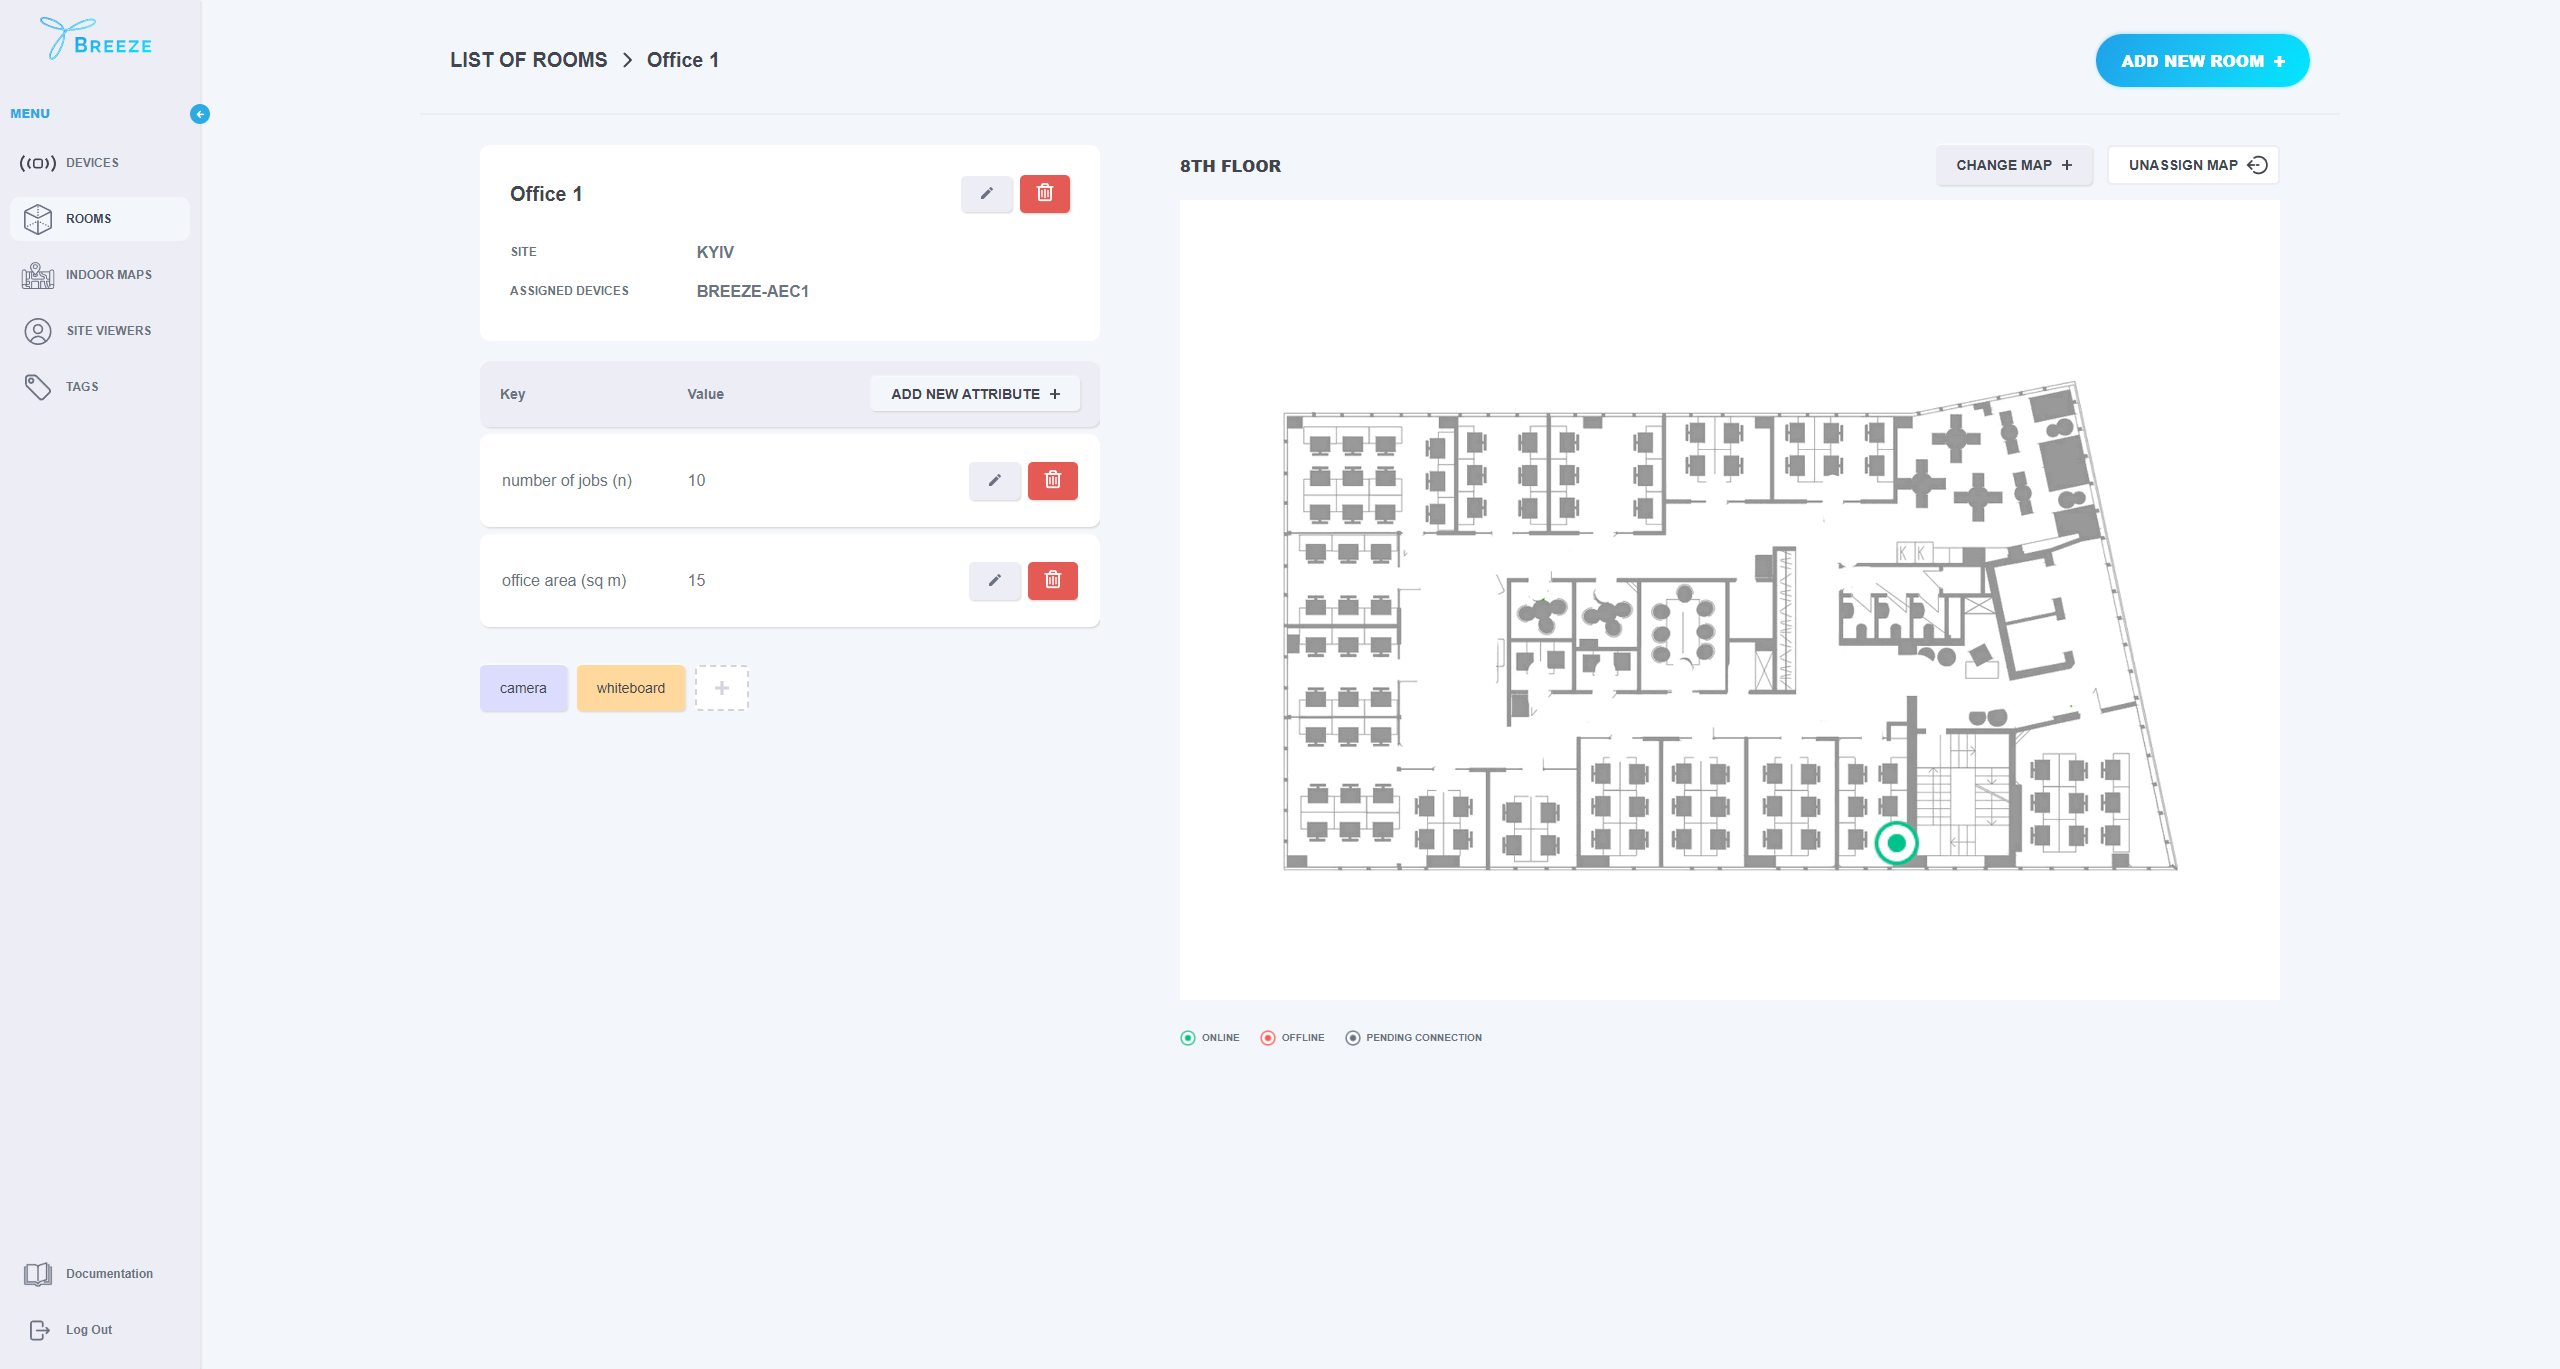
To check the detailed information about your room, simply click a record in the table and the system will open the detailed view where you can see the room details, its location, and the location of all devices in it if set.
To add a new room, click “ADD NEW ROOM +":
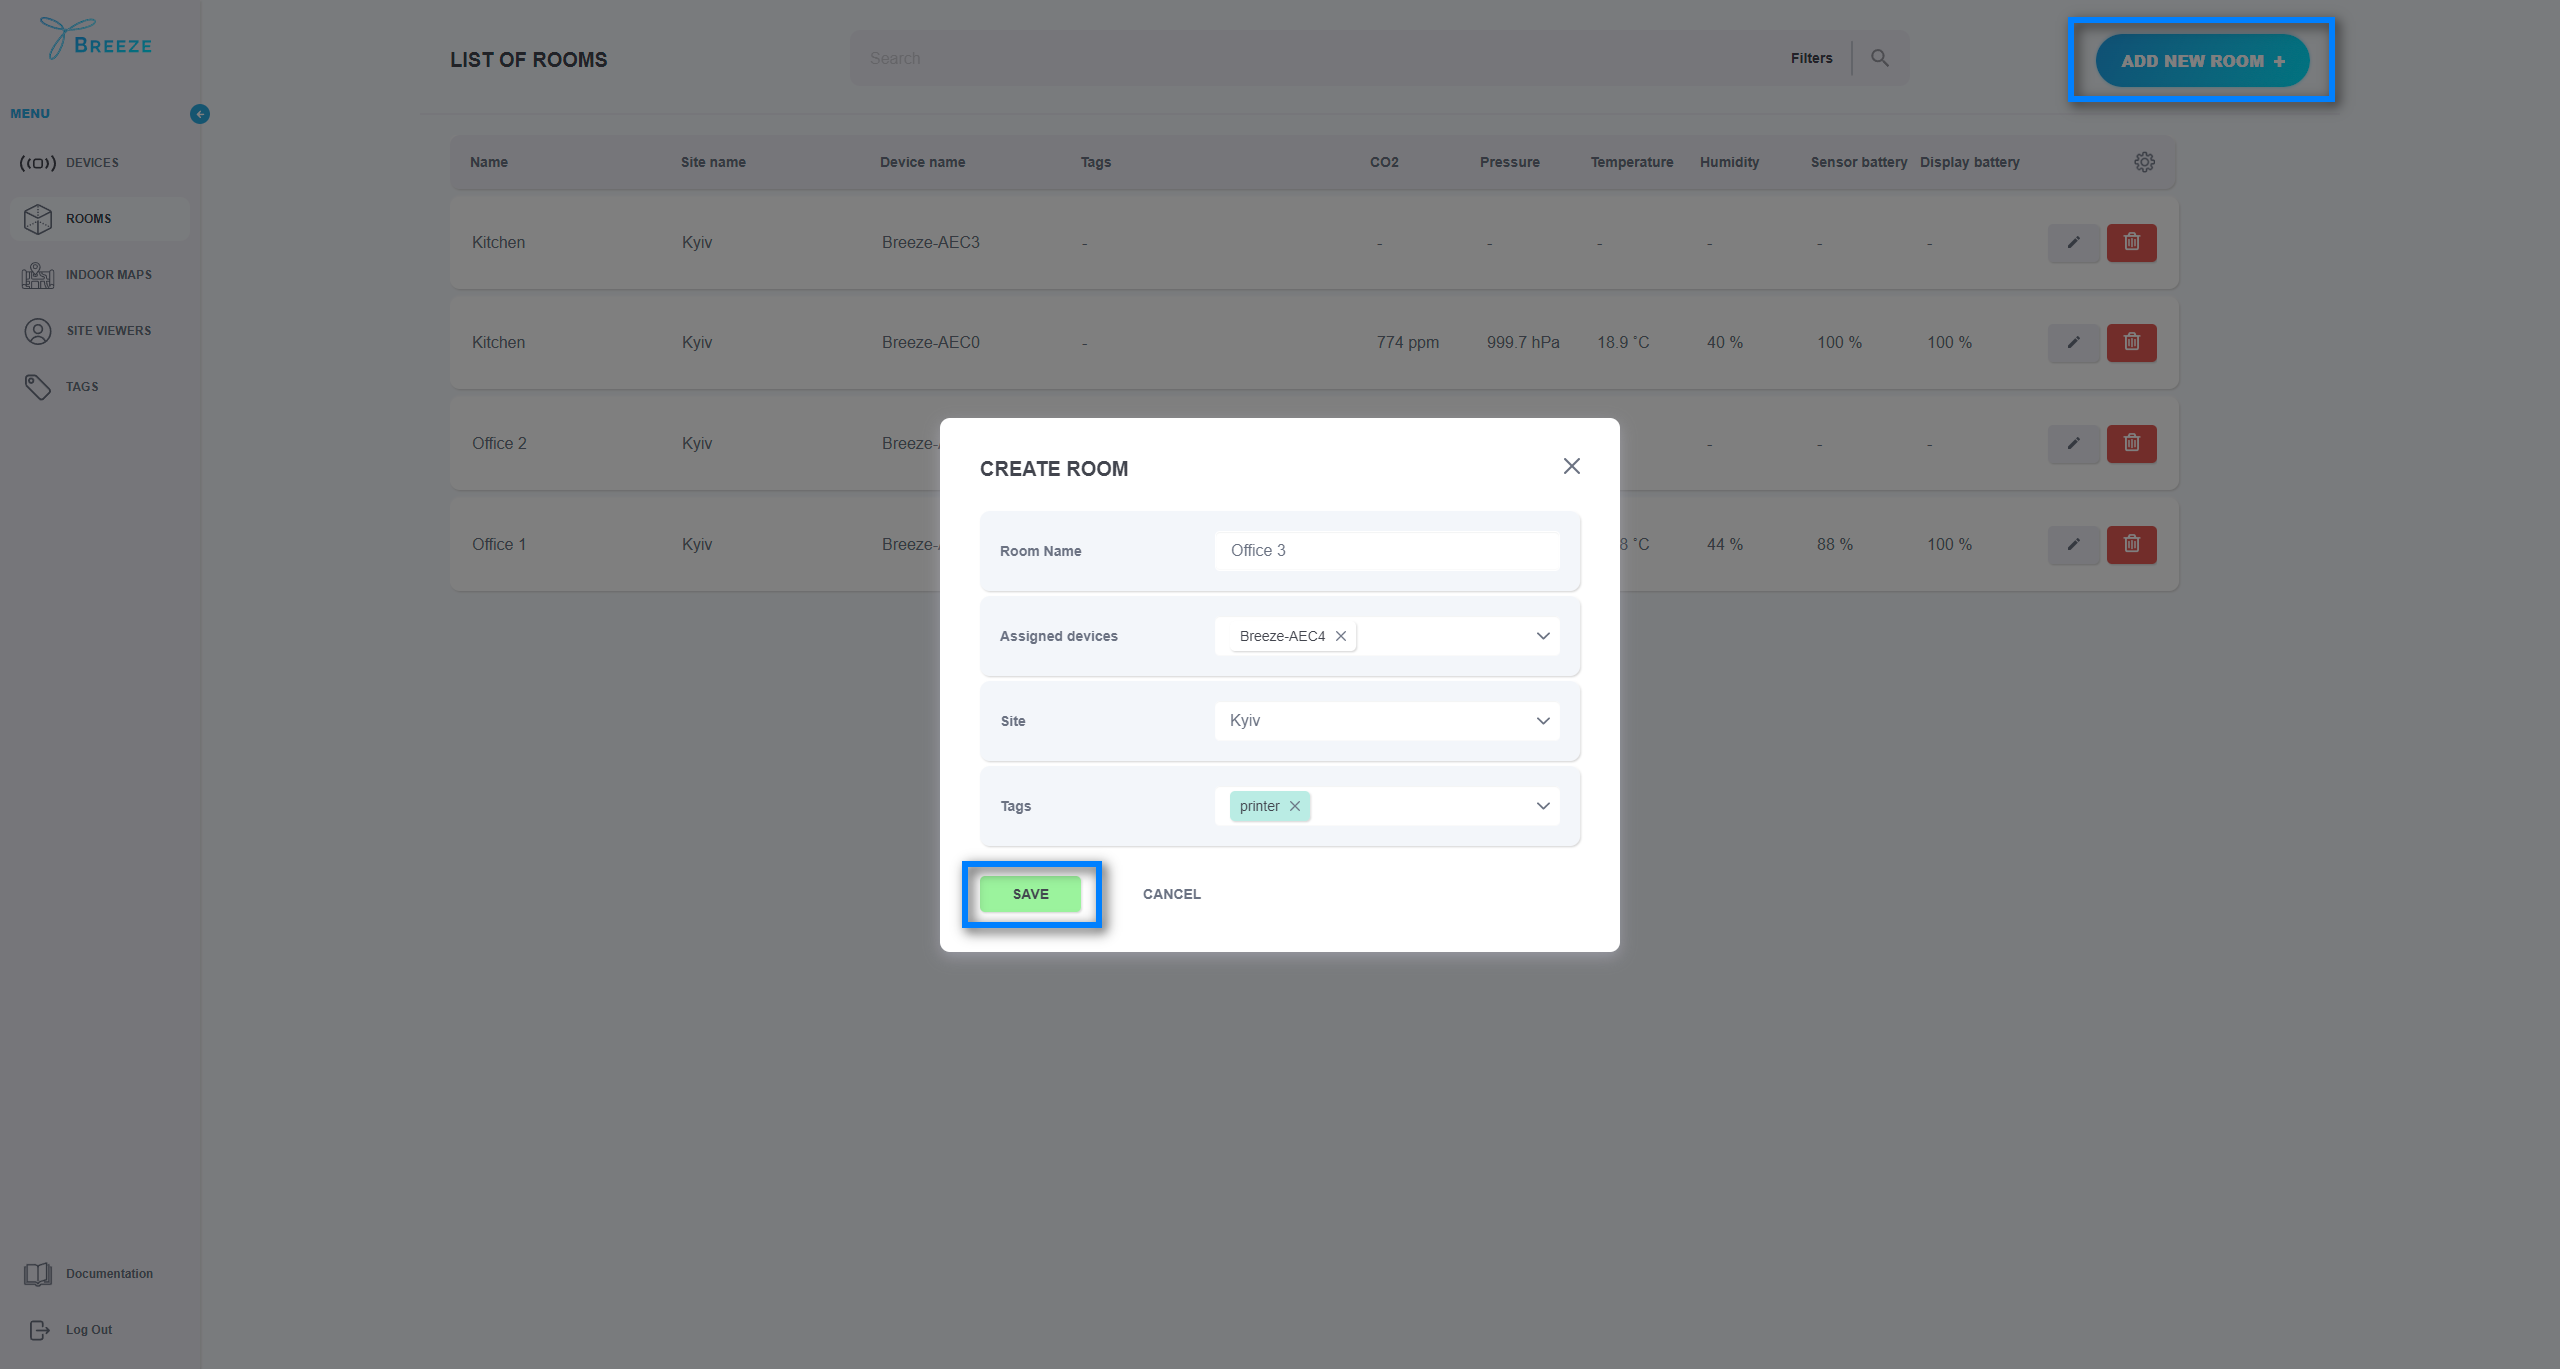
In the new window, fill in the mandatory fields: Room name and Site. The Tag is not a required field.
- Room name should be unique within a Site and should be minimum of 3 characters long.
- Site is a required field to fill in (in case Site Admin has access to several sites).
At this stage, you can leave the field “Assigned Devices” blank however, if a device has been already installed in the room and added to the application, you will need to select the corresponding device name from the drop-down menu.
Once done, click “SAVE” and the new room will appear in the list of rooms. In case you have several devices assigned to the room, you will see a separate record for each assigned device.
To update or delete a room that already exists, simply select the corresponding option next to the item you would like to edit or delete.
Before deleting a room, you should unassign all devices located in it first. Please note that once devices are unassigned, device pins showing the location of your devices will be removed as well.
If required, the user may add additional information about the room using the attributes functionality. The Attribute is a key-value pair that can be used to describe the room whatever the user`s needs are. Here the user can specify room number, room location, floor, room owner, etc.
For this purpose, open the room details by clicking the required record in the Rooms List and then click on “ADD NEW ATTRIBUTE +". In the new window, you will need to fill in the key and value and click “SAVE”:
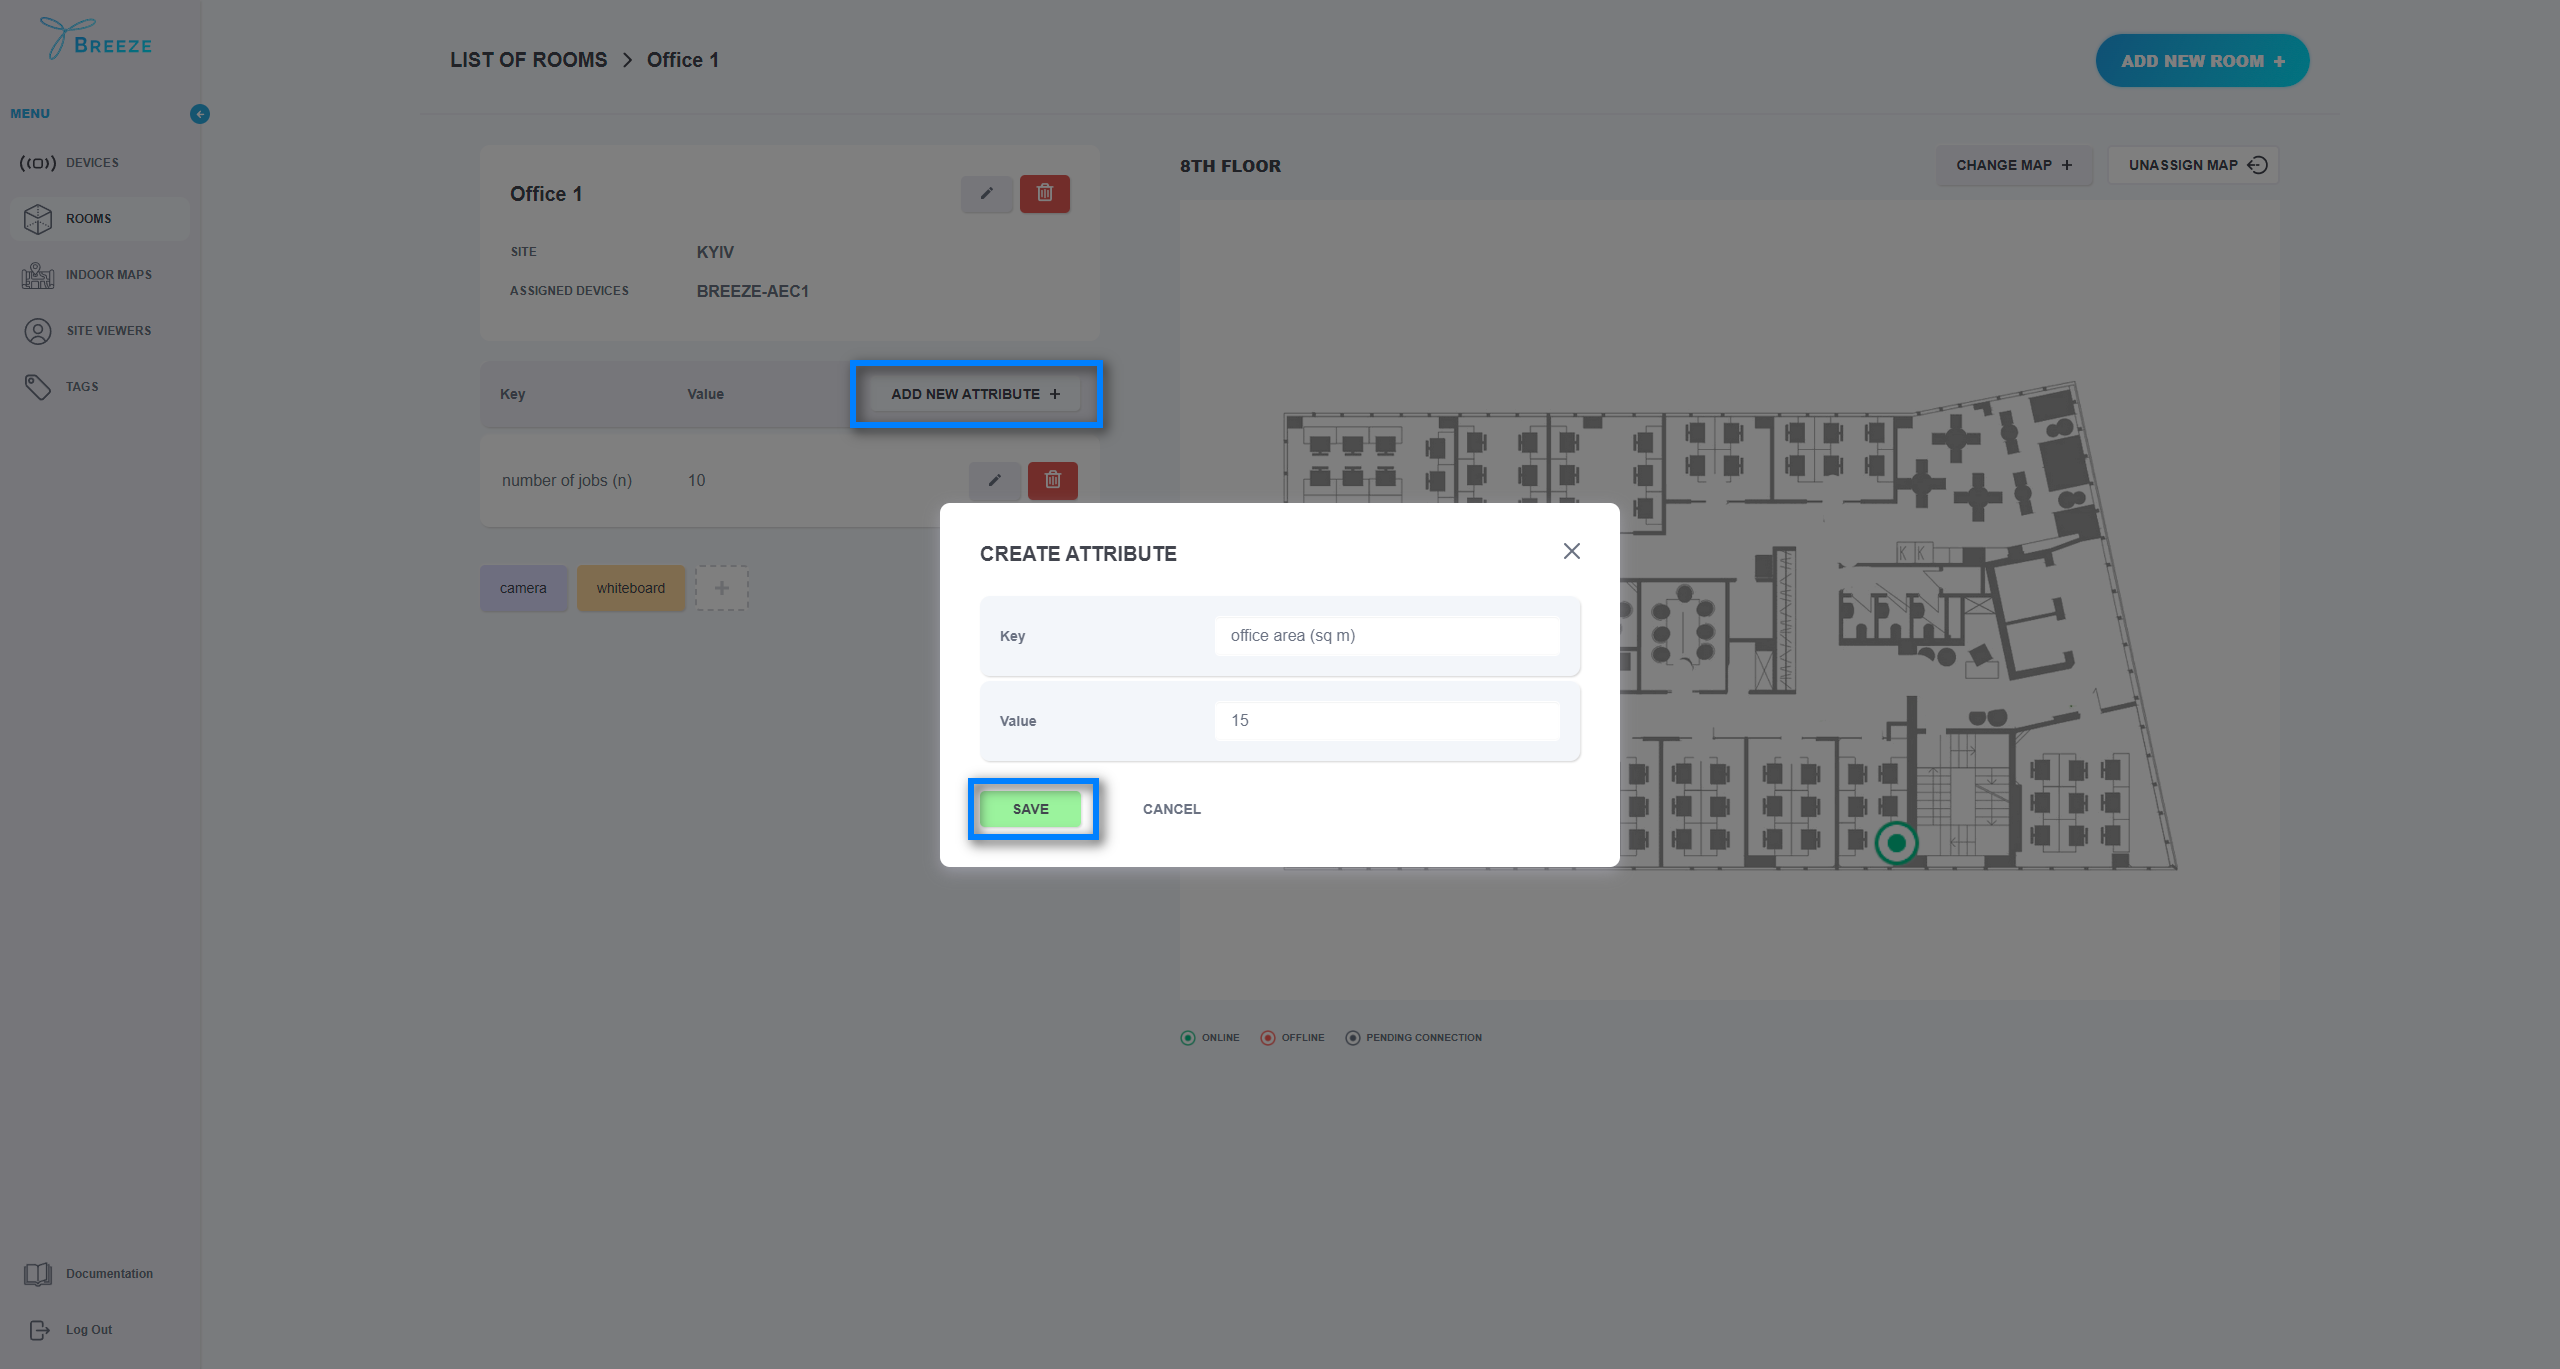
You can also edit and delete irrelevant attributes by using the corresponding options next to the required item.
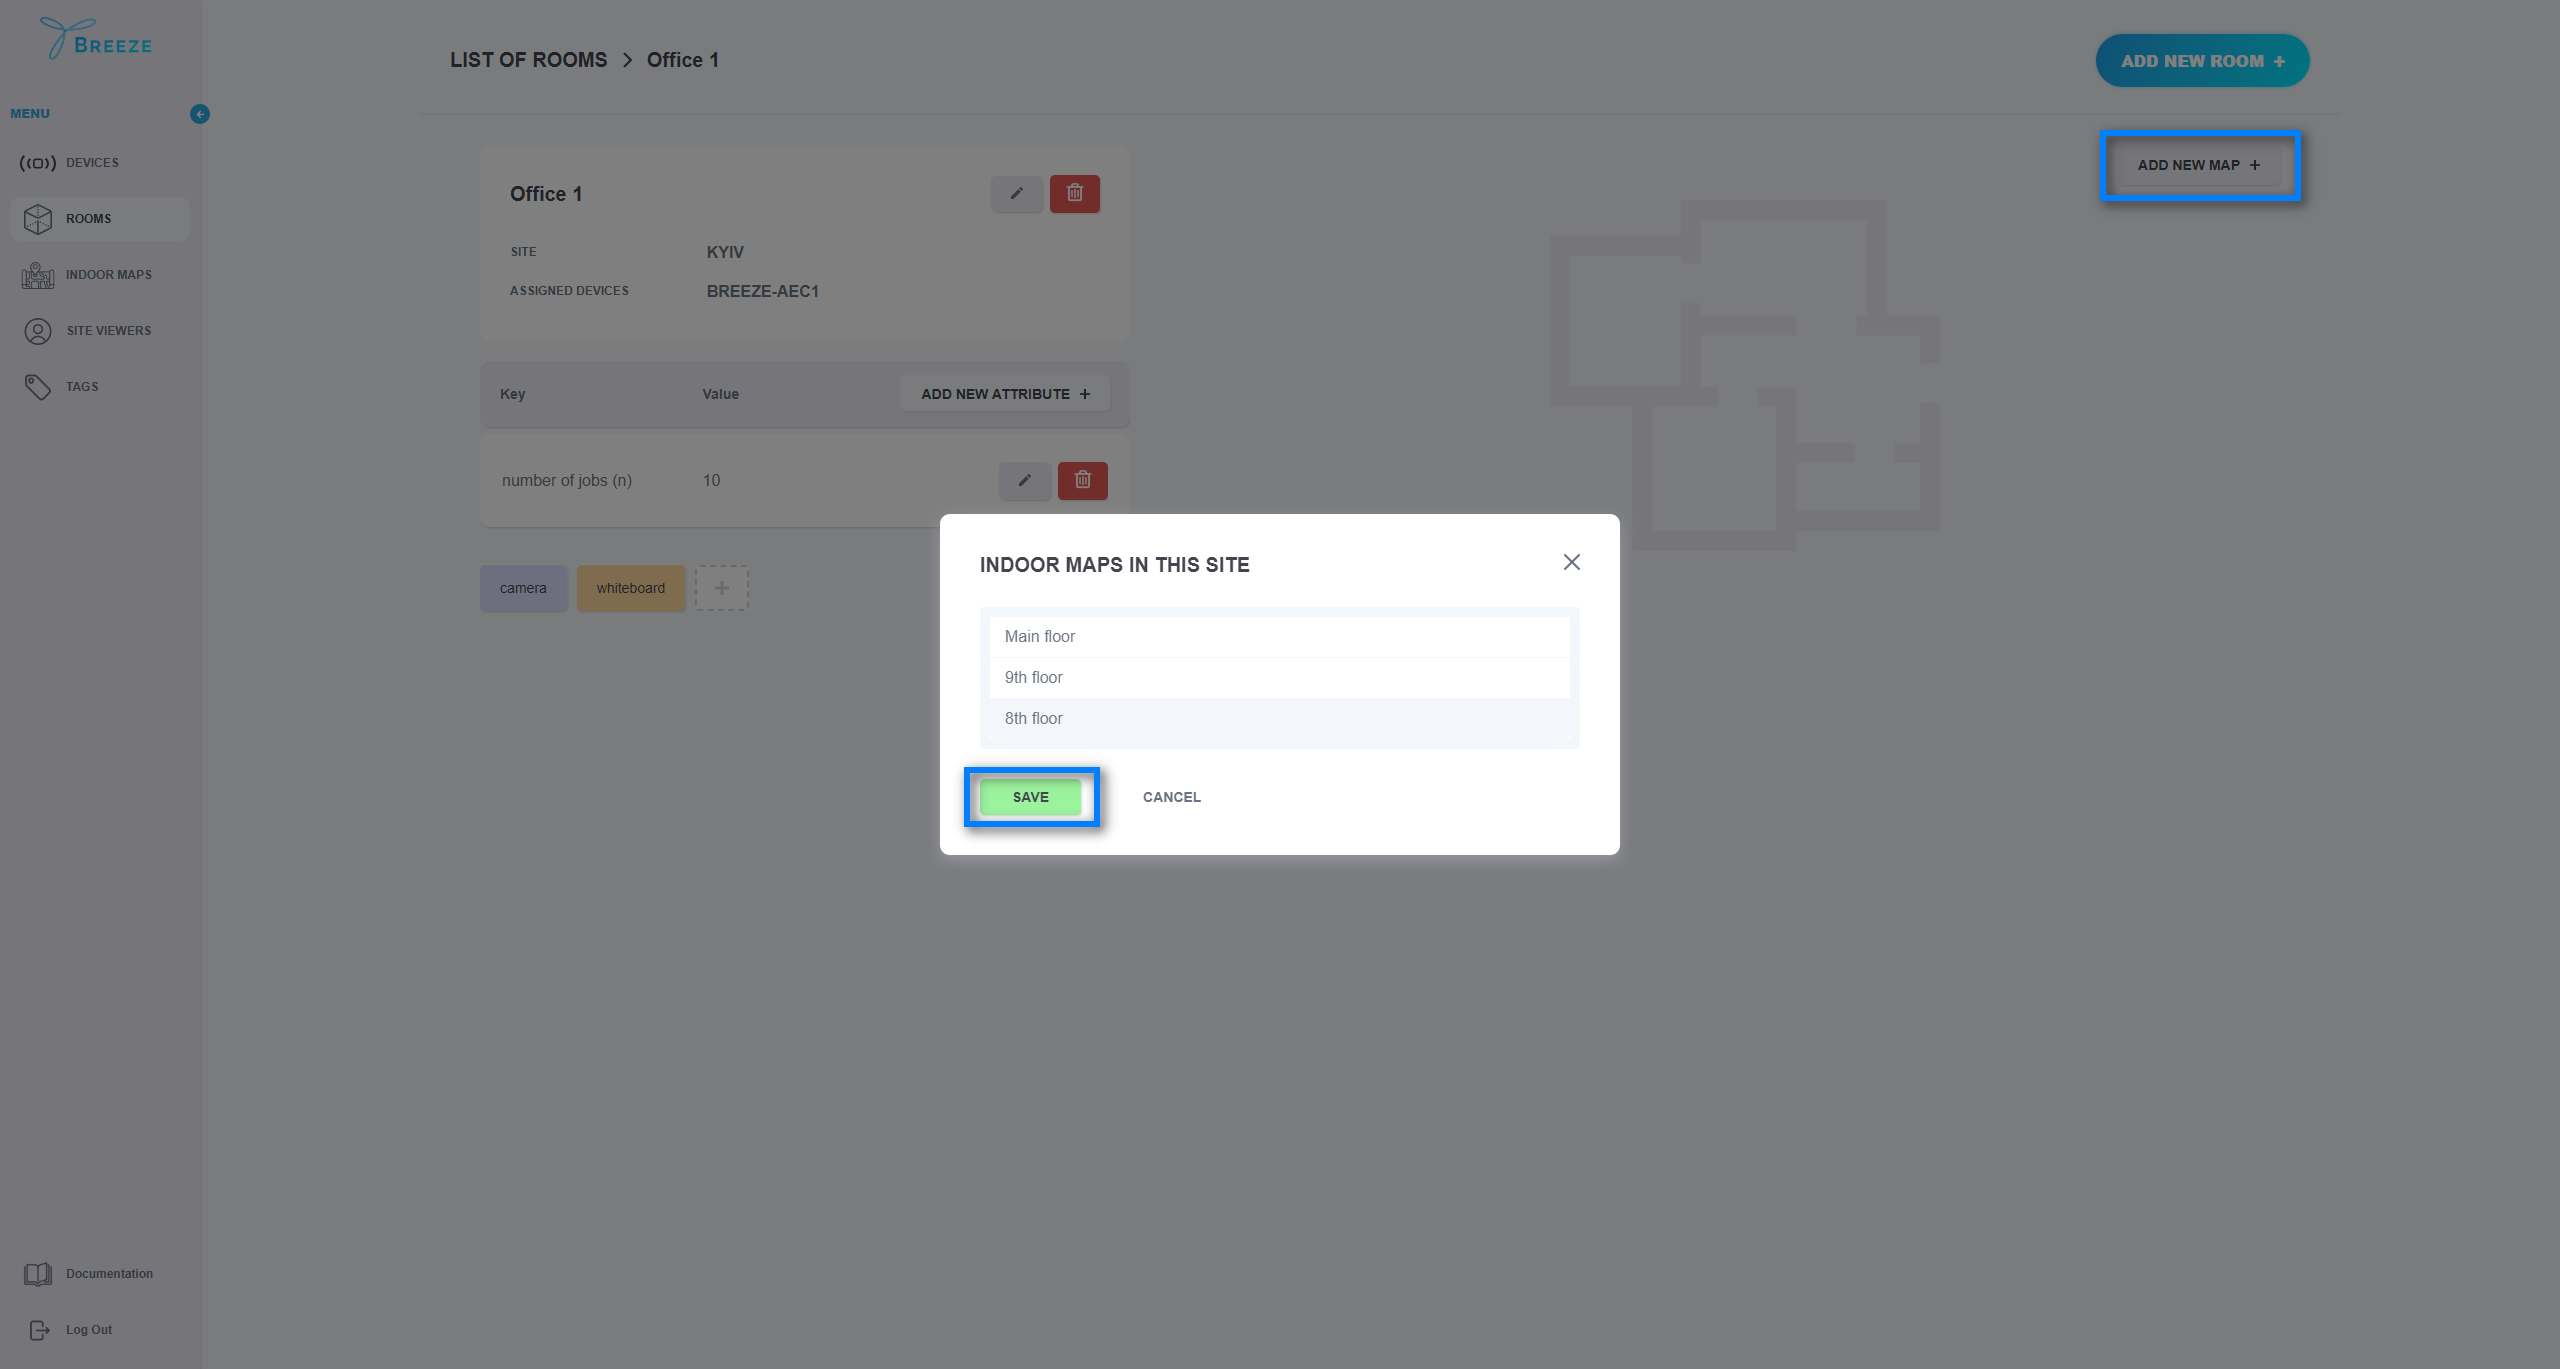
In the Room detailed view, the user can also assign a room to a map. Just click on the “ADD NEW MAP +" and select Indoor map. To save the assigned map click on the “SAVE” button. If you need to change the assigned map, just click on the “CHANGE MAP +" button, select a new map, and press the “SAVE” button.
Once Rooms have been added to the application, they can be searched by room name, tags, site name, or device name. Also, they can be filtered by site name and tags.
