LeapX Setup Wizard User Guide
When the application is successfully downloaded, installed, and opened, the user will begin the registration process.
Please fill out the mandatory fields with the values that will be used for your account registration.

The registration process cannot be considered successful if the account was created but not verified with the verification code that was sent to the user’s email after the account was successfully created.
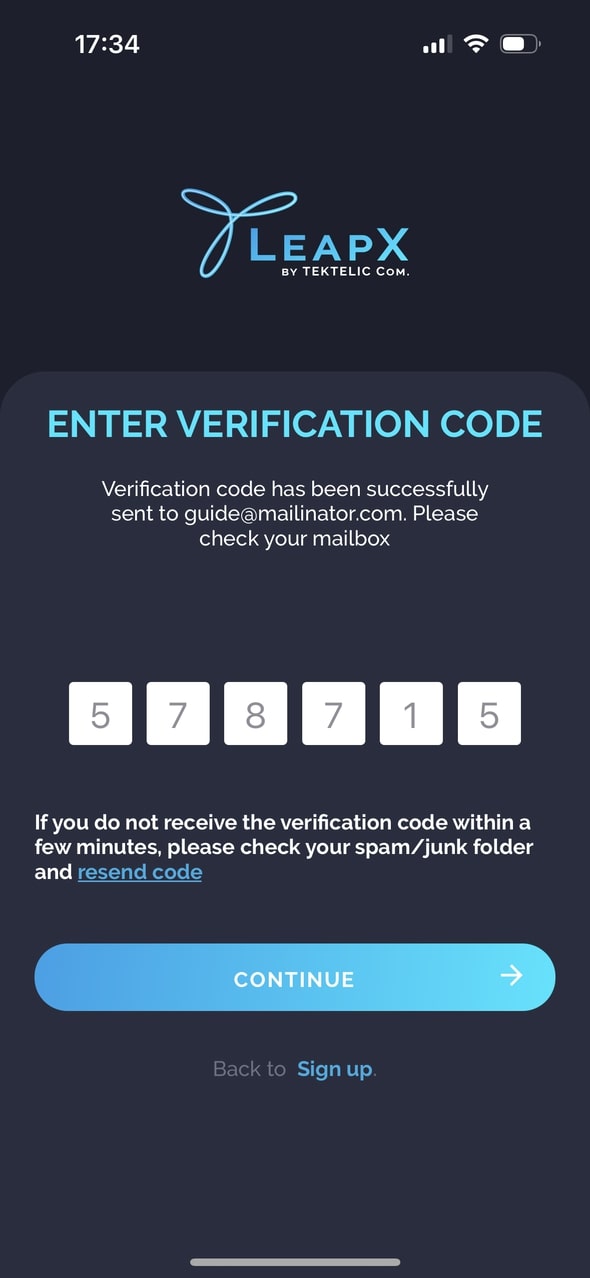
If you do not receive the verification code within a few minutes, please check your spam/junk folder and tap on the “Resend Code” button.
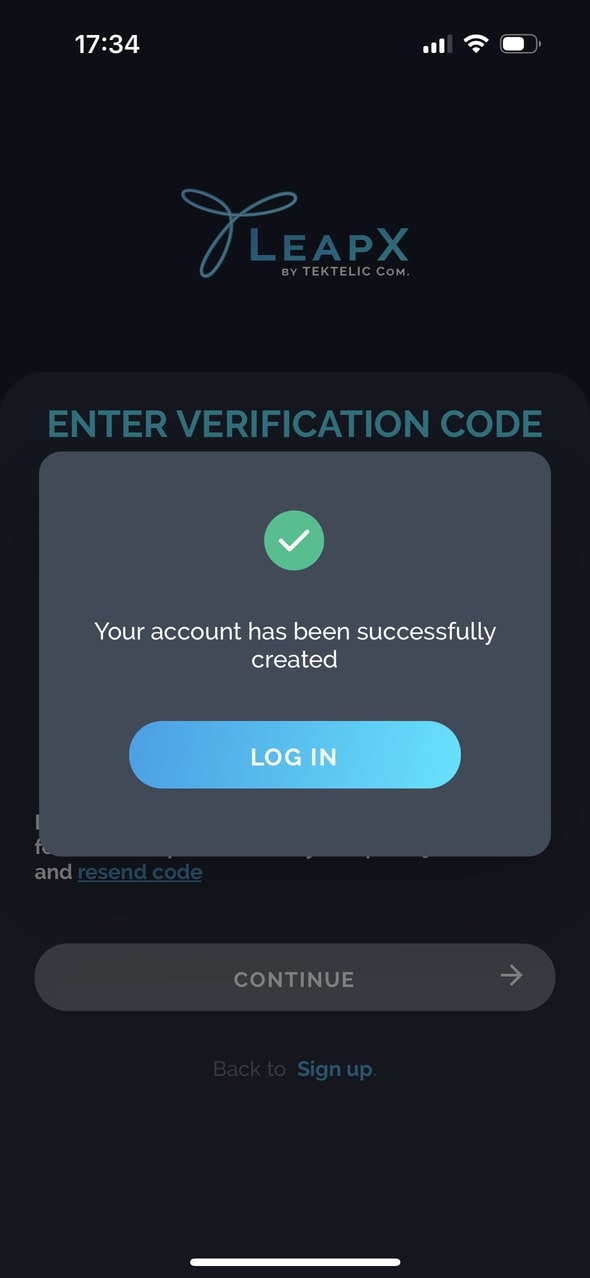
After the user’s account is successfully created and verified, the simple onboarding process “SetupWizard” will be initiated.
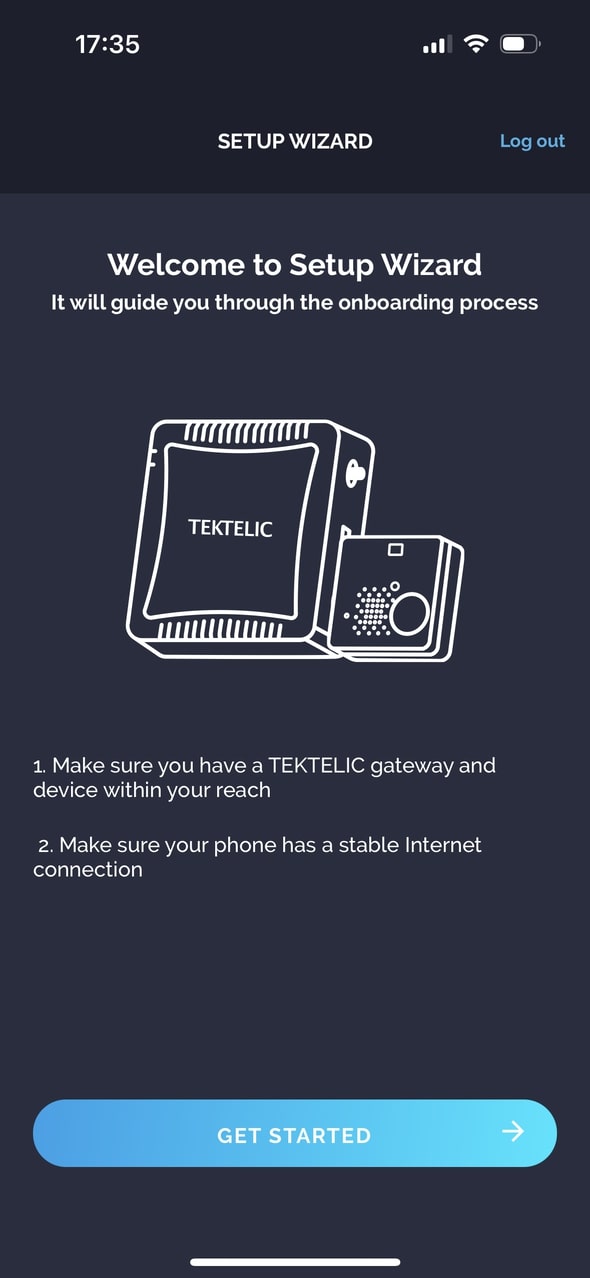
During “SetupWizard,” users will have the possibility to onboard the Gateway and Sensor via QR code or manually if the QR code is not reachable.
Please follow the instructions that are described on every screen of “SetupWizard” to proceed with the Gateway and Sensor onboarding process.
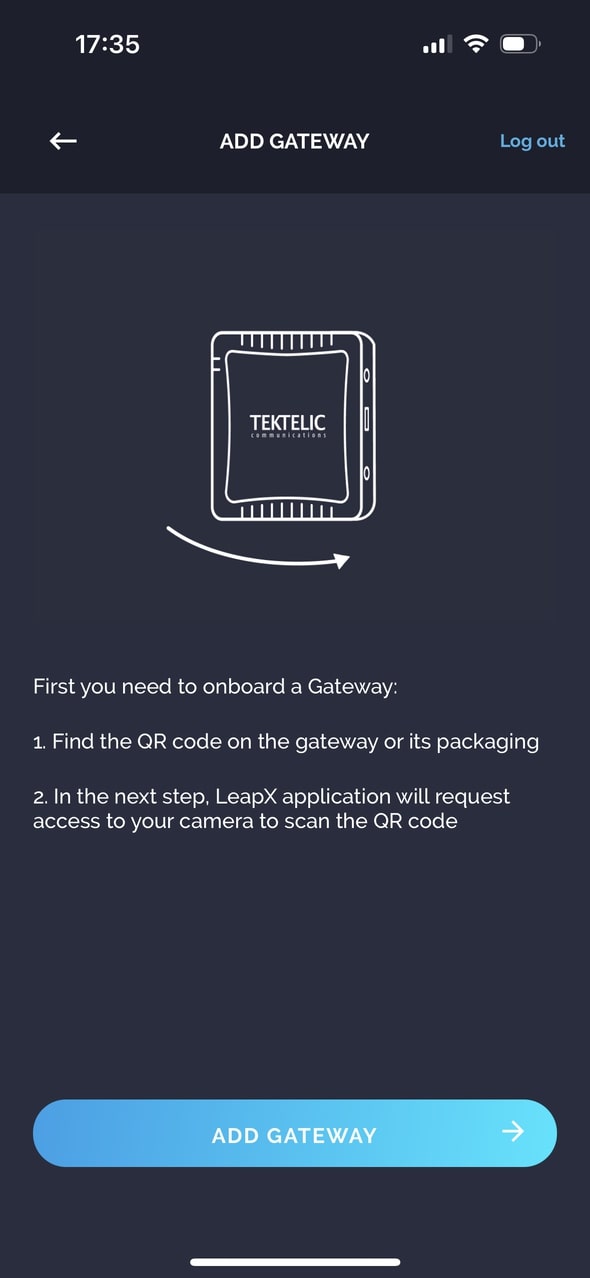
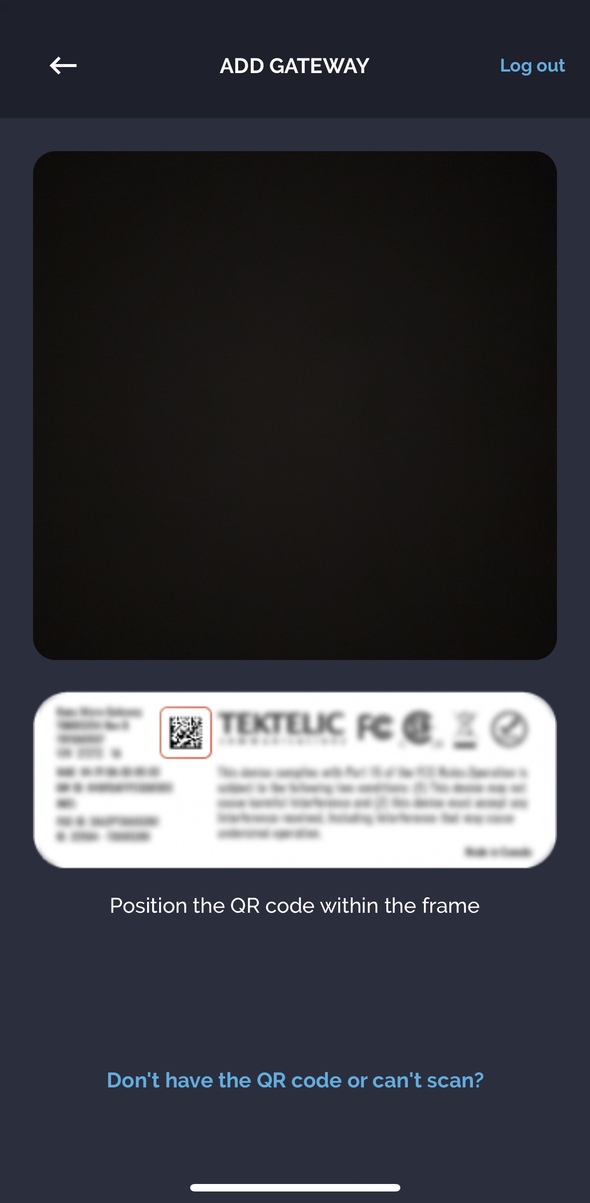
At this stage, the user will be prompted to add the first TEKTELIC Gateway. Please select “Add Gateway” and then scan the Gateway’s QR code that can be found on the Gateway’s label.
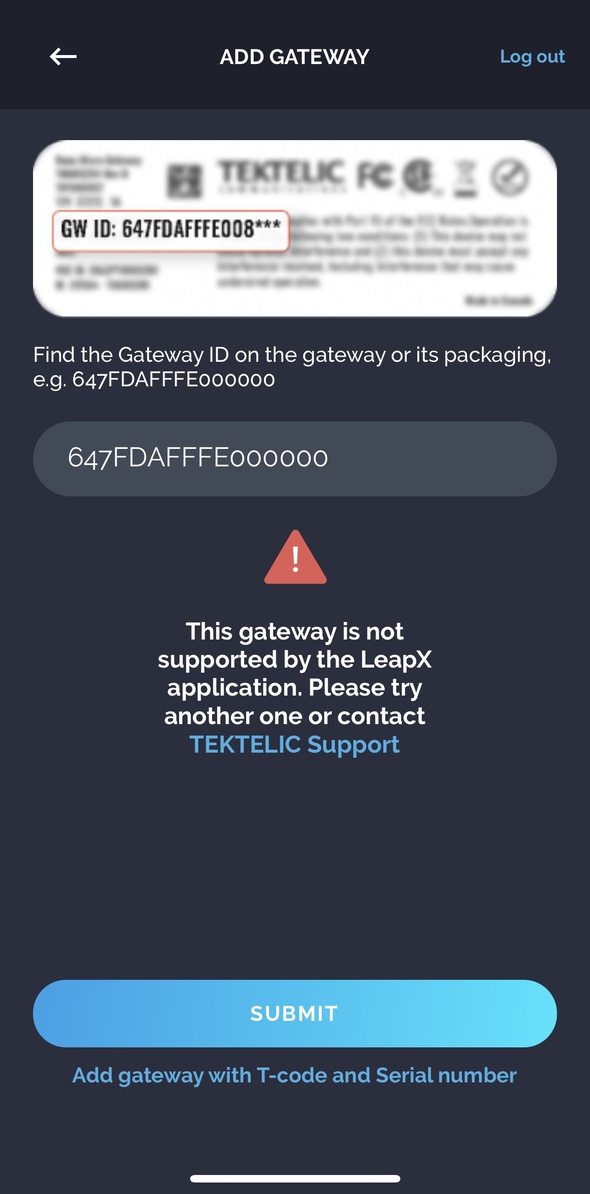
If the Gateway’s QR code on the label is damaged or you do not have the QR on hand, it is possible to add the Gateway manually by entering the Gateway ID or T-code/serial number.
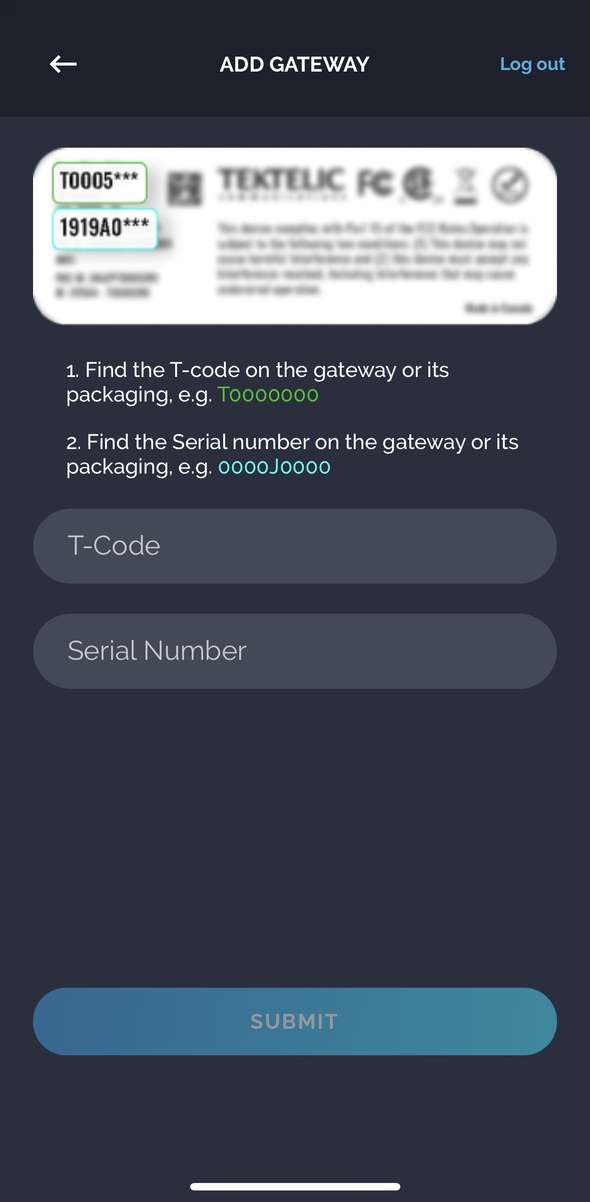
To add your Gateway manually, please select the “Don’t Have the QR Code or Can’t Scan It” button.
When the Gateway entity is successfully added, the user will have the possibility to “Edit” the Gateway’s name according to their choice.
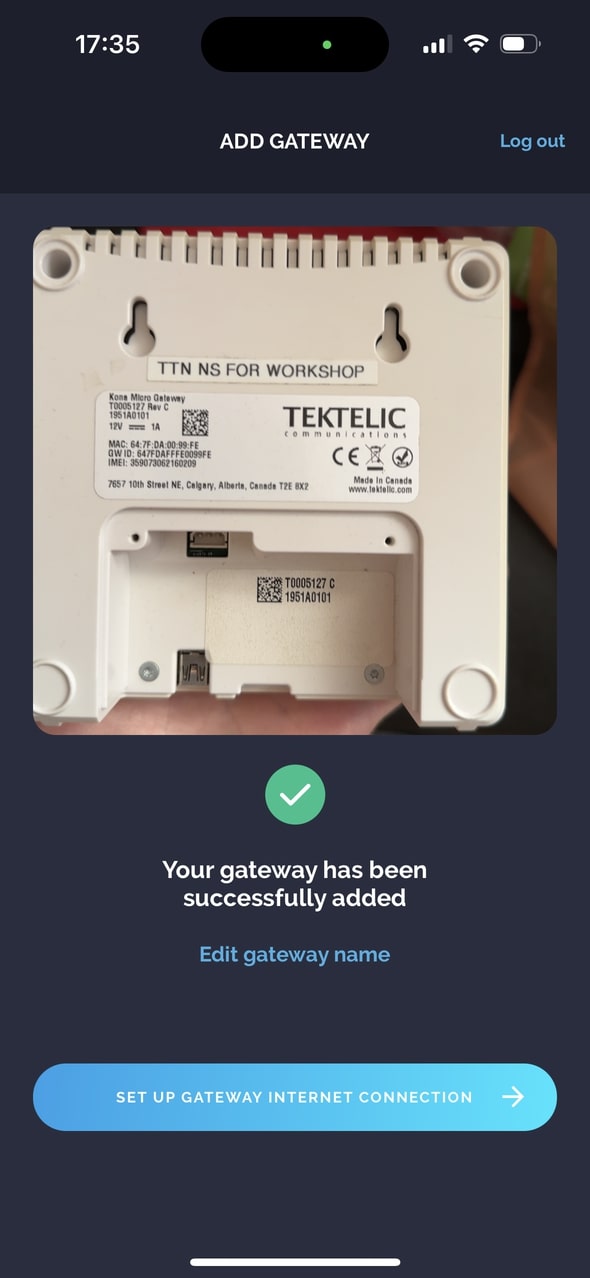
Next, the user will be transferred to the Gateway connection pending screen until the Gateway is successfully provisioned on the network and goes online.
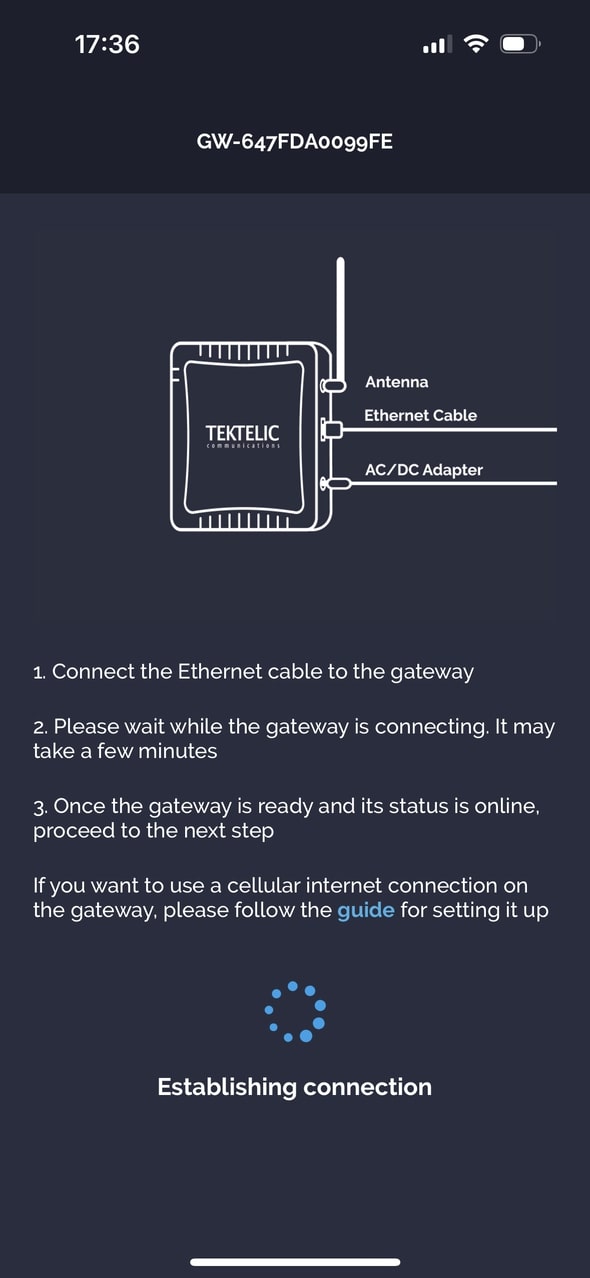
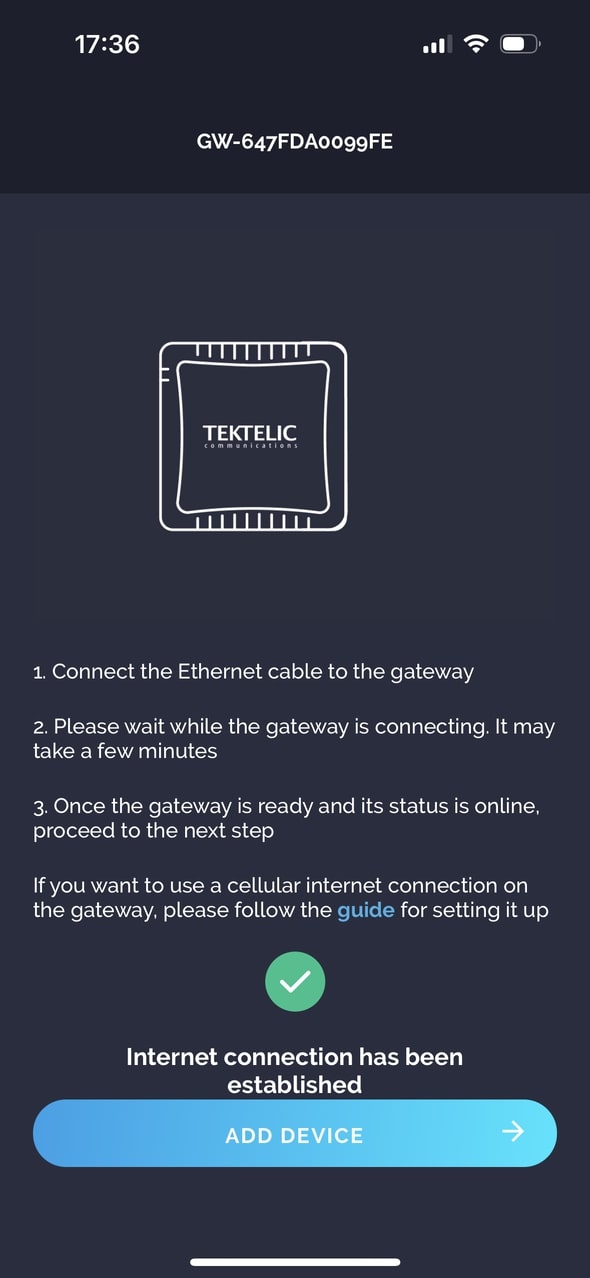
The Gateway’s connection screen varies according to the Gateway specification.
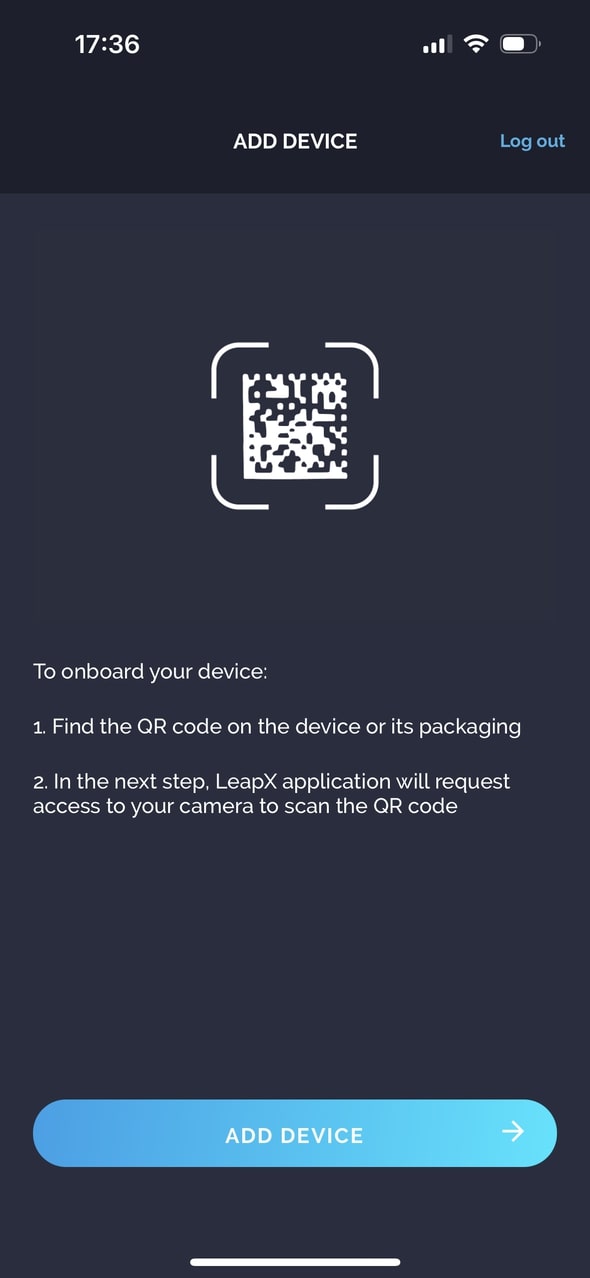
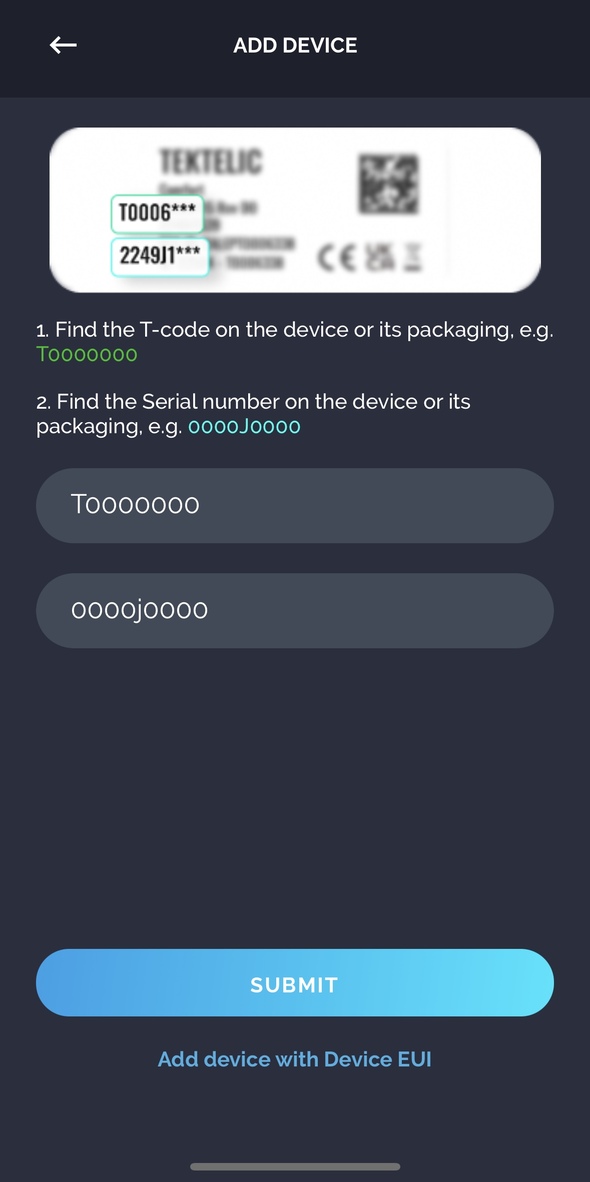
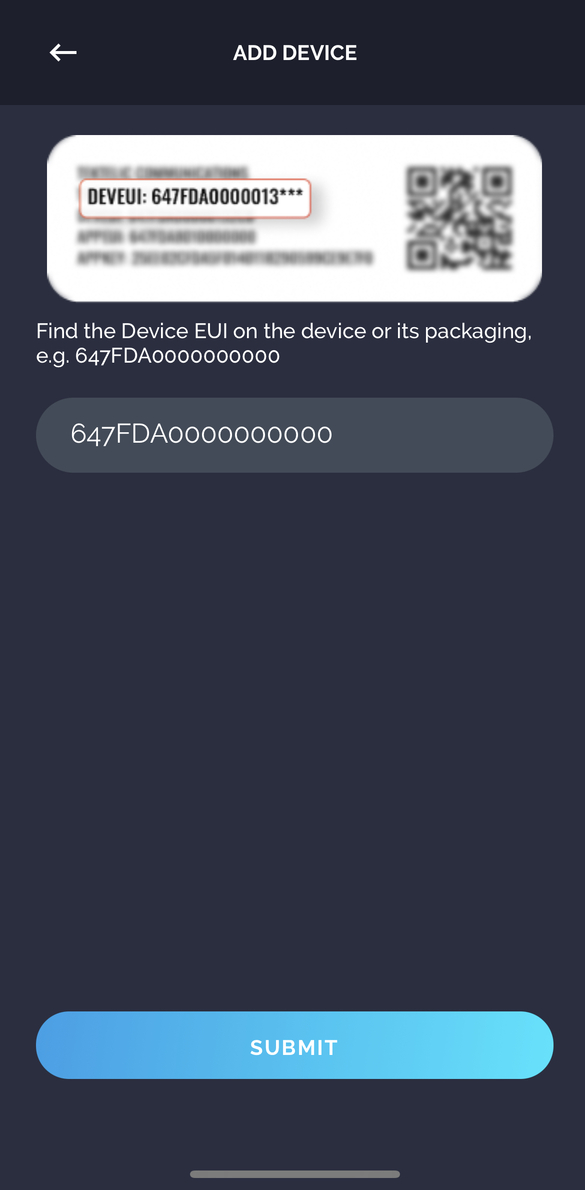
At this stage, the user can onboard the Device by scanning the QR code or manually add it using the T-code & serial number or the DevEUI identifier.

When the Device entity is successfully added, the user will have the possibility to “Edit” the Device name according to their choice.
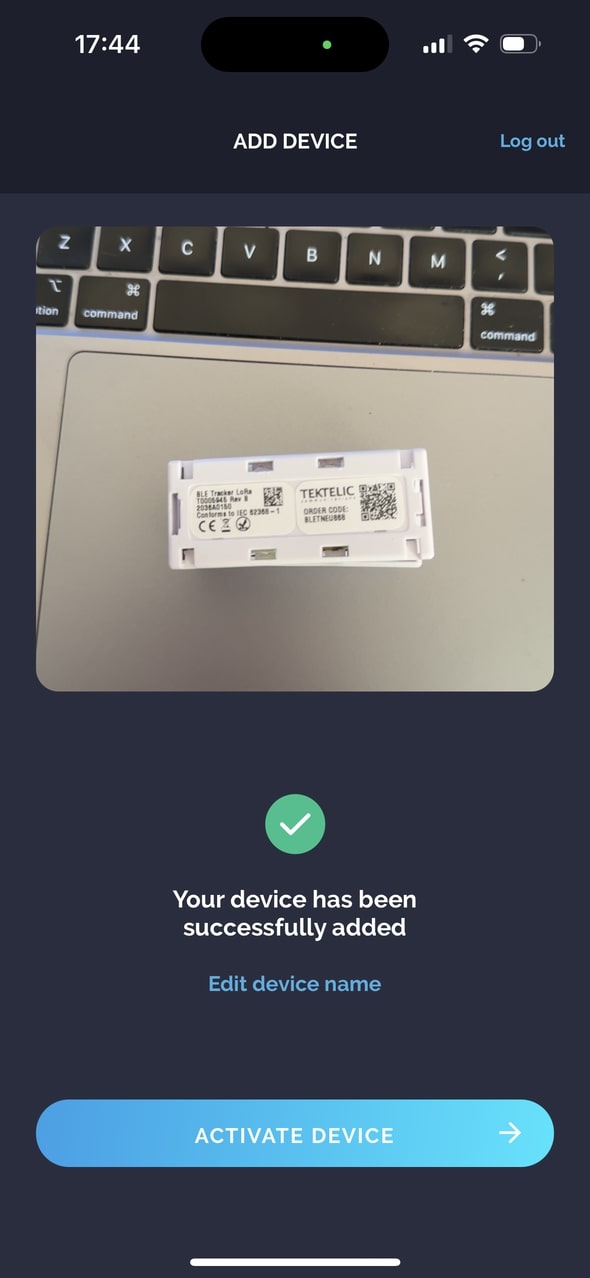
After the Device entity is successfully added, the user will be transferred to the Device connection pending screen until the Device is successfully provisioned on the network and goes online.
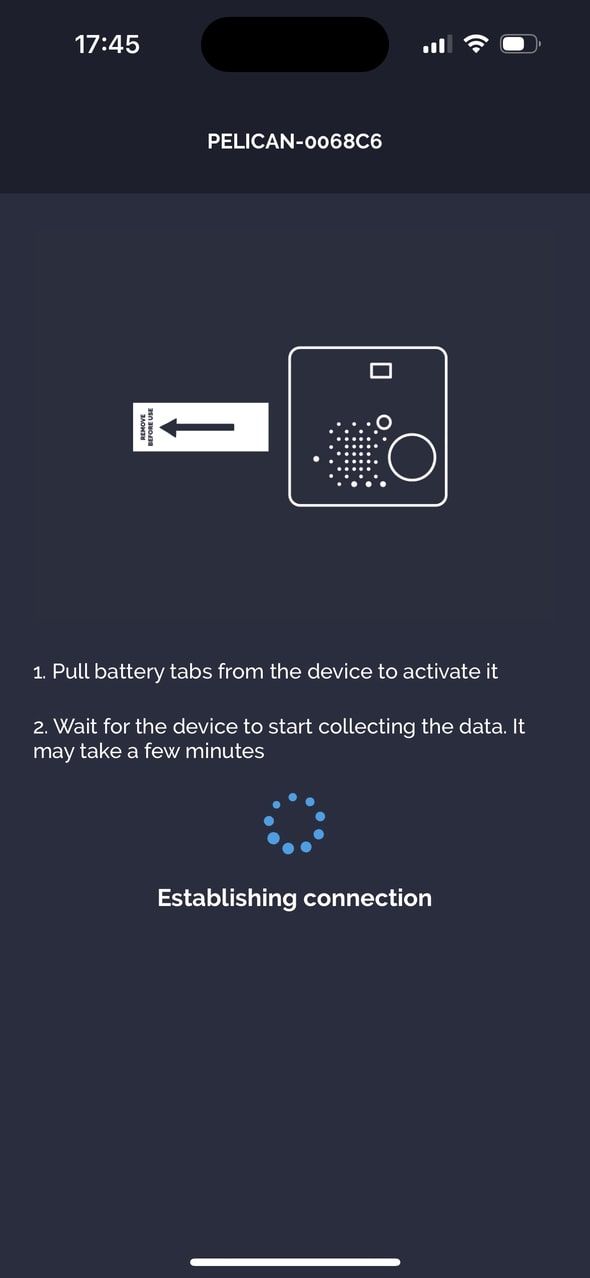
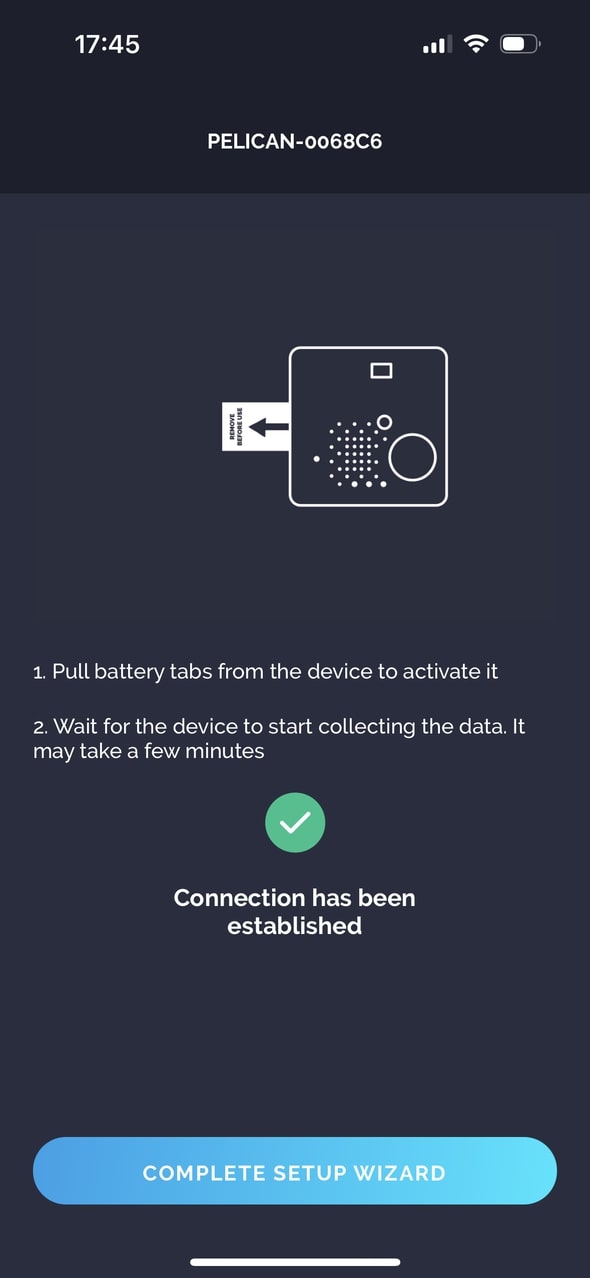
To provision the Device, please bring it online by either removing the battery pull tab or applying the magnet wake-up pattern for your TEKTELIC Sensor.
Once powered up, your Sensor should show as online after a few minutes, indicating that your LoRaWAN® setup is now working.
In case you do not manage to bring either the Gateway or Sensor online, please raise a support ticket on TEKTELIC Support | Home, and a member of the TEKTELIC support team will assist you as soon as possible.
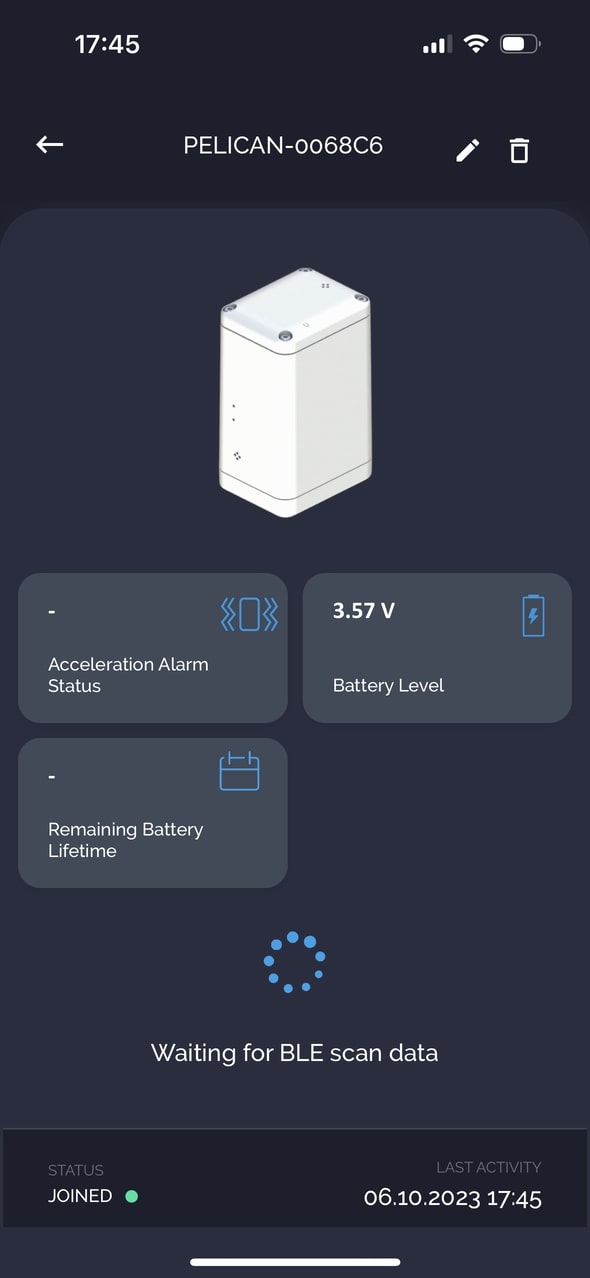
After the user successfully finishes “SetupWizard”, they will be automatically transferred to the Device measurements info screen.
At this point, the user can add another Gateway and Sensor by simply tapping on the “+” button and further scanning the QR code or doing it manually.
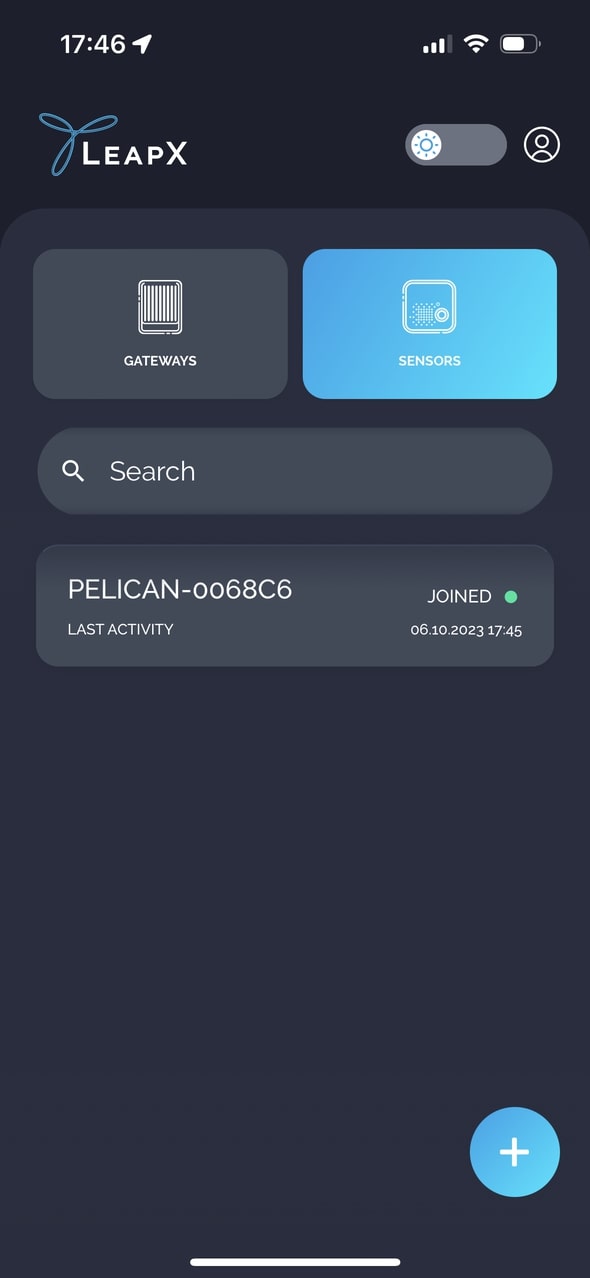
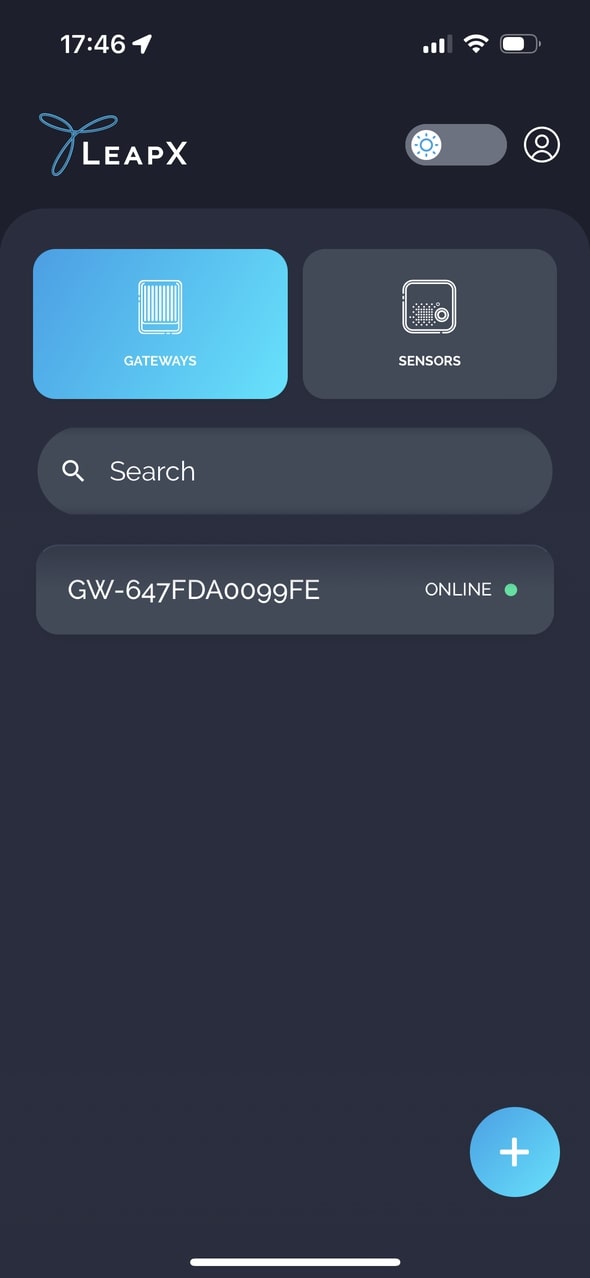
Also, the user has the possibility to edit the Gateway/Device name and description according to their needs.