Integrating TEKTELIC KONA Gateway with LORIOT Network Server via LoRa Basics™ Station
This article explains how to connect a TEKTELIC KONA Gateway to the LORIOT LoRaWAN Network Server (LNS) using LoRa Basics™ Station through the KONA Link web interface. These steps replace the command-line configuration described in the LORIOT setup guide.
Before beginning:
- The gateway must be connected to the same local network as your PC.
- You must have login access to KONA Link (see Log in to KONA Link article).
- You must have access to your LORIOT Network Server account.
- Log in to your LORIOT LNS dashboard.
- Navigate to: Home → Network → Your Network → Add Gateway
- Select Basics Station and enter your gateway’s EUI (MAC address).
- Once the gateway is created, open the Certificates tab.
- Click Generate TLS Certificate.
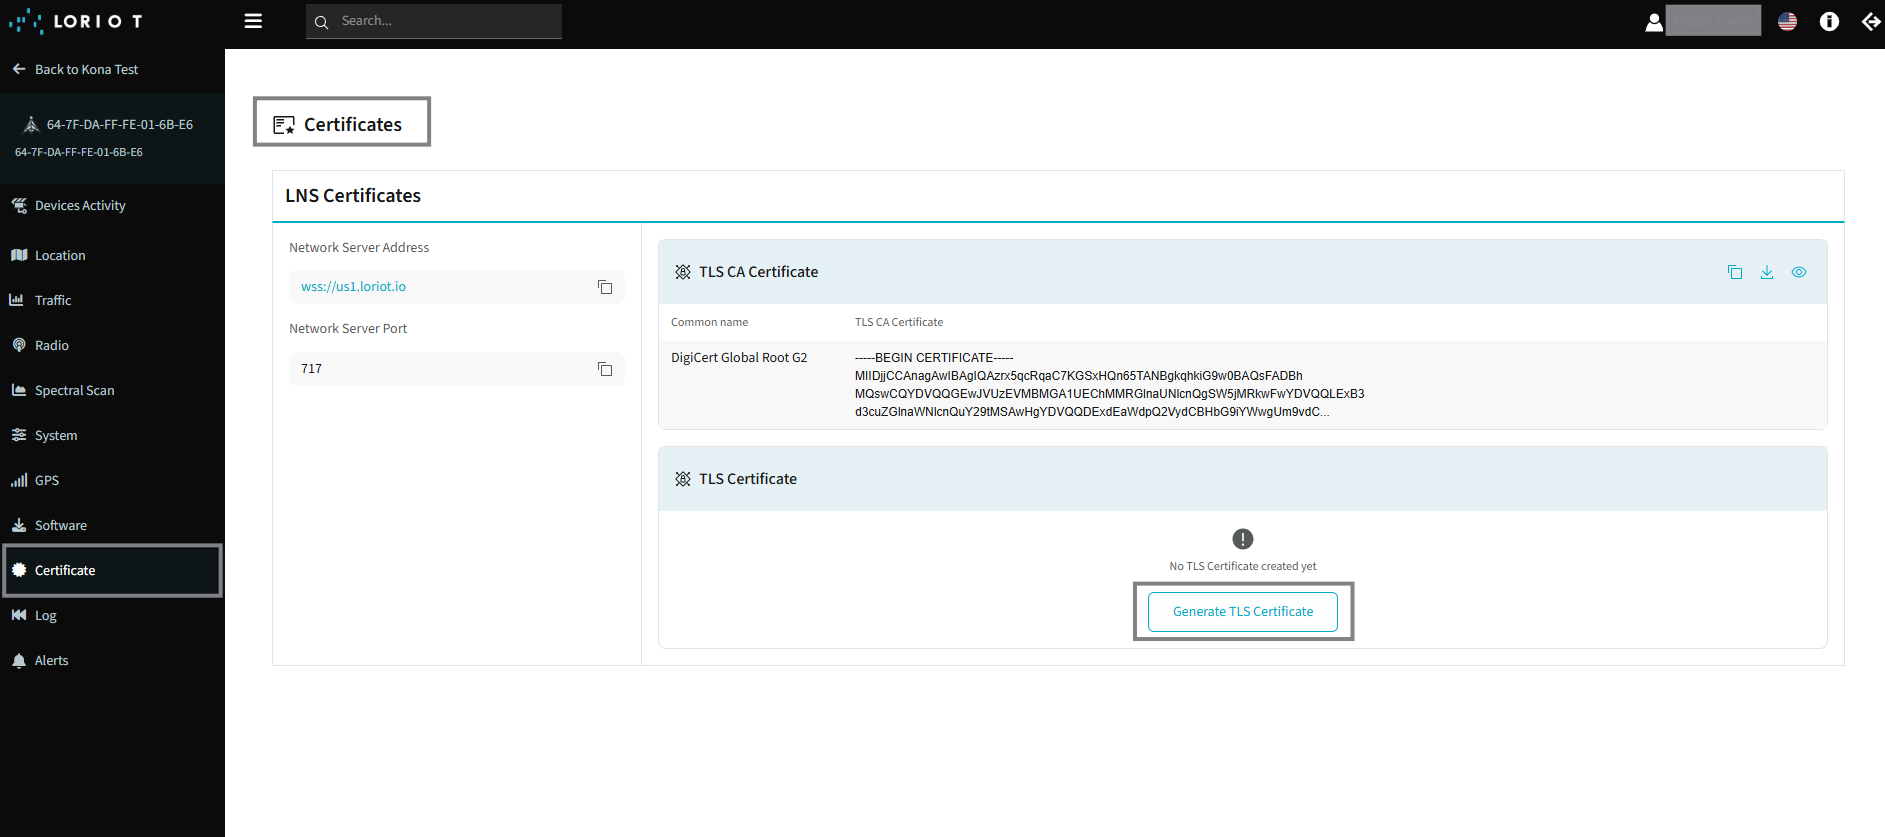
Important: Certificates are displayed only once. Download and save all files immediately before closing the page, or you will need to revoke and recreate them.
You should now have the following files:
- Root CA certificate – used as
tc.trust - Gateway certificate – used as
tc.crt - Gateway private key – used as
tc.key - Network server URI – used as
tc.uri(e.g.,wss://us1.loriot.io:717)
-
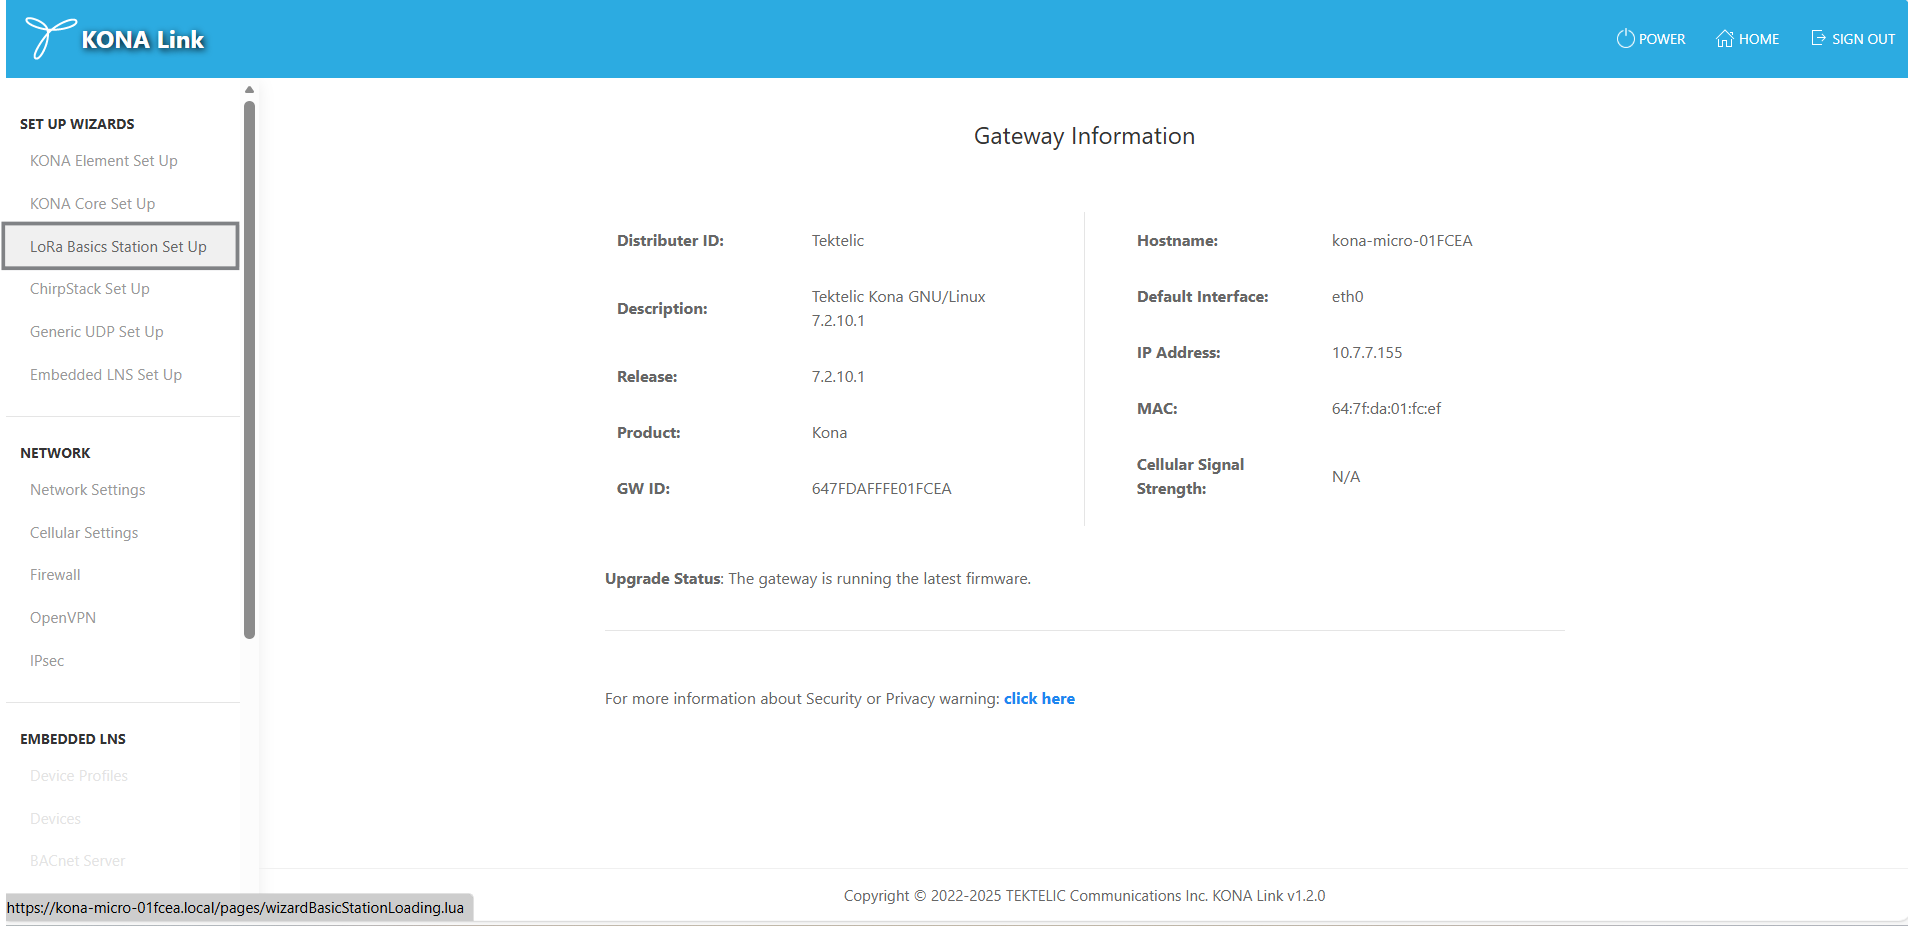
On your PC, open a browser and enter the gateway’s hostname or IP address:
http://kona-<GW variant>-<last 6 digits of GW ID>.local/Example:
http://kona-micro-0011ab.local/ -
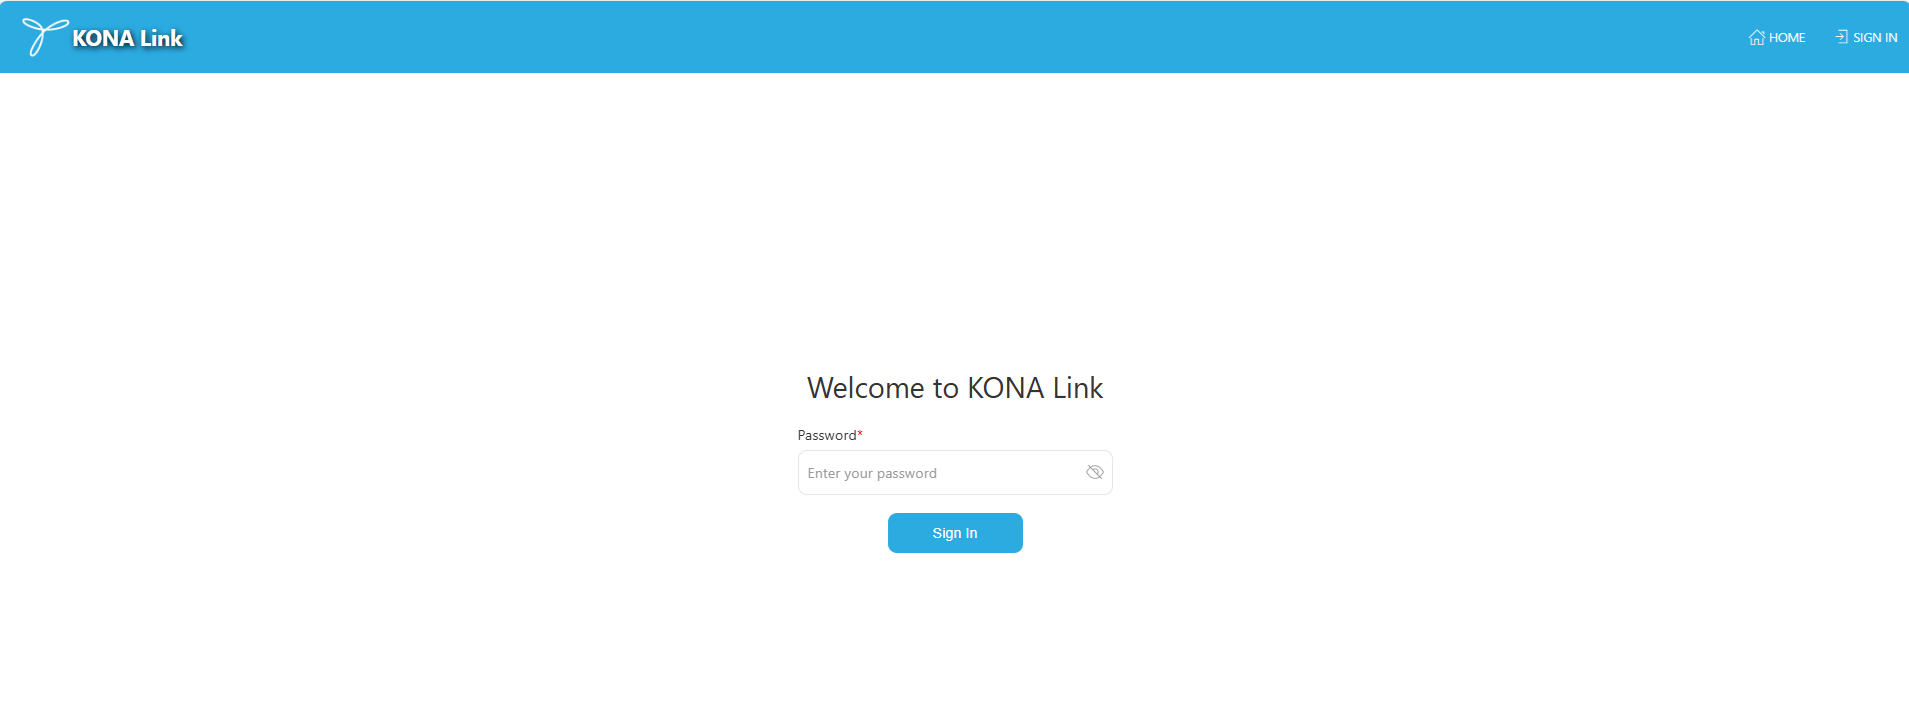
Log in using the Basic Webpassword printed on the KONA Test Summary Certificate included with your gateway.
-
On the KONA Link main page, select LoRa Basics Station Set Up from the Set Up Wizards menu.
-
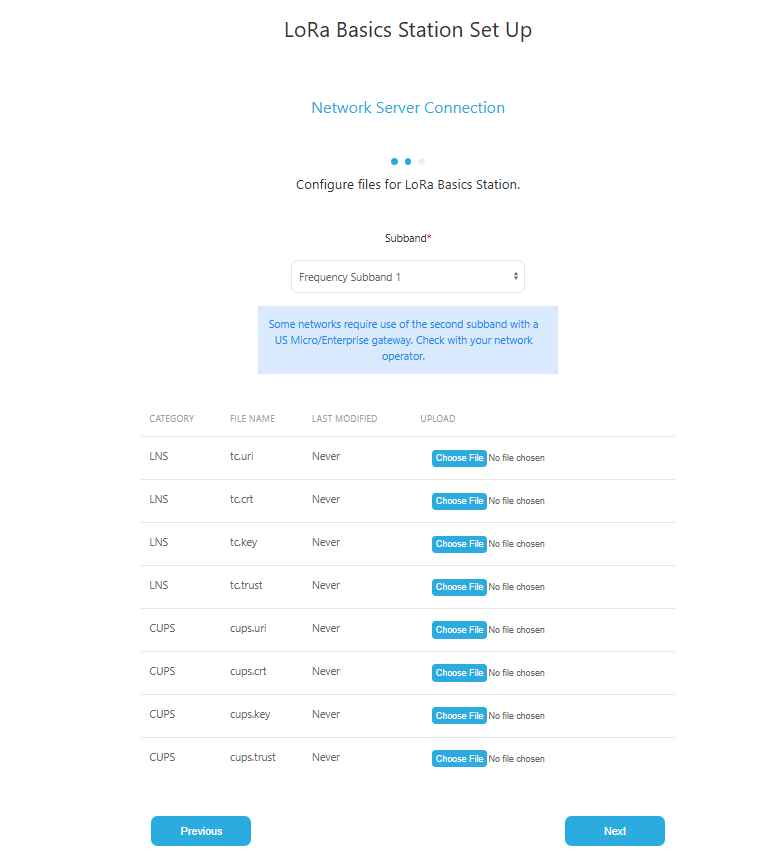
Click Next to continue to the setup page.
-
Frequency Subband: Select the subband that matches your LORIOT region (default is 1).
-
Upload Configuration Files: Use the file upload fields to provide the certificates and URI obtained from LORIOT:
- Upload
tc.uri— network server address and port (e.g.,wss://us1.loriot.io:717) - Upload
tc.trust— TLS CA certificate - Upload
tc.crt— TLS certificate - Upload
tc.key— TLS private key
These files replace the manual steps of copying files to
/etc/bstnas described in the LORIOT guide. - Upload
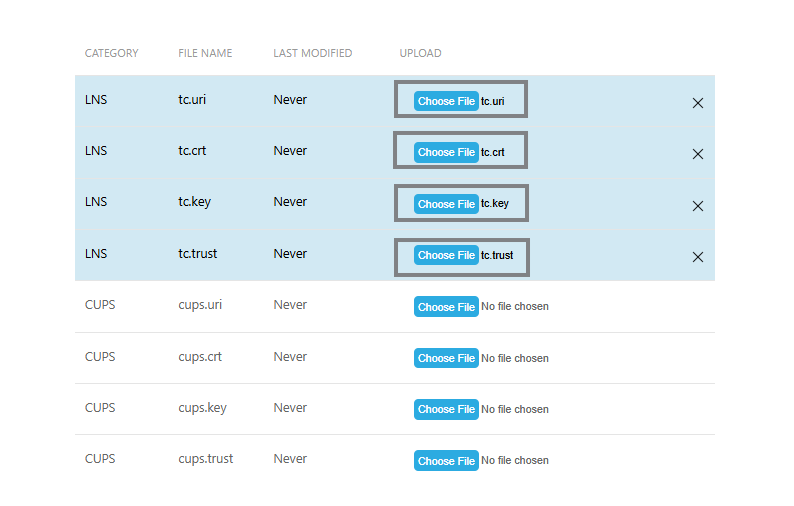
- Click Next, then Done to apply the configuration.
After the configuration is saved, a message will appear prompting a reboot. Select Reboot Gateway from the setup page to restart and apply the settings.
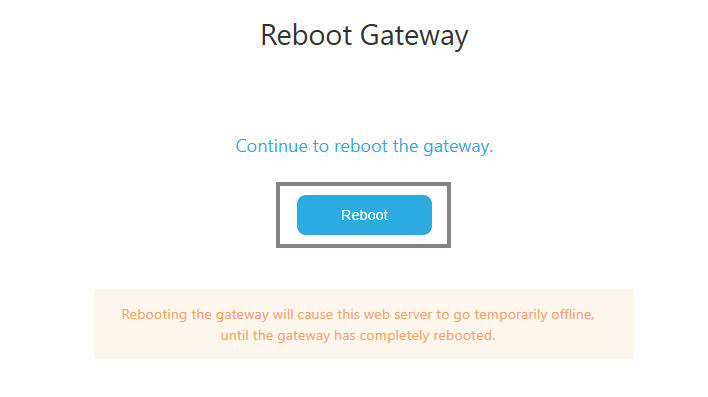
The reboot takes approximately 2 minutes.
Once the gateway reboots:
- Return to your LORIOT dashboard.
- Verify that the gateway status shows Online. This confirms a successful Basics Station connection to the LNS.
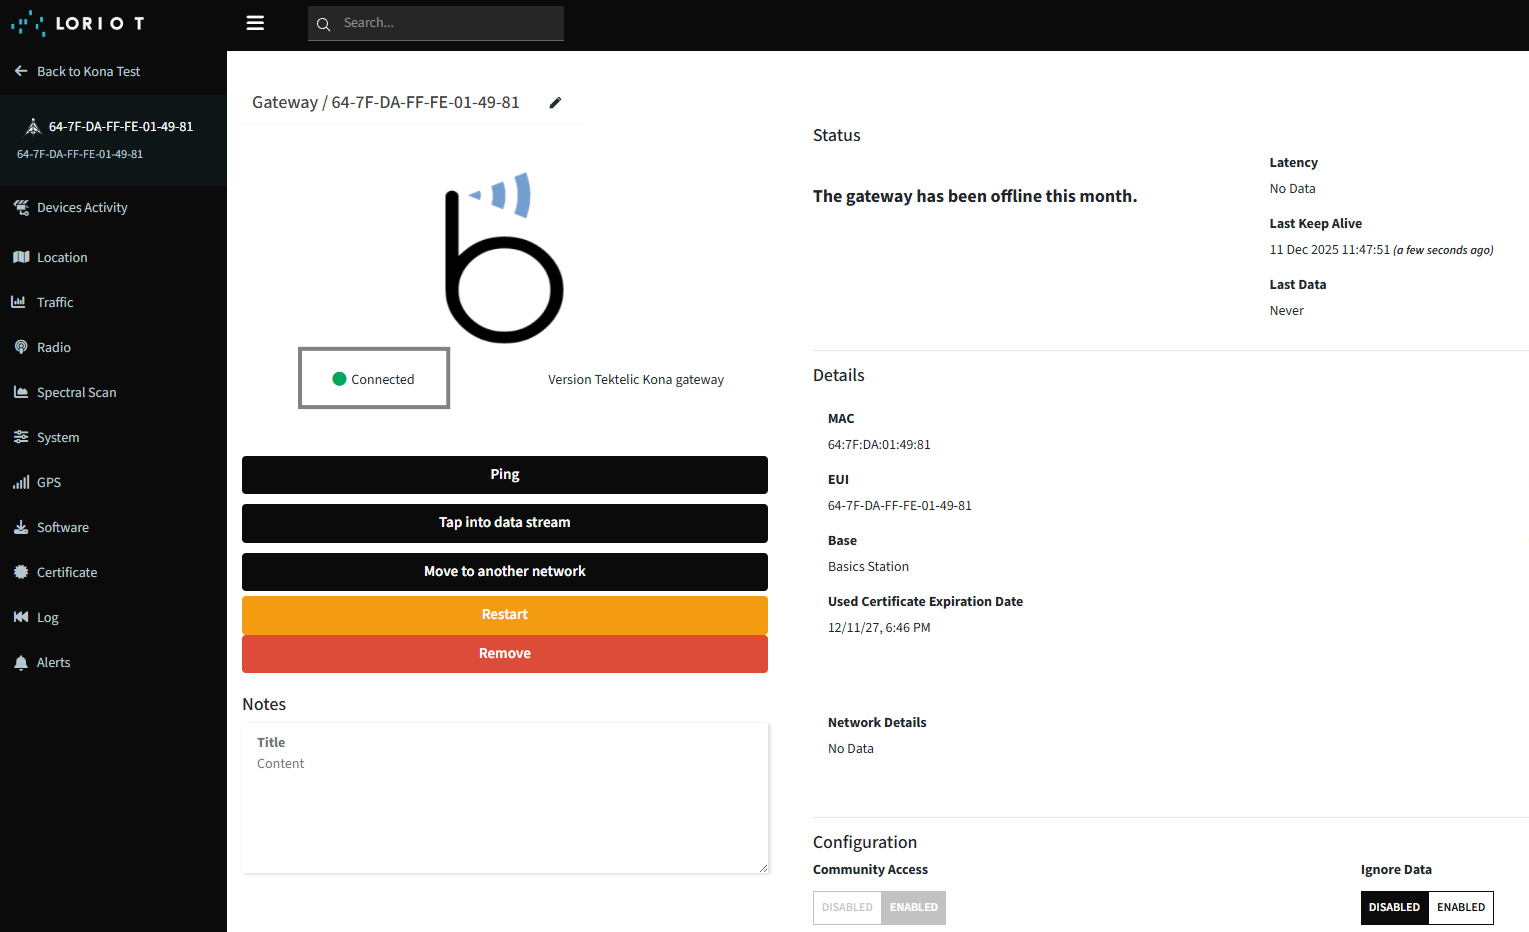
If the gateway remains offline, verify:
- The correct subband is selected.
- The uploaded certificate and URI files match your LORIOT credentials.
- The gateway has Internet connectivity.
| Parameter | Description |
|---|---|
| Protocol | LoRa Basics™ Station |
| Server URI | wss://<region>.loriot.io:717 |
| Files required | tc.uri, tc.trust, tc.crt, tc.key |
| Configuration method | KONA Link → LoRa Basics Station Wizard |
| Reboot required | Yes |
Result: Your TEKTELIC KONA Gateway is now connected to the LORIOT LoRaWAN Network Server using LoRa Basics™ Station via the KONA Link web interface.