Buildings
List View (Main Table)
-
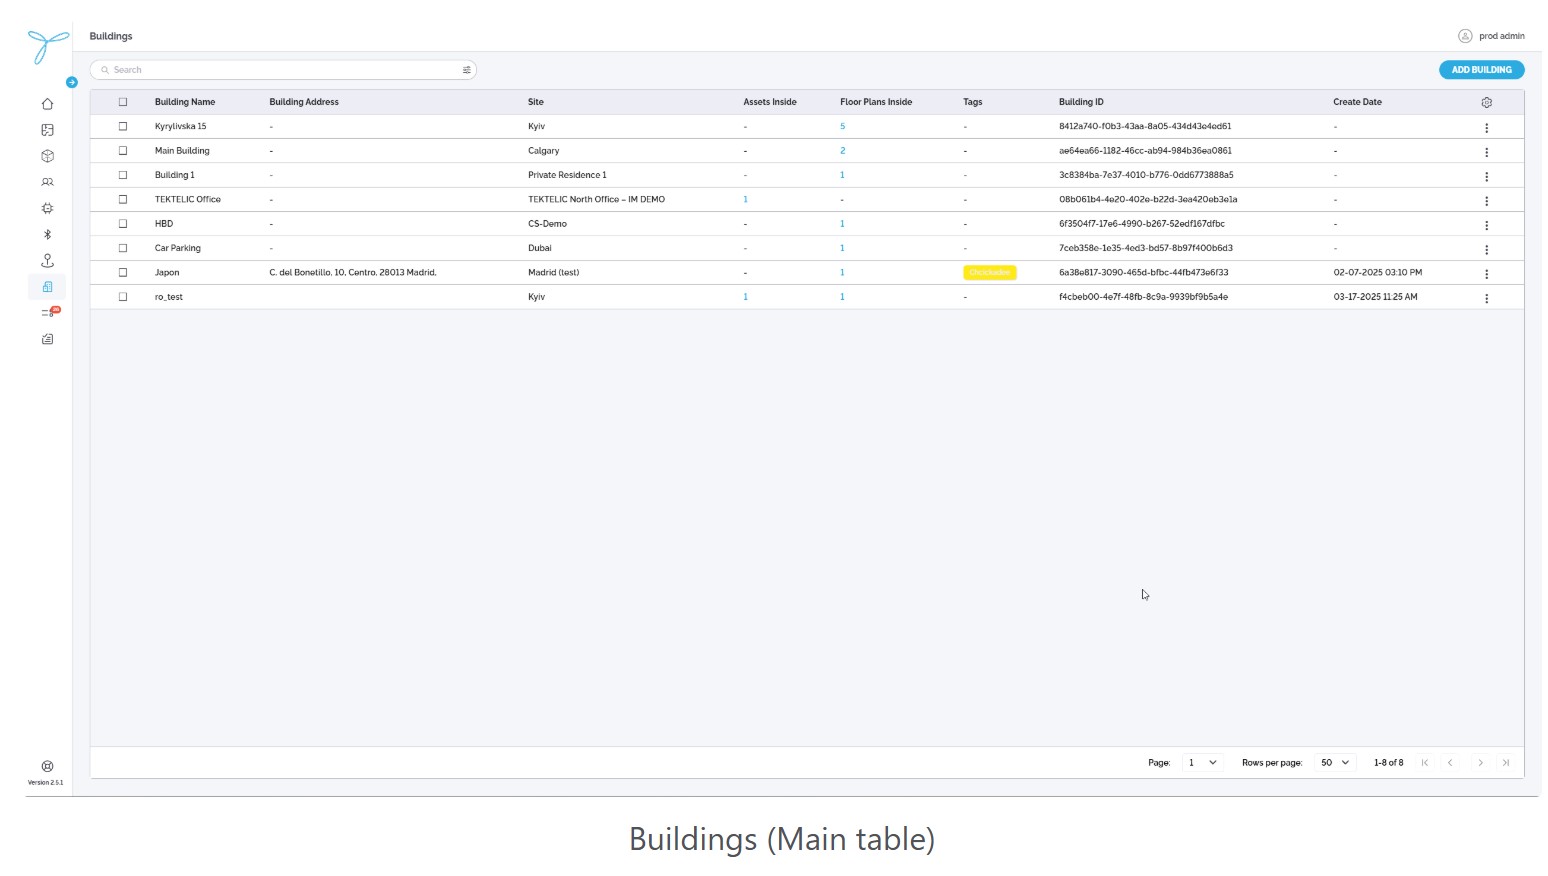
The table displays all buildings with the following default columns: Building Name, Building Address, Site, Assets Inside, Floor Plans Inside, Tags, Building ID, Create Date.
-
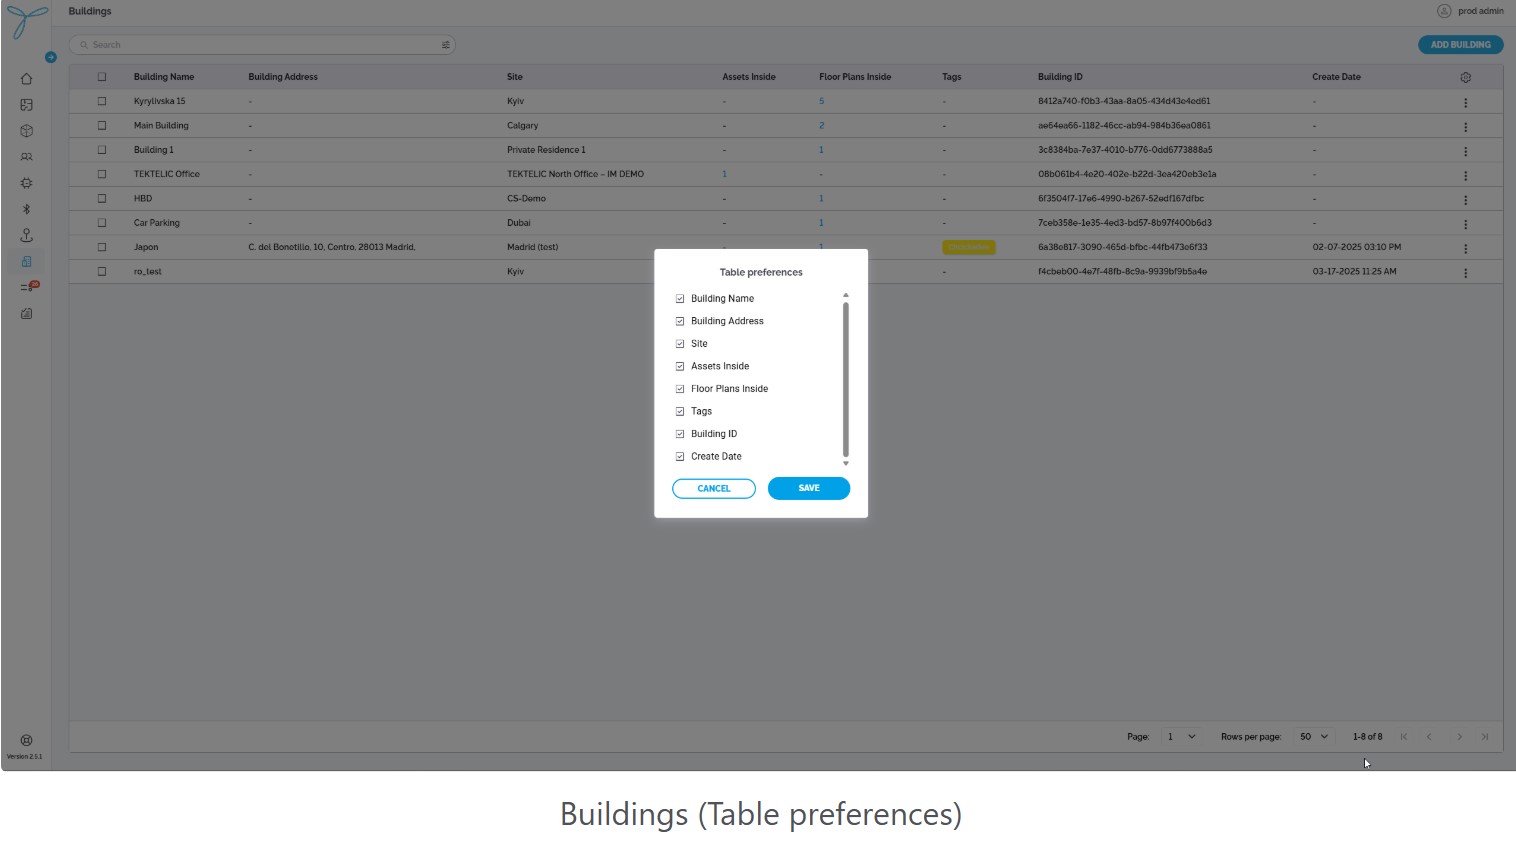
Column Configuration (Table Preferences):
- Click the gear icon to open the Table Preferences modal.
- Select which columns to show or hide (e.g., Building Name, Building Address, Site, Assets Inside, Floor Plans Inside, Tags, Building ID, Create Date).
- Columns can be rearranged by dragging, hidden by deselecting, but resizing is not supported.
- Click Save to apply changes; Cancel to discard.
-
Search and Filter:
-
Use the Search bar to find buildings by Building Name.
-
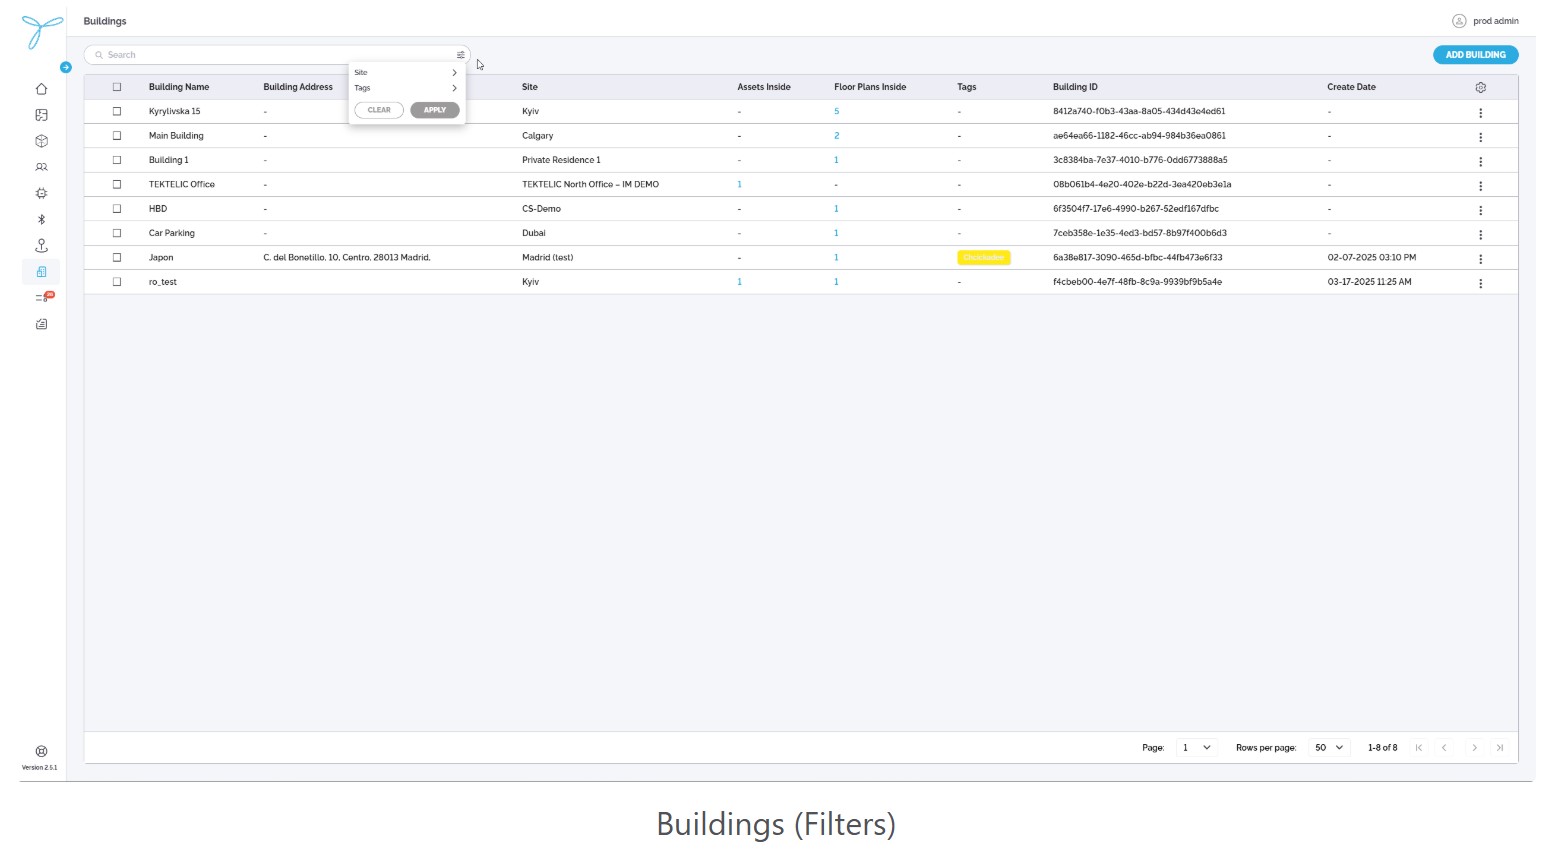
Use the Tags filter dropdown to filter buildings by tags.
- Steps: Click the filter icon, select tags, click Apply to filter, or Clear to reset.
- Expectations: Displays only buildings matching the selected tags.
-
Use the Site filter dropdown to filter buildings by site (e.g., CS-Demo, Kyiv).
- Steps: Click the filter icon, select a site, click Apply to filter, or Clear to reset.
- Expectations: Displays only buildings associated with the selected site.
-
-
Actions (Based on Permissions):
- Click the More Actions (…) button next to a building in the table to open a context menu with Edit and Delete options (to be detailed if needed).
- Admins: Add, edit, or delete buildings.
- Standard Users: View buildings; edit or delete if granted explicit permissions.
-
Pagination: Adjust rows per page (e.g., 50) and navigate pages (e.g., 1 of 8) using the pagination controls at the bottom.
Conditions: You need admin permissions or explicit rights to add buildings.
Steps:
-
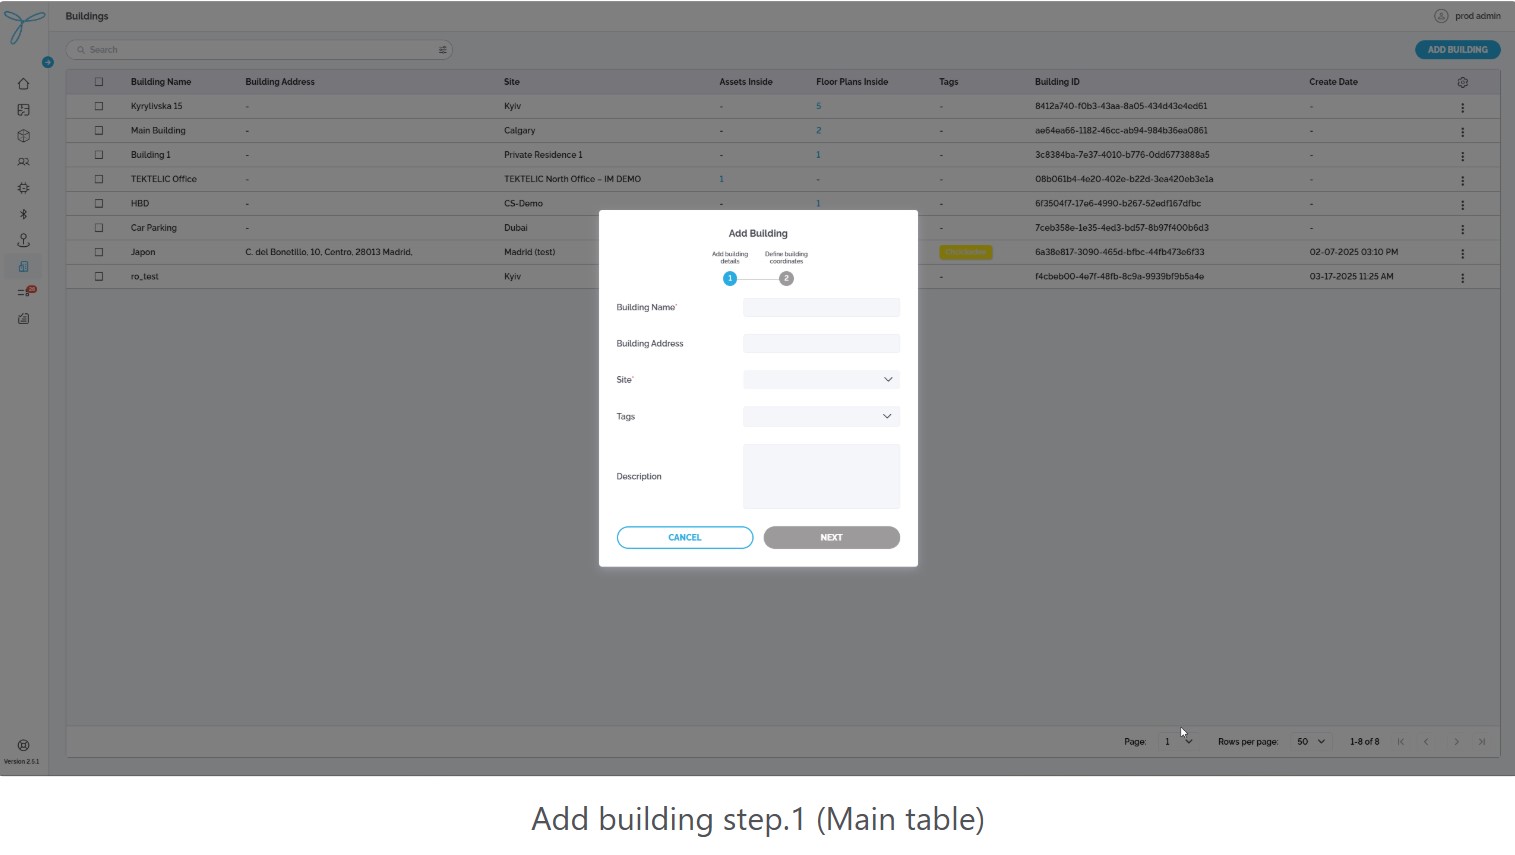
Click the Add Building button to open the Add Building modal.
-
Step 1: Enter Building Details:
- Building Name: Input the building name (e.g., “ro_test”).
- Building Address: Input the address (e.g., “C. del Bonetillo, 10, Centro, 28013 Madrid”).
- Site: Select from the dropdown or add a new site (e.g., “Kyiv (test)").
- Tags: Select from the dropdown or add new tags.
- Description: Input an optional description.
- Click Next to proceed or Cancel to discard.
-
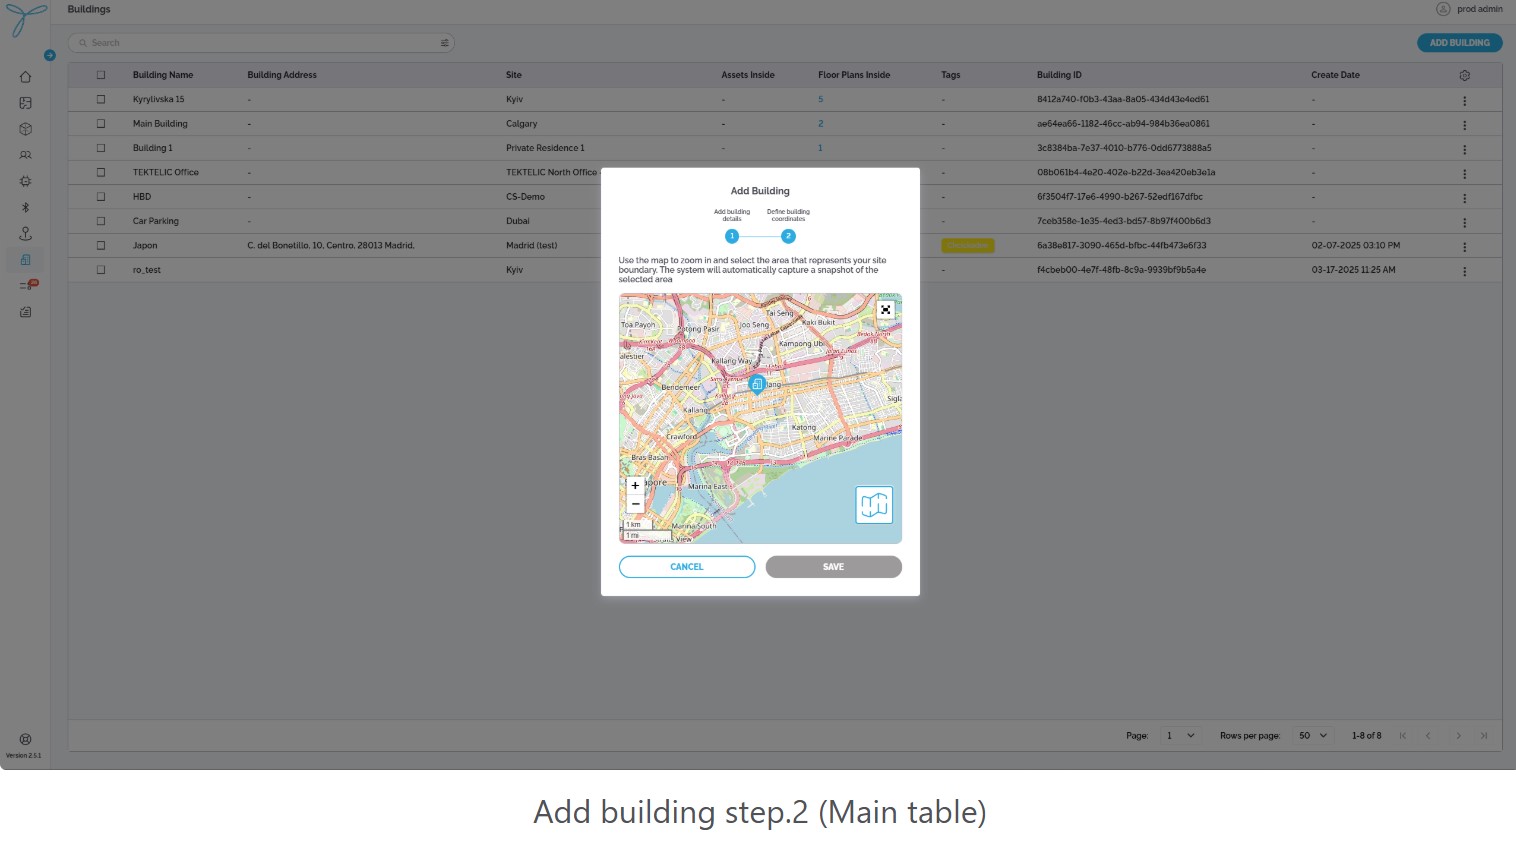
Step 2: Define Building Boundary:
-
A map interface appears with a search bar to locate the building.
-
Options:
- Enter an address in the search bar, and the map will load the corresponding coordinates.
- Manually drag the map to adjust the view and select the area.
-
The system automatically captures a screenshot of the selected area as the building boundary.
-
Click Save to confirm; Cancel to discard.
-
-
Expectations: The new building is added to the system with the specified name, address, site, tags, description, and boundary map.
Conditions: You need admin permissions or explicit rights to edit buildings. The building must already exist.
Steps:
-
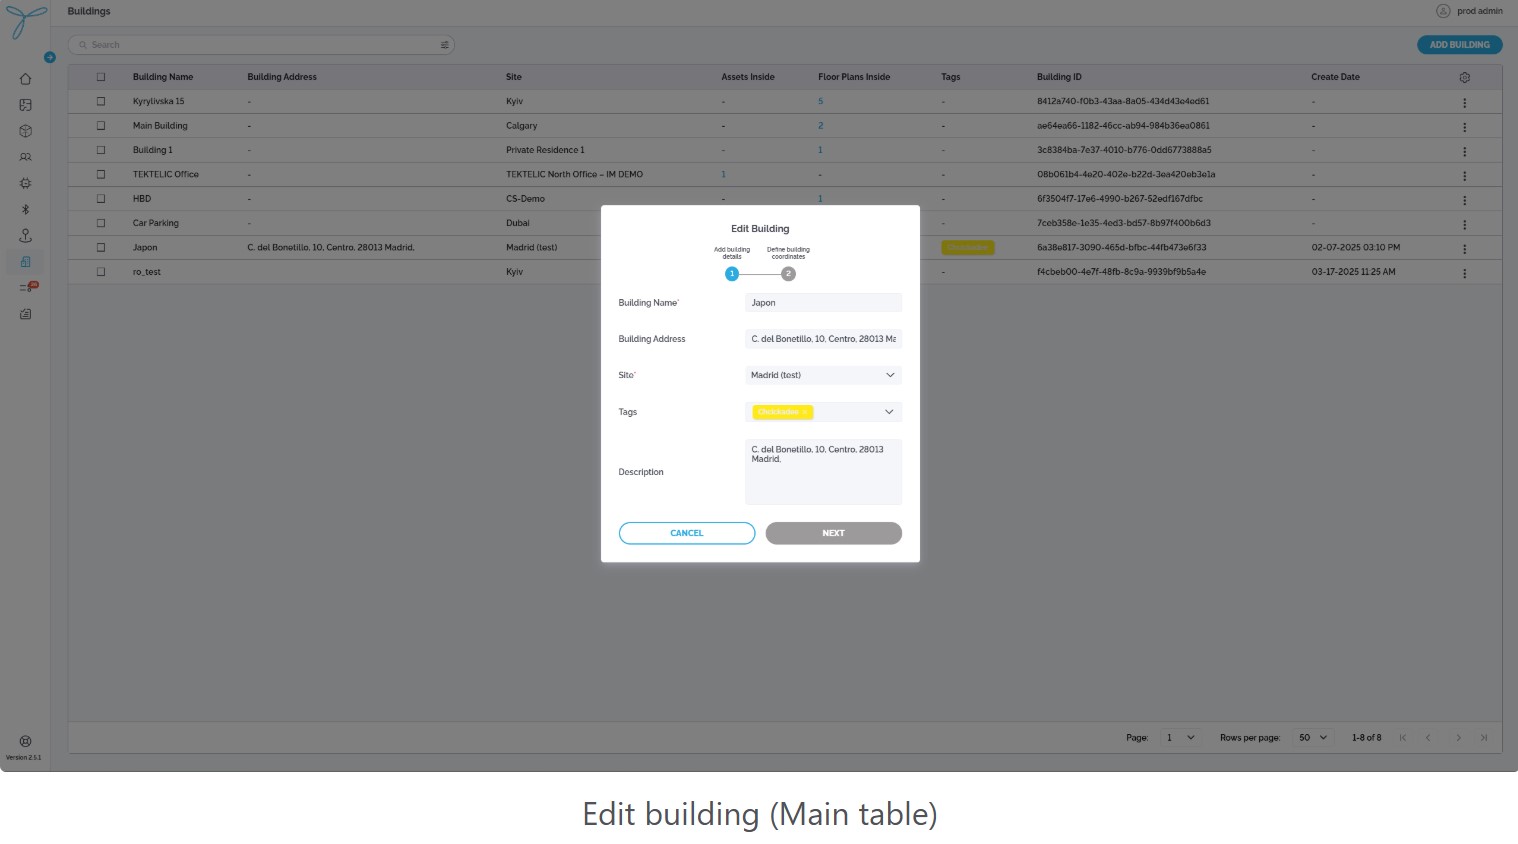
From List View: Click the More Actions (…) button next to a building (e.g., “ro_test”) in the table, then select Edit from the context menu to open the Edit Building modal.
-
From Details Screen: Click the pencil icon in the Building Info section of the Building Details Screen to open the Edit Building modal.
-
Update the following fields:
- Building Name: Modify the name.
- Building Address: Modify the address.
- Site: Change the associated site.
- Tags: Add or remove tags.
- Description: Modify the description.
-
Modify Boundary: Use the same map component as in Add Building to adjust the building boundary.
- Steps: Enter a new address or manually drag the map, then save the updated boundary.
-
Click Save to confirm changes; Cancel to discard.
-
Expectations: The updated building reflects changes in the list and the Building Details Screen, including the boundary.
Conditions: You need admin permissions or explicit rights to delete buildings. The building must not be linked to active floor plans, assets, or beacons.
Consequences: Deleting a building removes it from the system, unpairs it from associated data, and affects related records. If the building is associated with floor plans, assets, or beacons, deletion is blocked until all dependencies are removed.
Steps:
-
Click the More Actions (…) button next to a building (e.g., “ro_test”) in the table.
-
Select Delete from the context menu to open the Confirm Delete Building modal.
-
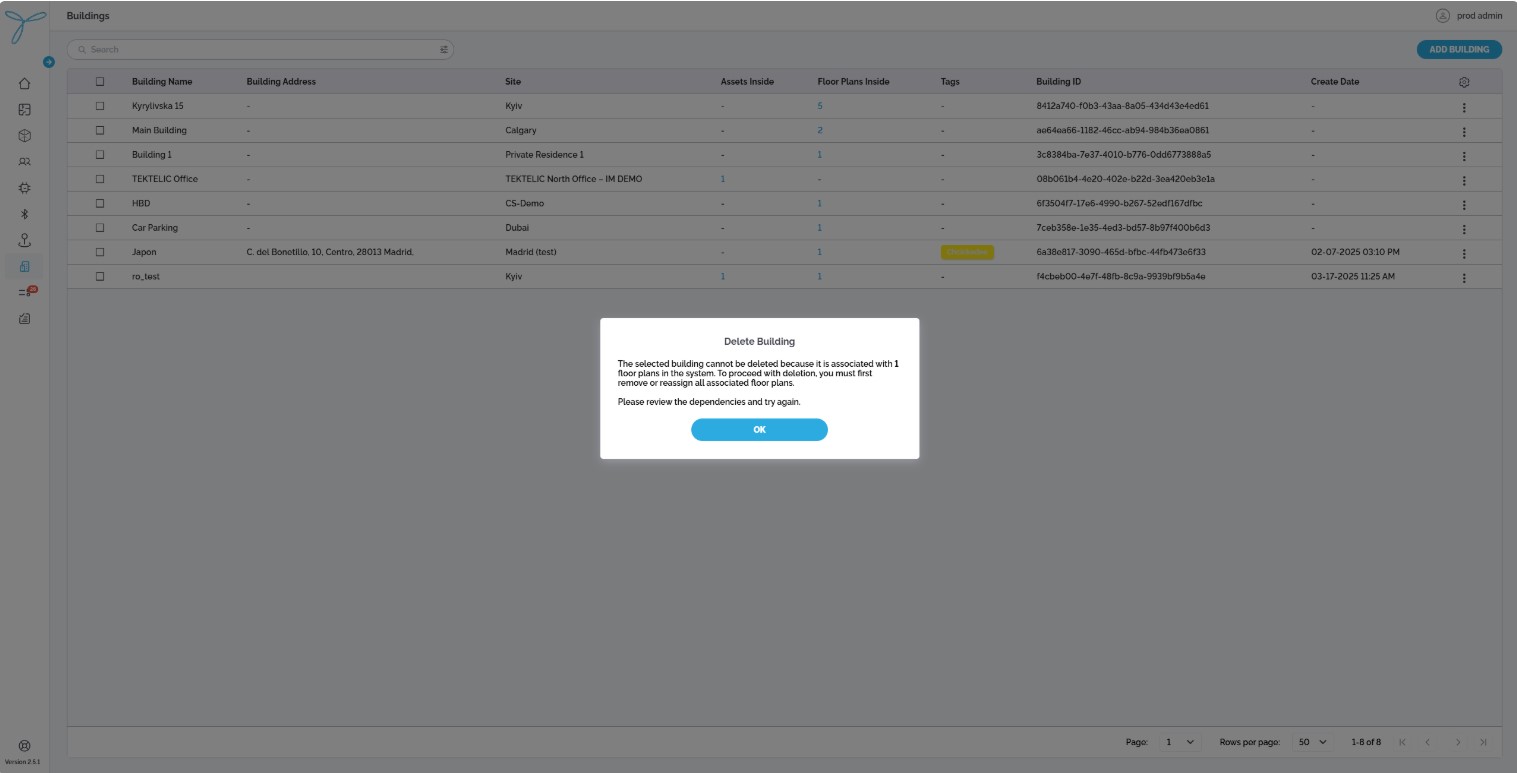
If Dependencies Exist:
- A warning modal appears: “Delete Building is disabled in the system because it is associated with other entities in the system. To proceed with deletion, you must first remove all associated entities. Please review the dependencies and try again.”
- Click OK to close the modal and address the dependencies.
-
If No Dependencies:
- Review the warning about permanent deletion and its impacts (unpairing, data loss).
- Click Delete to confirm; Cancel to abort.
-
Expectations:
- If dependencies exist, the building remains until all associated floor plans, assets, or beacons are deleted.
- If no dependencies, the building is permanently removed and cannot be restored.
Tabs and Sections
-
Details Tab:
- Displays comprehensive information about the selected building, organized into sections.
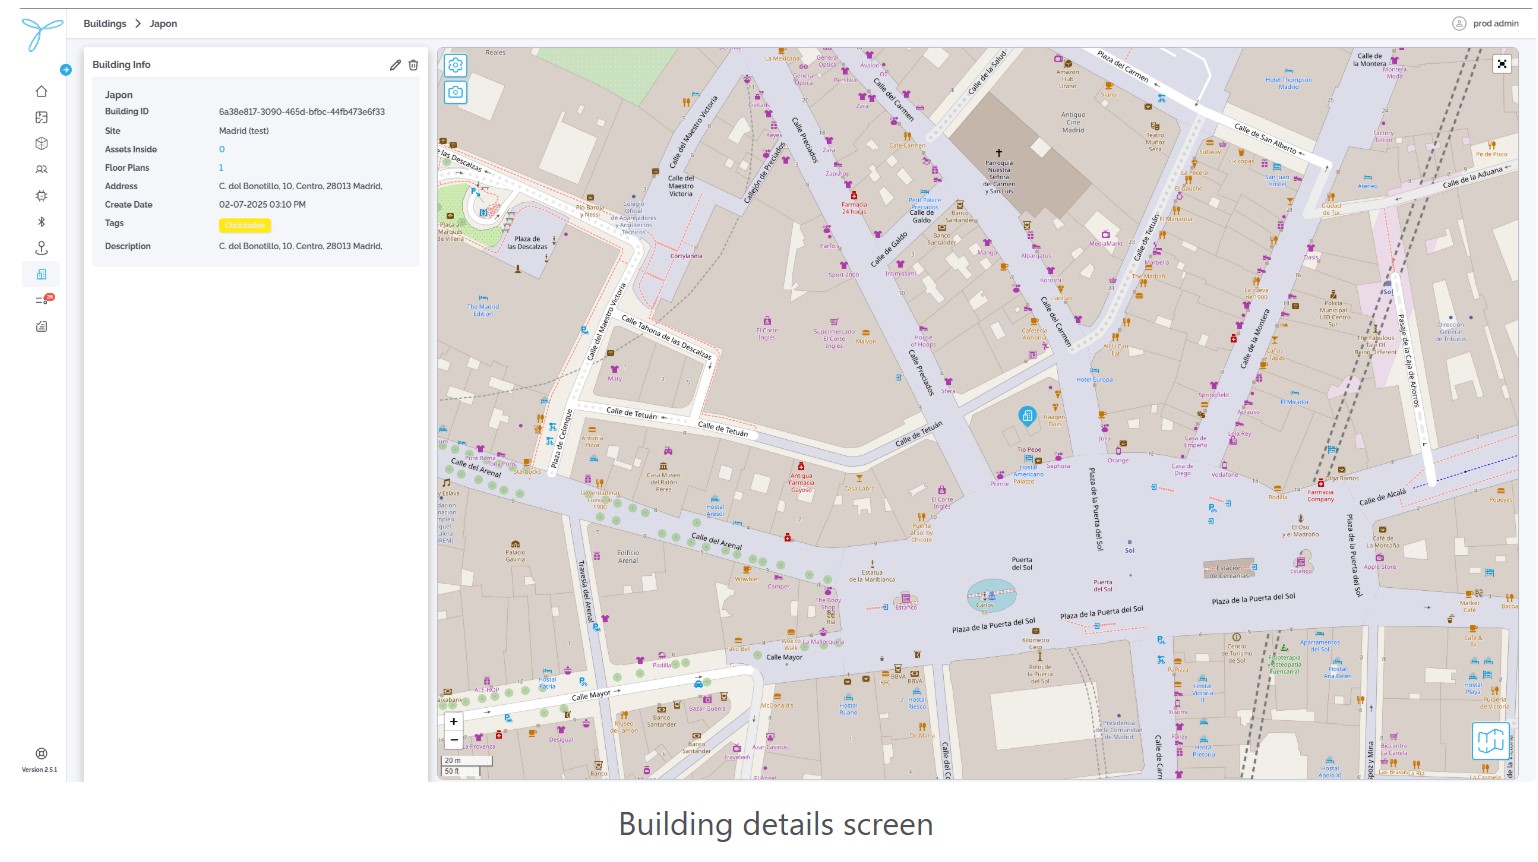
Building Info
-
Parameters:
- Building Name: Japon
- Building ID: 6a38e817-3094-45bd-b4f4-7d7c20456f33
- Site: Madrid (test)
- Assets Inside: 0
- Floor Plans: 1
- Address: C. del Bonetillo, 10, Centro, 28013 Madrid
- Create Date: 02-07-2025 03:10 PM
- Tags: CheckBox
- Description: C. del Bonetillo, 10, Centro, 28013 Madrid
Map Interface
-
Visual Representation: Displays the building’s location on a map with markers indicating assets, beacons, or other relevant entities (e.g., purple and blue markers in the Madrid area around Plaza de la Puerta del Sol).
- The map includes zoom controls (e.g., 20m, 50m scale) and a search bar for navigation.
- A red outline may represent the building boundary or geofence area.
-
Interactivity:
- Zoom: Use the + and - controls to zoom in/out on the map.
- Search: Enter an address or location (e.g., “C. del Bonetillo, 10, Madrid”) to center the map.
- Marker Details: Click on markers to view associated asset or beacon information (if available).
-
Buttons and Actions:
- Edit: Click the pencil icon in the Building Info section to open the Edit Building modal (same process as in the Buildings list).
- Delete: Click the trash icon in the Building Info section to initiate deletion (subject to dependency checks, as in the Buildings list).
- Visibility Preferences: Toggle visibility options (e.g., show only geofence or all markers), though specific options may depend on the system configuration.
- Export (Screenshot): Capture the current map view as a screenshot (similar to Beacons map functionality).
