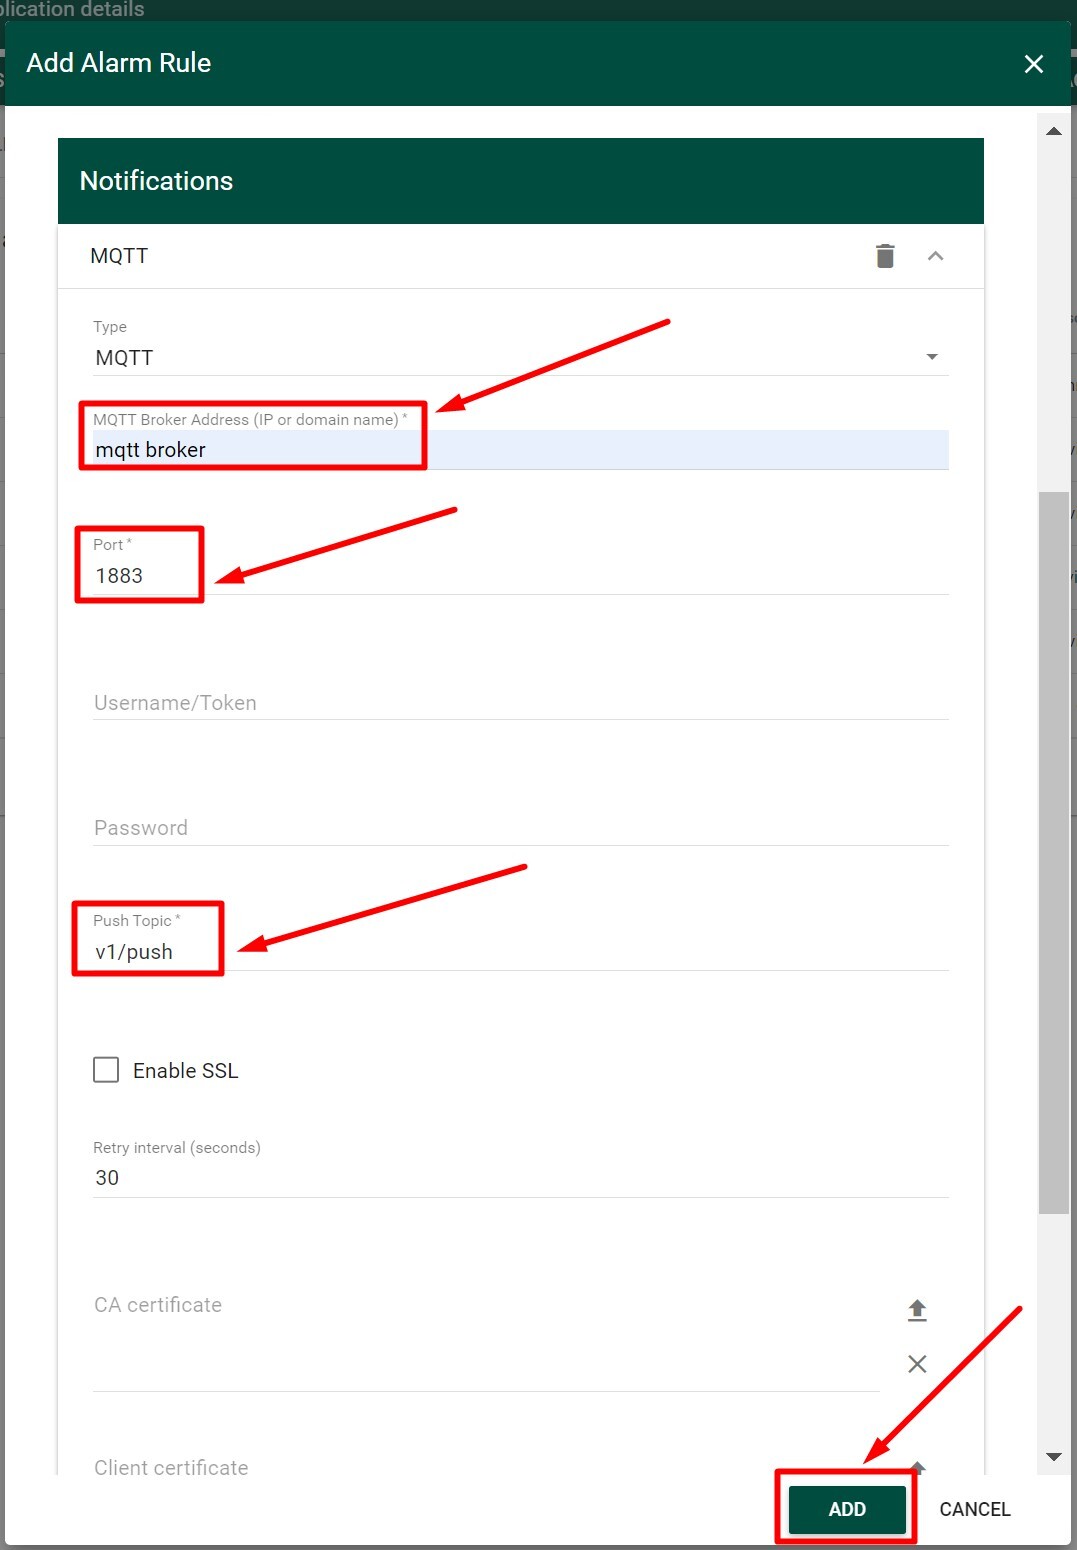
Application Alarm Rules
-
Navigate to the Tektelic Network Server –> Applications.
-
Open the Application you want to add Alarm Rule to.
-
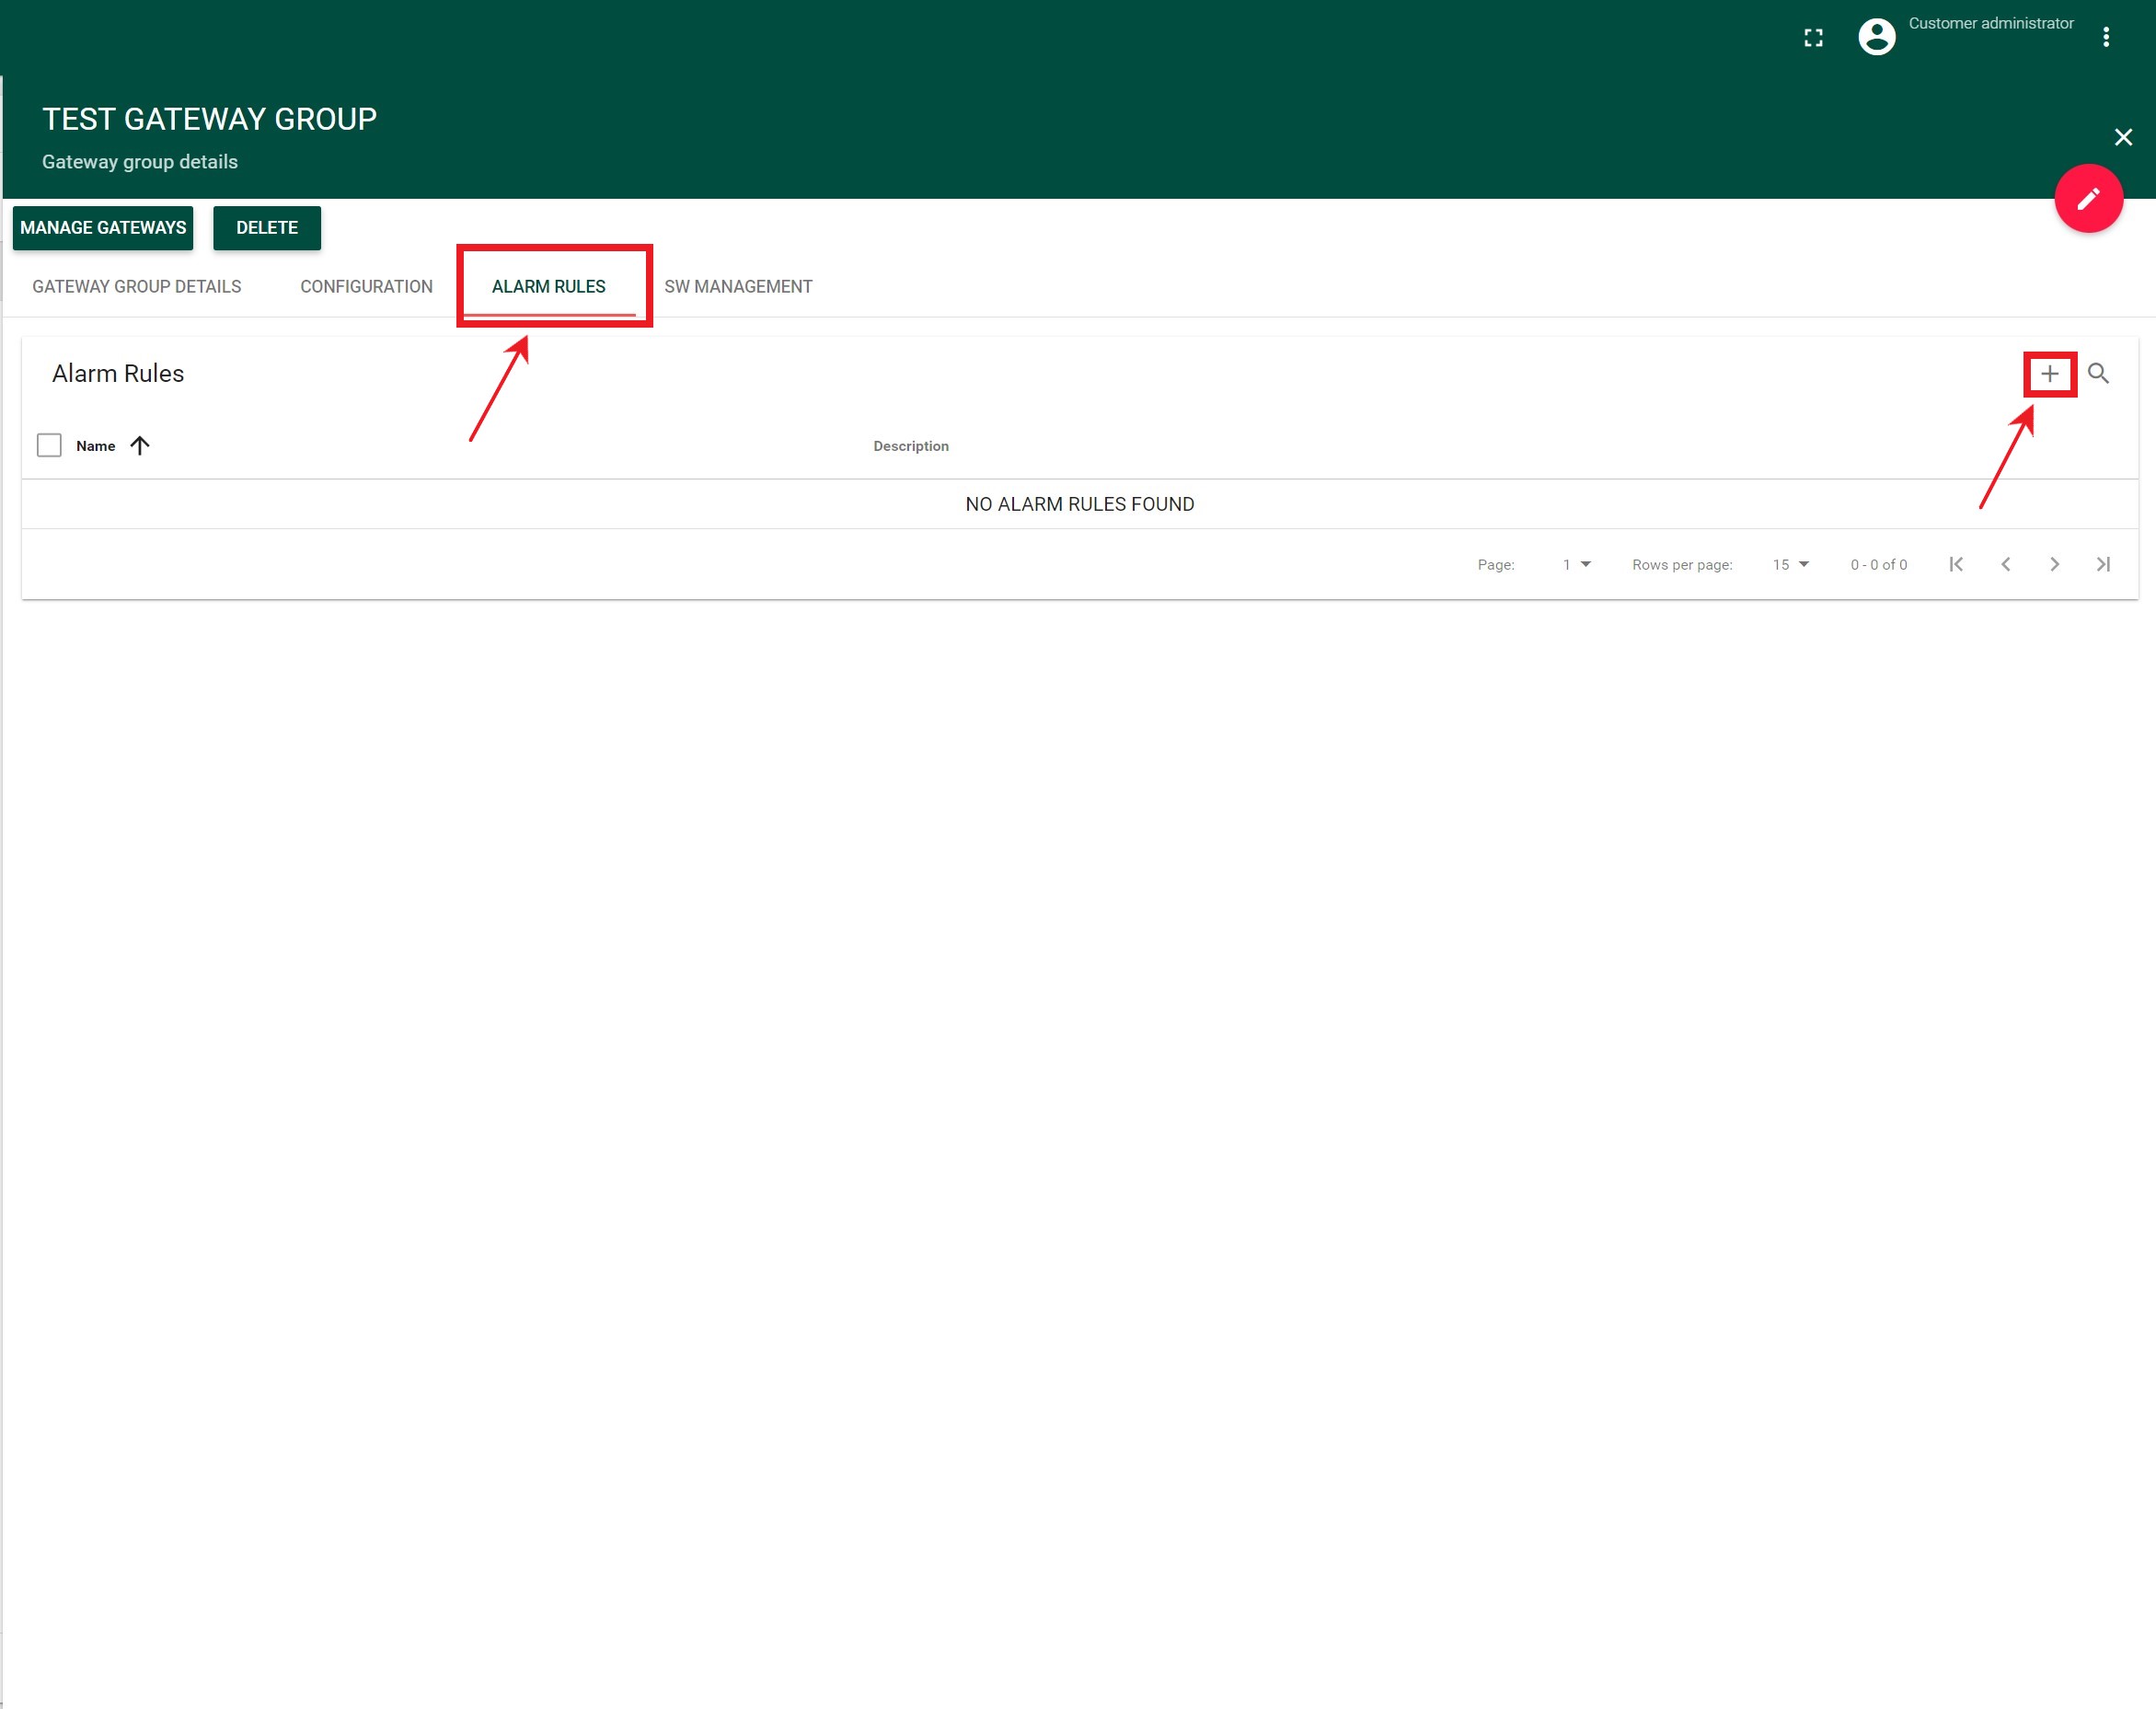
Press the Alarm Rules tab in the Application menu
-
In the opened Alarm Rules tab press the “+” button
-
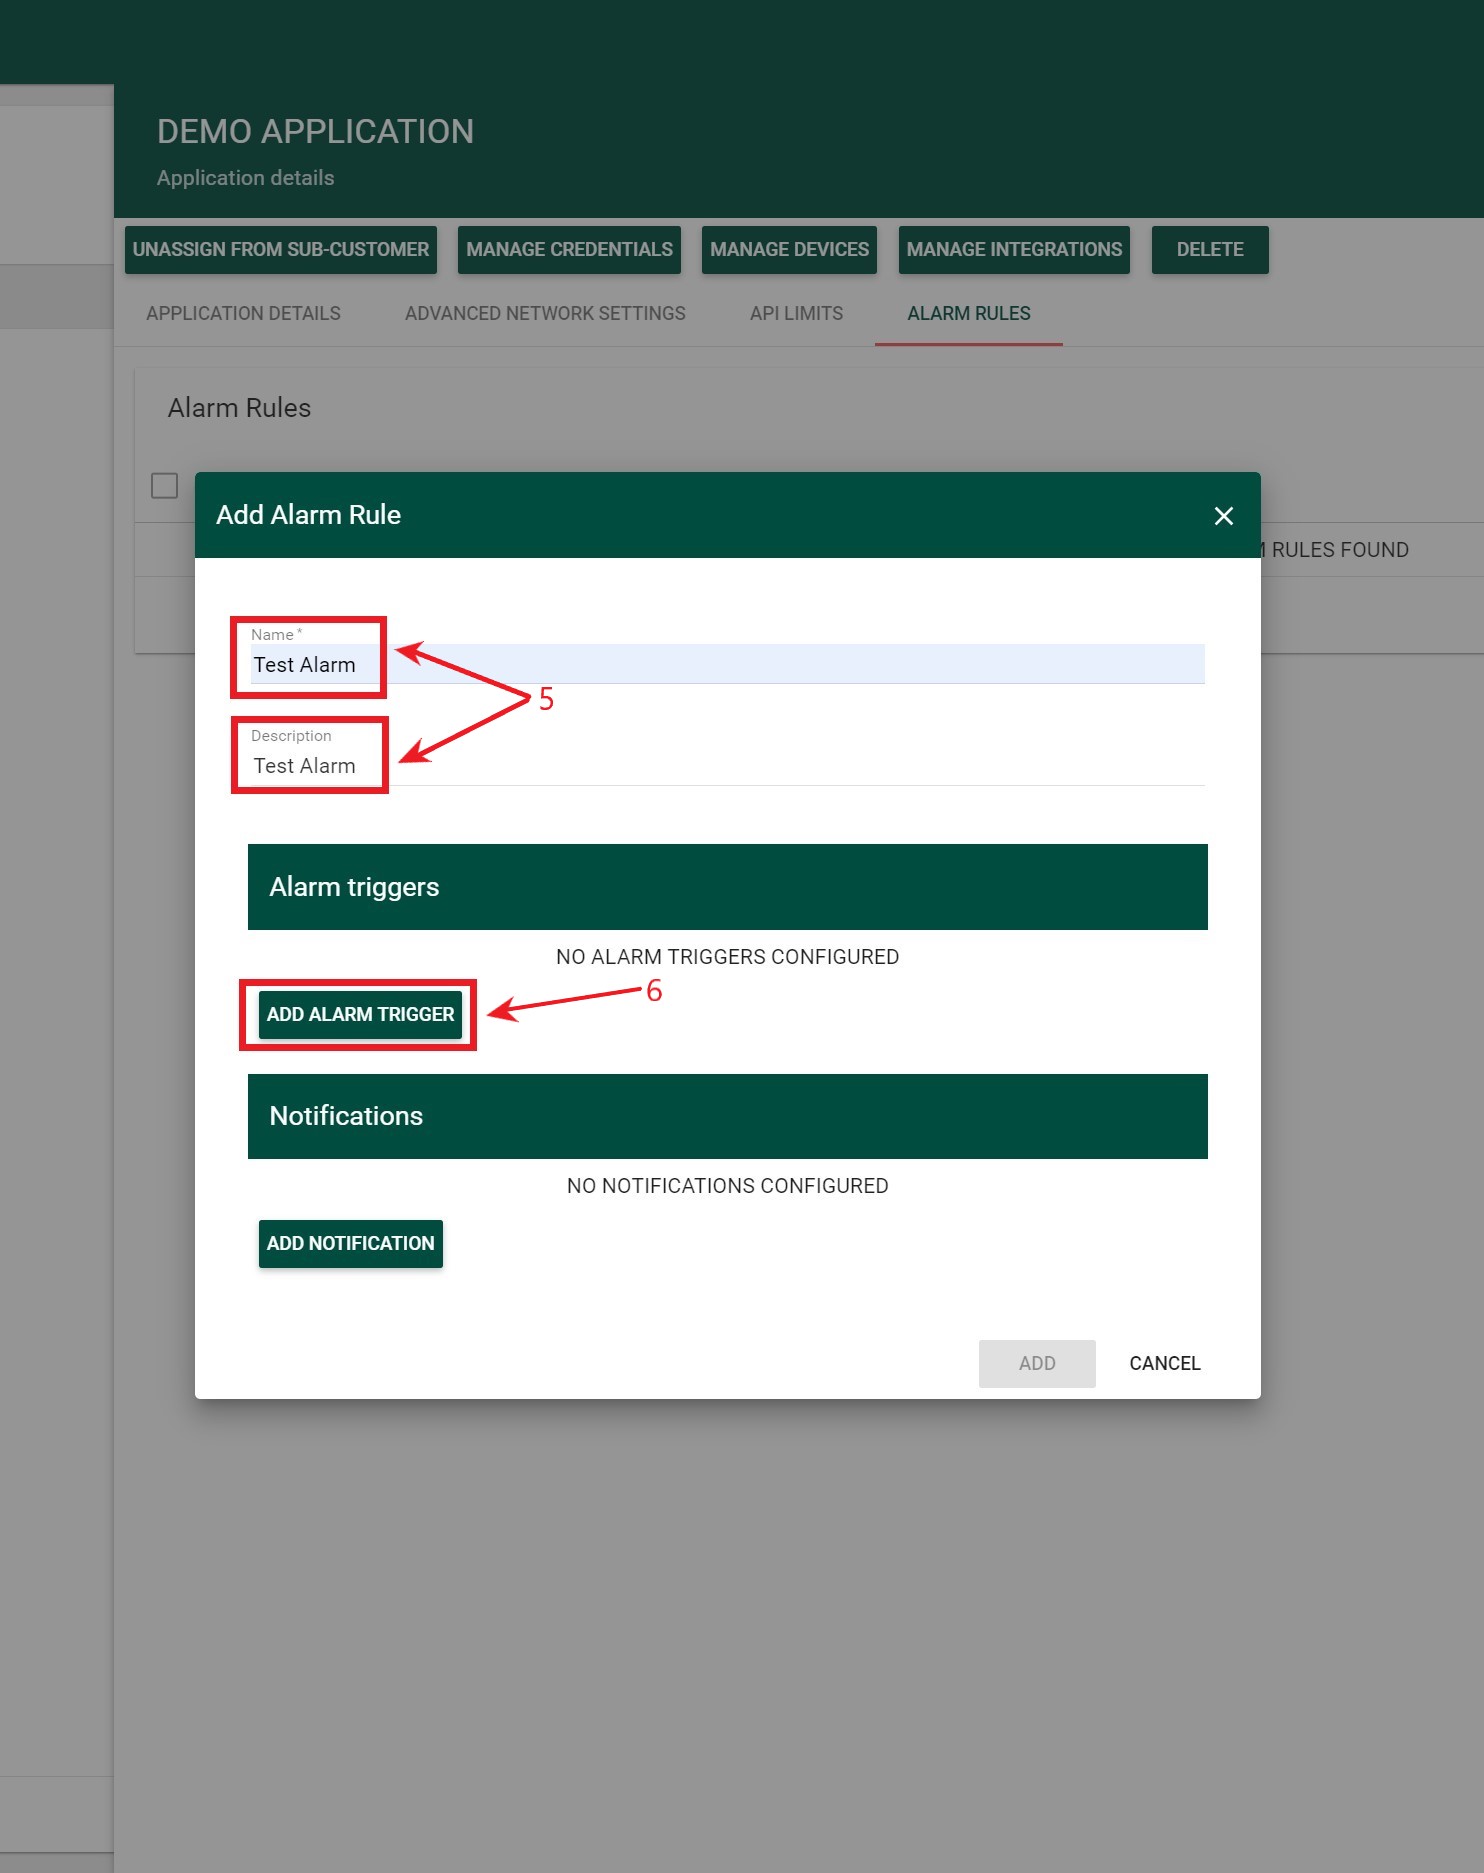
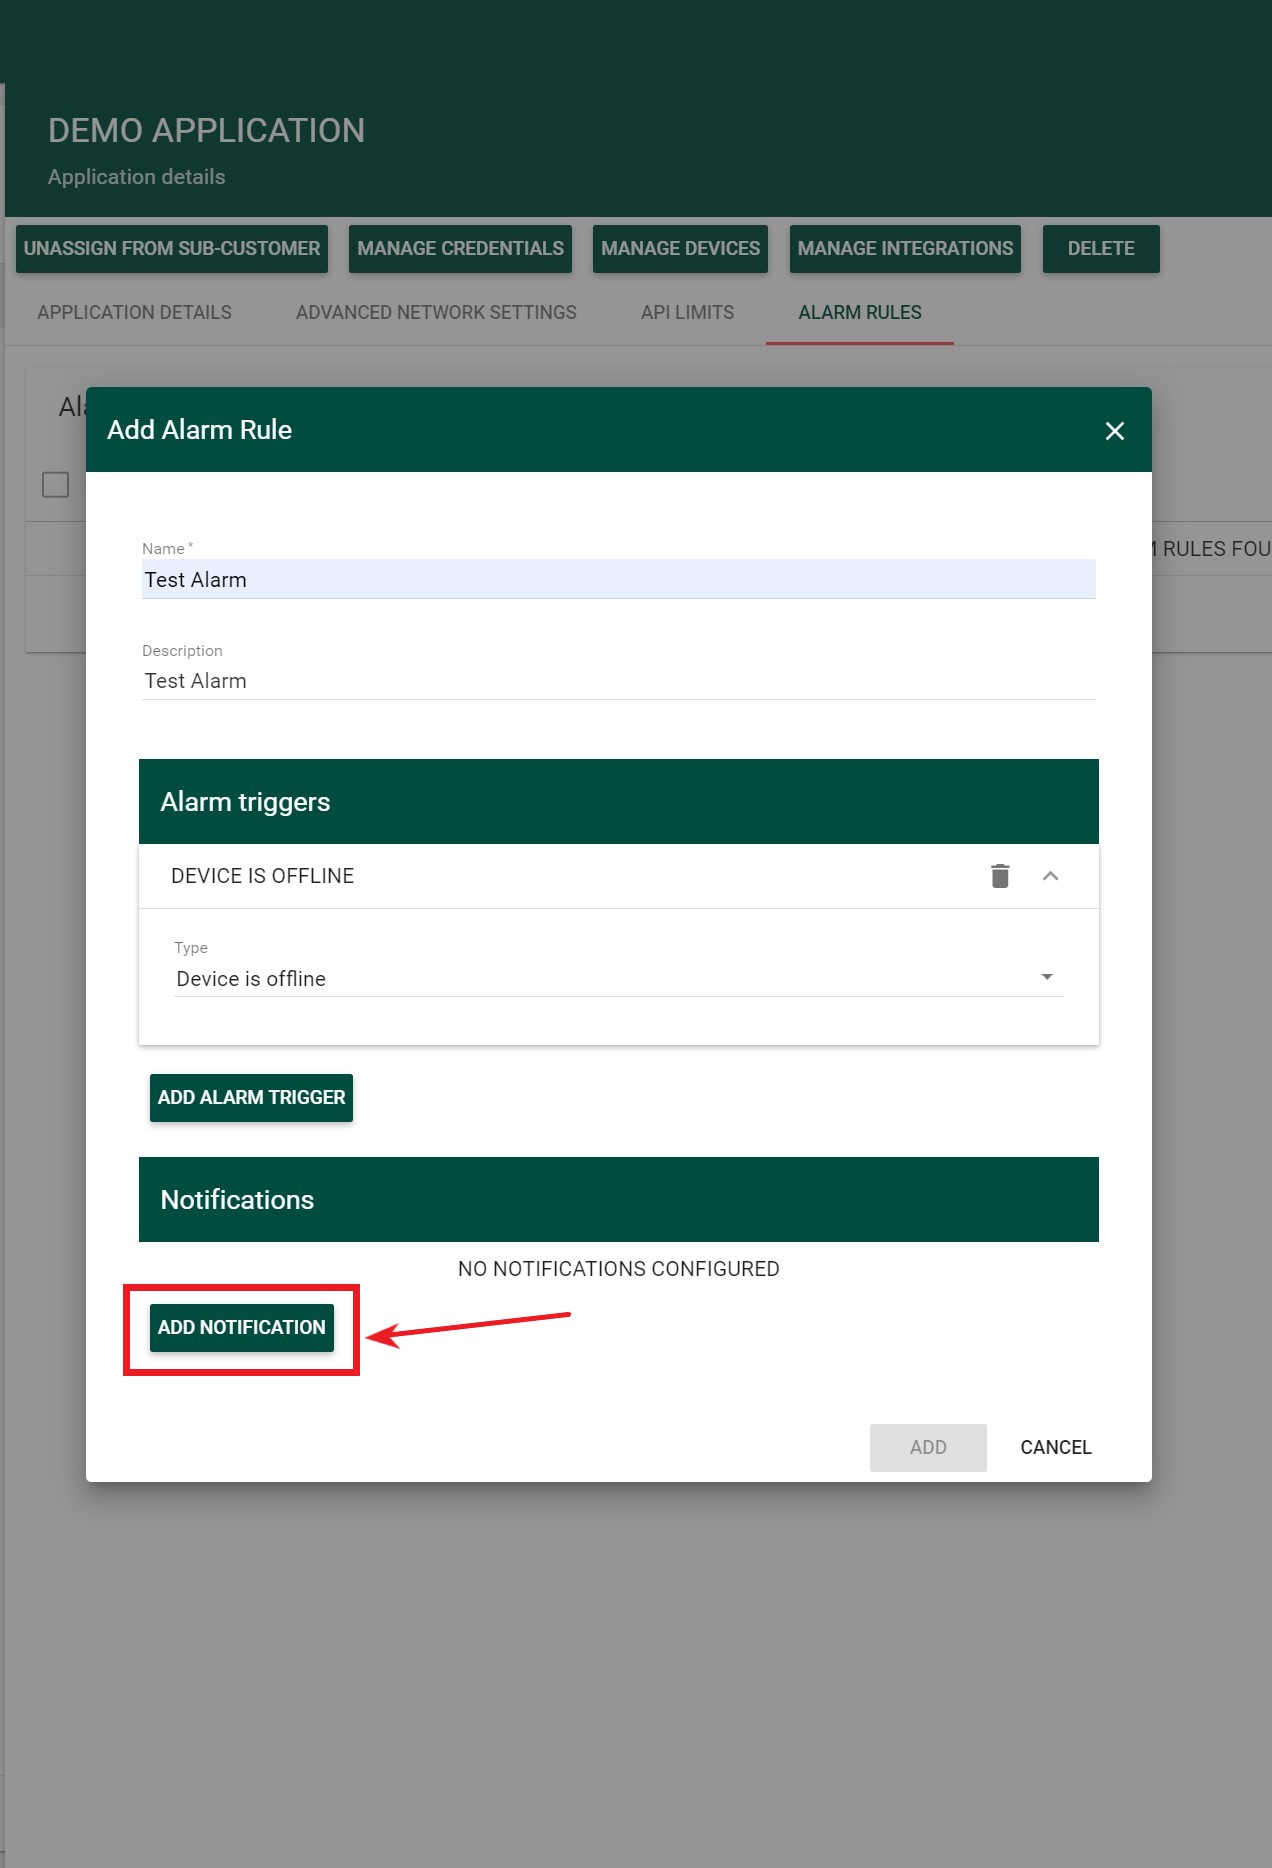
Fill in the Name and Description fields with any data.
-
Press the Add Alarm Trigger button
-
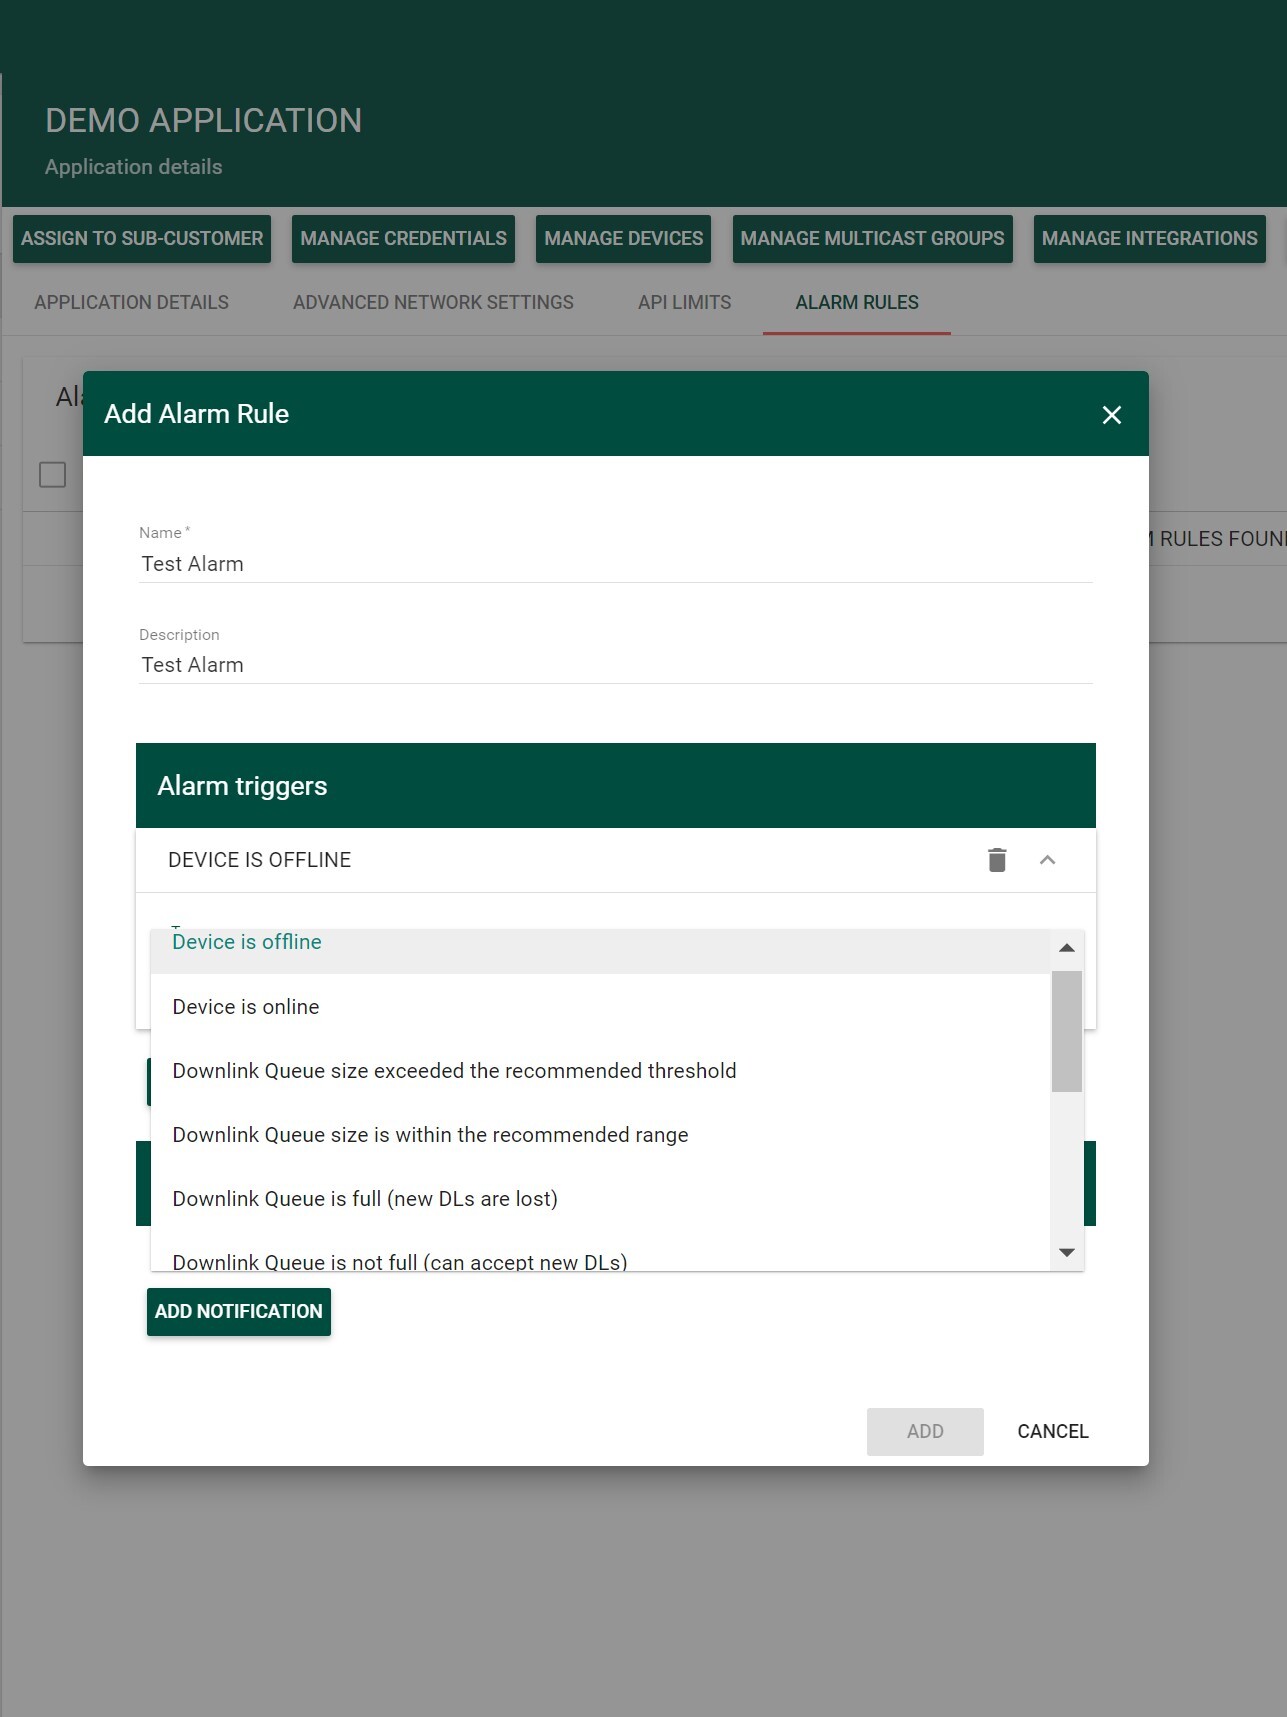
Select the desired option from the Alarm Triggers drop-down list:
- “Device is Offline” will be triggered when Device goes Offline
- “Device is Online” will be triggered when Device goes Online.
- “Downlink Queue size exceeded the recommended threshold” the set threshold for Downlink Queue size has been exceeded
- “Downlink Queue size is within the recommended range” the set threshold for Downlink Queue size is not exceeded
- “Downlink Queue is full” new DLs are lost
- “Downlink Queue is not full” can accept new DLs
- “Integration is disconnected” will be triggered when Integration is disconnected.
- “Integration is connected” will be triggered when Integration is connected.
- “Decoder is banned” will be triggered when decoder is banned.
- “Decoder is unbanned” will be triggered when decoder is unbanned.
- “Encoder is banned” will be triggered when encoder is banned.
- “Encoder is unbanned” will be triggered when encoder is unbanned. Please Note: you have to add 1 alarm trigger to 1 Alarm Rule for the alarm to work correctly.
-
Click the Add Notification button.
-
Fill in the Enter Recipients field with the email address to which you wish to receive notifications and press Enter.
-
Fill in Subject and Body fields with any data.
-
Press ADD button.
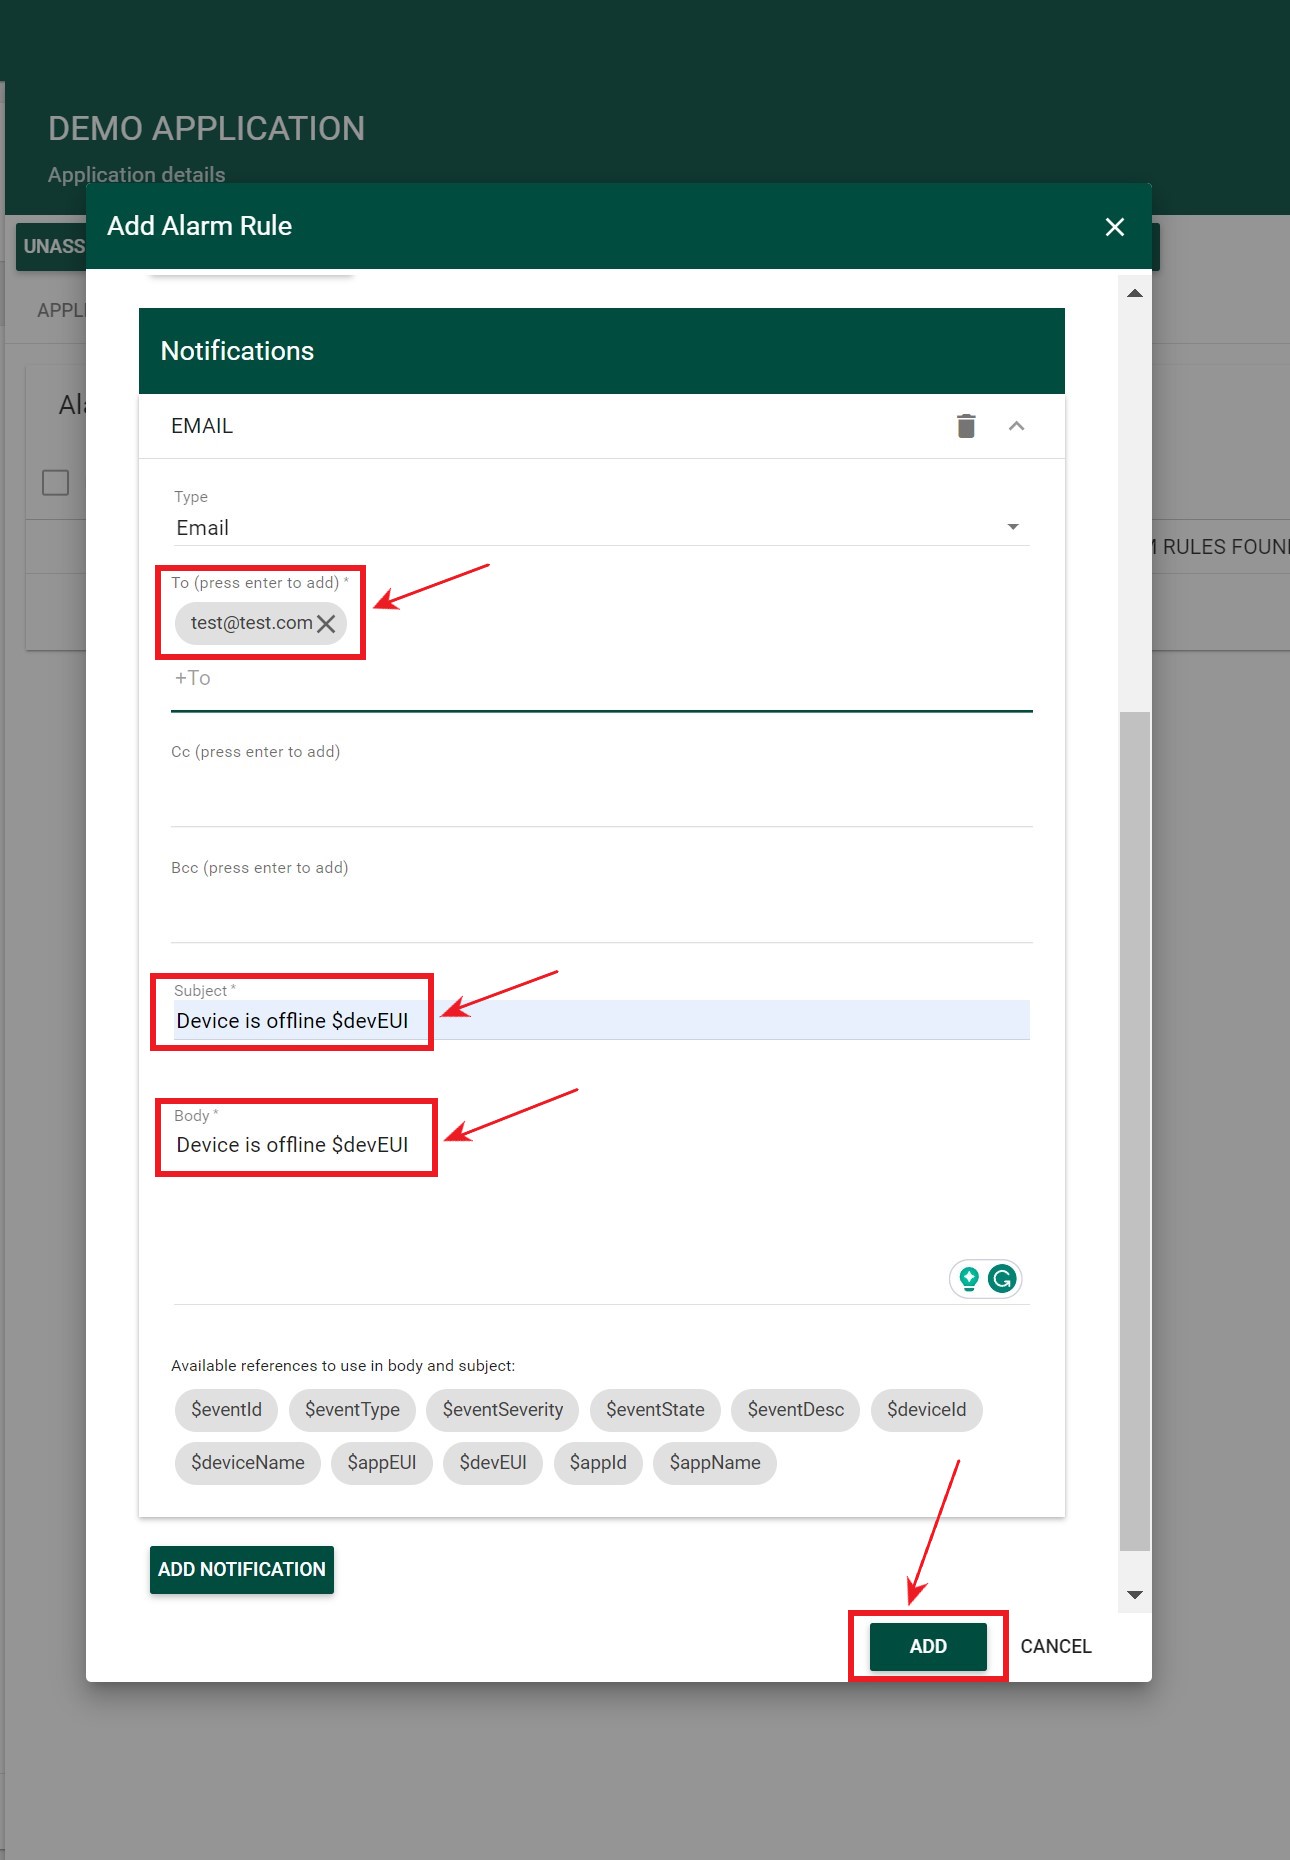
Please note: For easy reading of the notification, you can add a reference that is used in the body or/and subject. Placeholder could be added by double-clicking on the one in the list (in this case it would appear in the body right after the cursor current location)
Available references to use in body and subject:
- $eventId
- $eventType
- $eventSeverity
- $eventState
- $eventDesc
- $deviceId
- $deviceName
- $appEUI
- $devEUI
- $appId
- $appName
-
Navigate to the Tektelic Network Server –> Applications.
-
Open the Application you want to add Alarm Rule to.
-
Press the Alarm Rules tab in the Application menu
-
In the opened Alarm Rules tab press the “+” button

-
Fill in the Name and Description fields with any data.
-
Press the Add Alarm Trigger button

-
Select the desired option from the Alarm Triggers drop-down list:
- “Device is Offline” will be triggered when Device goes Offline
- “Device is Online” will be triggered when Device goes Online.
- “Downlink Queue size exceeded the recommended threshold” the set threshold for Downlink Queue size has been exceeded
- “Downlink Queue size is within the recommended range” the set threshold for Downlink Queue size is not exceeded
- “Downlink Queue is full” new DLs are lost
- “Downlink Queue is not full” can accept new DLs
- “Integration is disconnected” will be triggered when Integration is disconnected.
- “Integration is connected” will be triggered when Integration is connected.
- “Decoder is banned” will be triggered when decoder is banned.
- “Decoder is unbanned” will be triggered when decoder is unbanned.
- “Encoder is banned” will be triggered when encoder is banned.
- “Encoder is unbanned” will be triggered when encoder is unbanned. Please Note: you have to add 1 alarm trigger to 1 Alarm Rule for the alarm to work correctly.

-
Click the Add Notification button.

-
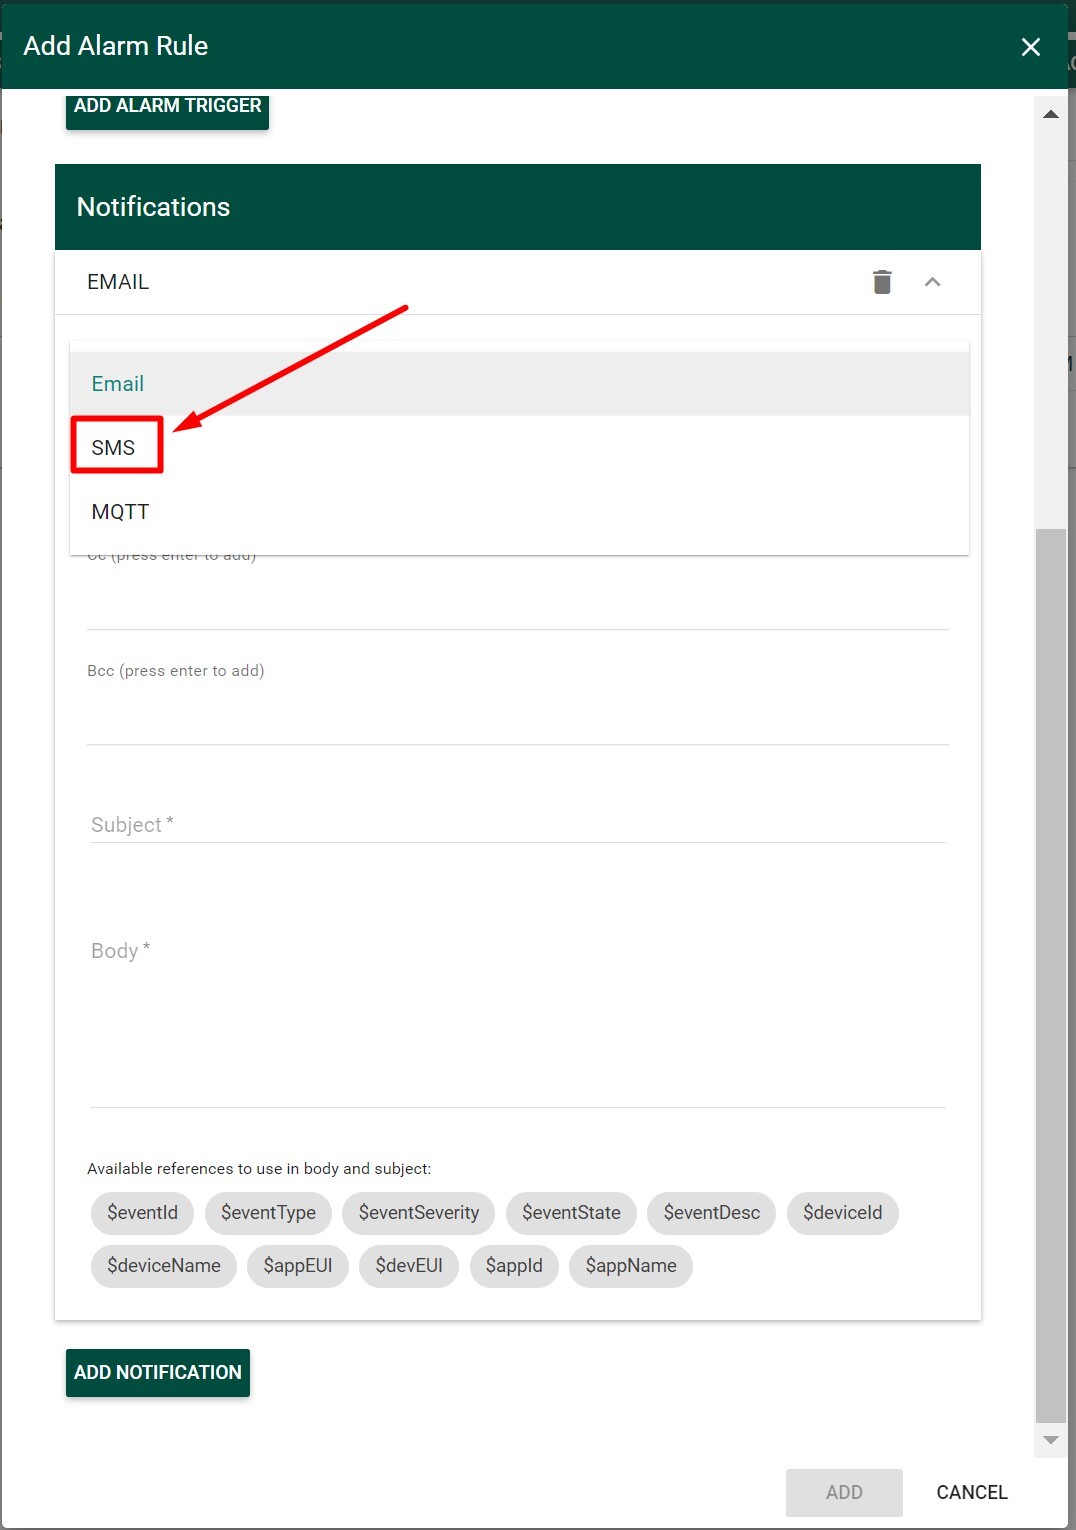
Press on Type drop-down and select SMS.
-
Fill in the Enter Recipients field with the desired phone number for receiving notifications and press Enter.
-
Fill in Body field with any data.
-
Press ADD button.
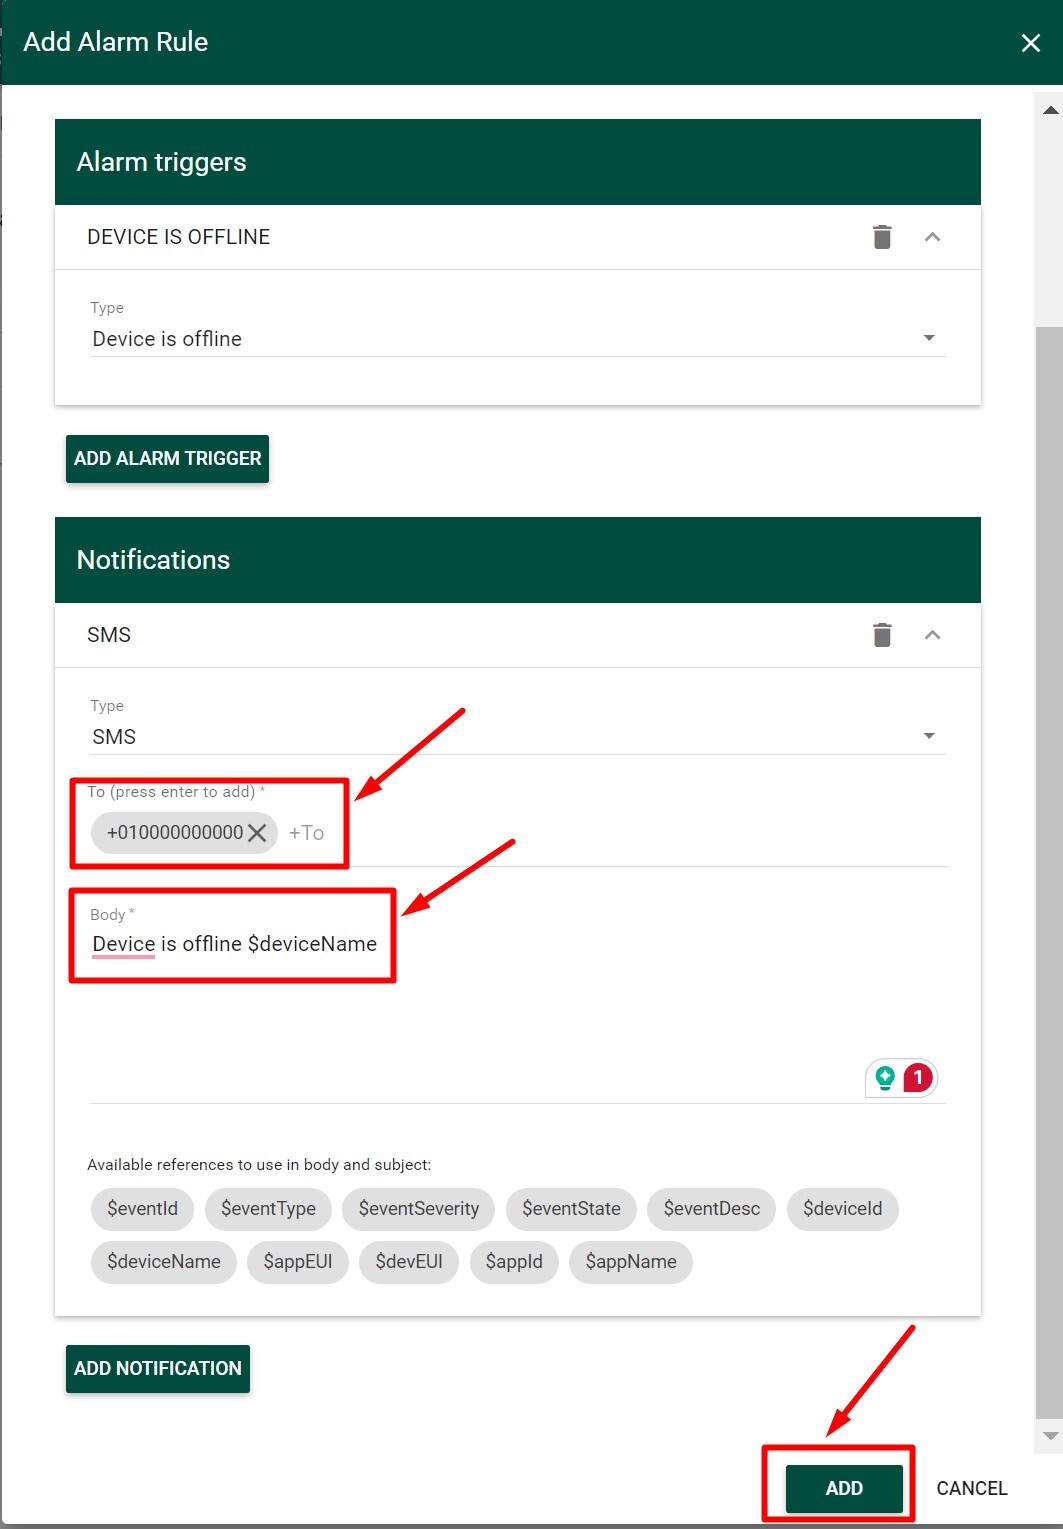
Please note: For easy reading of the notification, you can add a reference that is used in the body or/and subject. Placeholder could be added by double-clicking on the one in the list (in this case it would appear in the body right after the cursor current location)
Available references to use in body and subject:
- $eventId
- eventType
- eventSeverity
- eventState
- eventDesc
- gatewayId
- gatewayName
- gatewayMAC
- gatewayDesc
- gatewayModel
- gatewayBand
- gatewayCustomer
- groupId
- groupName
- groupDesc
-
Navigate to the Tektelic Network Server –> Applications.
-
Open the Application you want to add Alarm Rule to.
-
Press the Alarm Rules tab in the Application menu
-
In the opened Alarm Rules tab press the “+” button

-
Fill in the Name and Description fields with any data.
-
Press the Add Alarm Trigger button

-
Select the desired option from the Alarm Triggers drop-down list:
- “Device is Offline” will be triggered when Device goes Offline
- “Device is Online” will be triggered when Device goes Online.
- “Downlink Queue size exceeded the recommended threshold” the set threshold for Downlink Queue size has been exceeded
- “Downlink Queue size is within the recommended range” the set threshold for Downlink Queue size is not exceeded
- “Downlink Queue is full” new DLs are lost
- “Downlink Queue is not full” can accept new DLs
- “Integration is disconnected” will be triggered when Integration is disconnected.
- “Integration is connected” will be triggered when Integration is connected.
- “Decoder is banned” will be triggered when decoder is banned.
- “Decoder is unbanned” will be triggered when decoder is unbanned.
- “Encoder is banned” will be triggered when encoder is banned.
- “Encoder is unbanned” will be triggered when encoder is unbanned. Please Note: you have to add 1 alarm trigger to 1 Alarm Rule for the alarm to work correctly.

-
Click the Add Notification button.

-
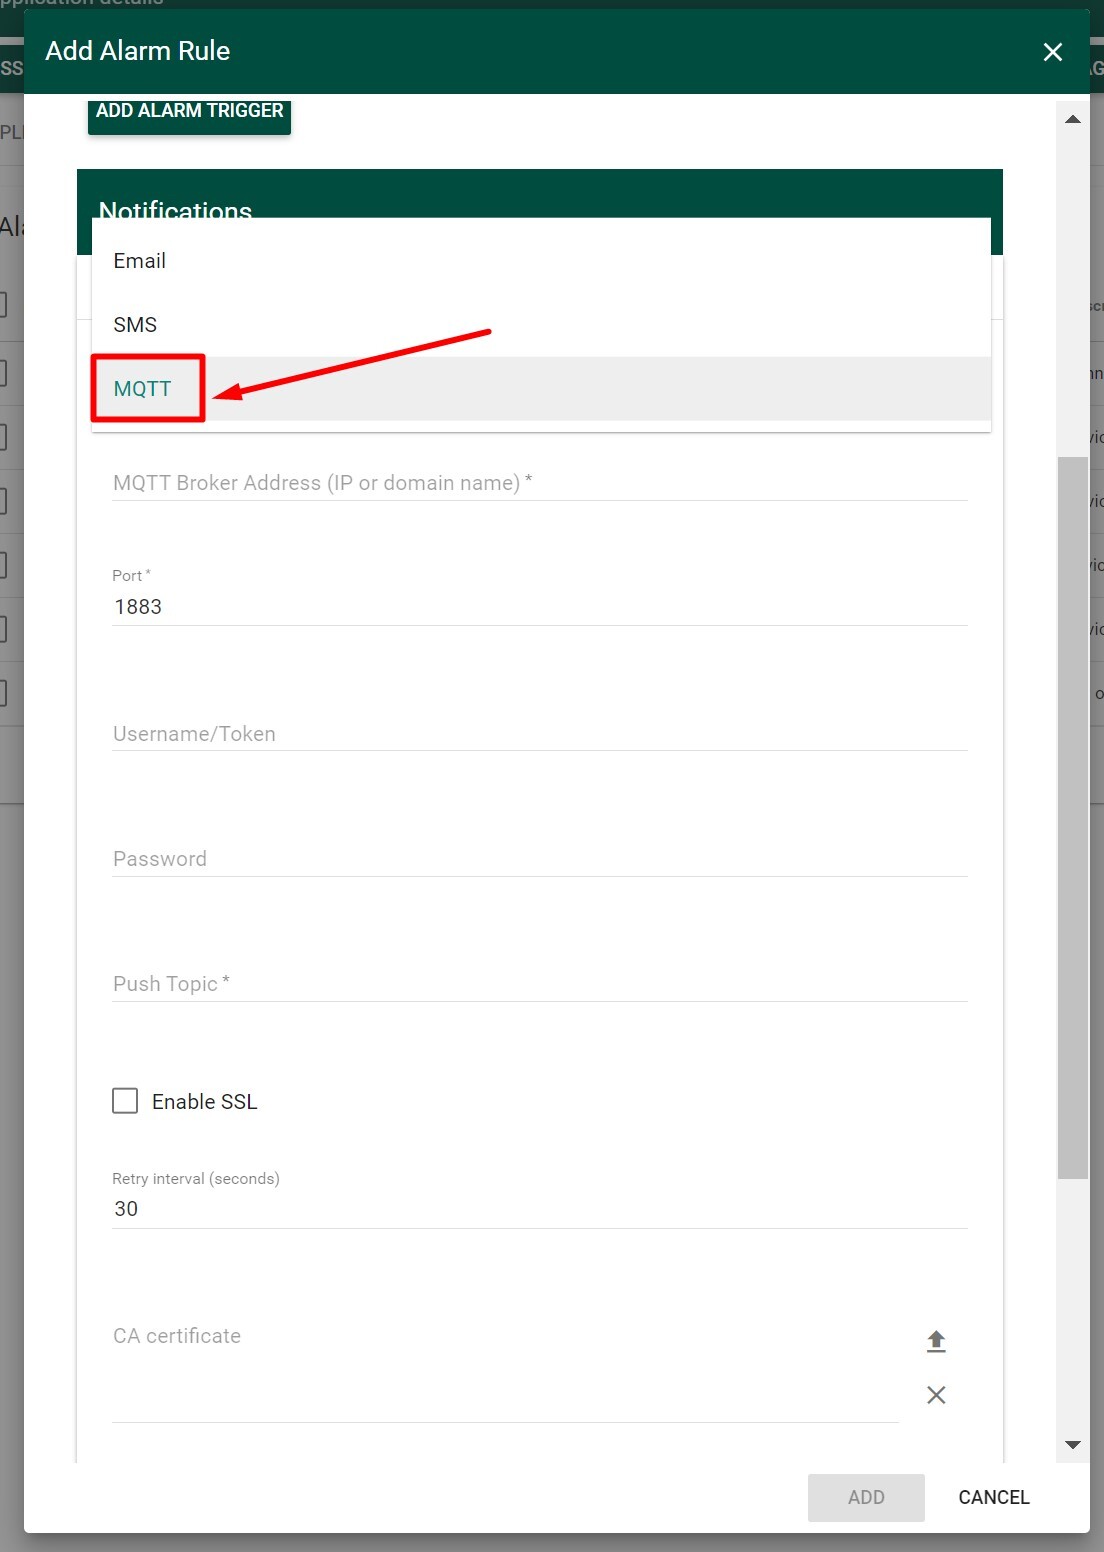
Press on Type drop-down and select SMS.
-
Fill in the Enter Recipients field with the desired phone number for receiving notifications and press Enter.
-
Fill in Body field with any data.
-
Press ADD button.
