4. Manage Tags
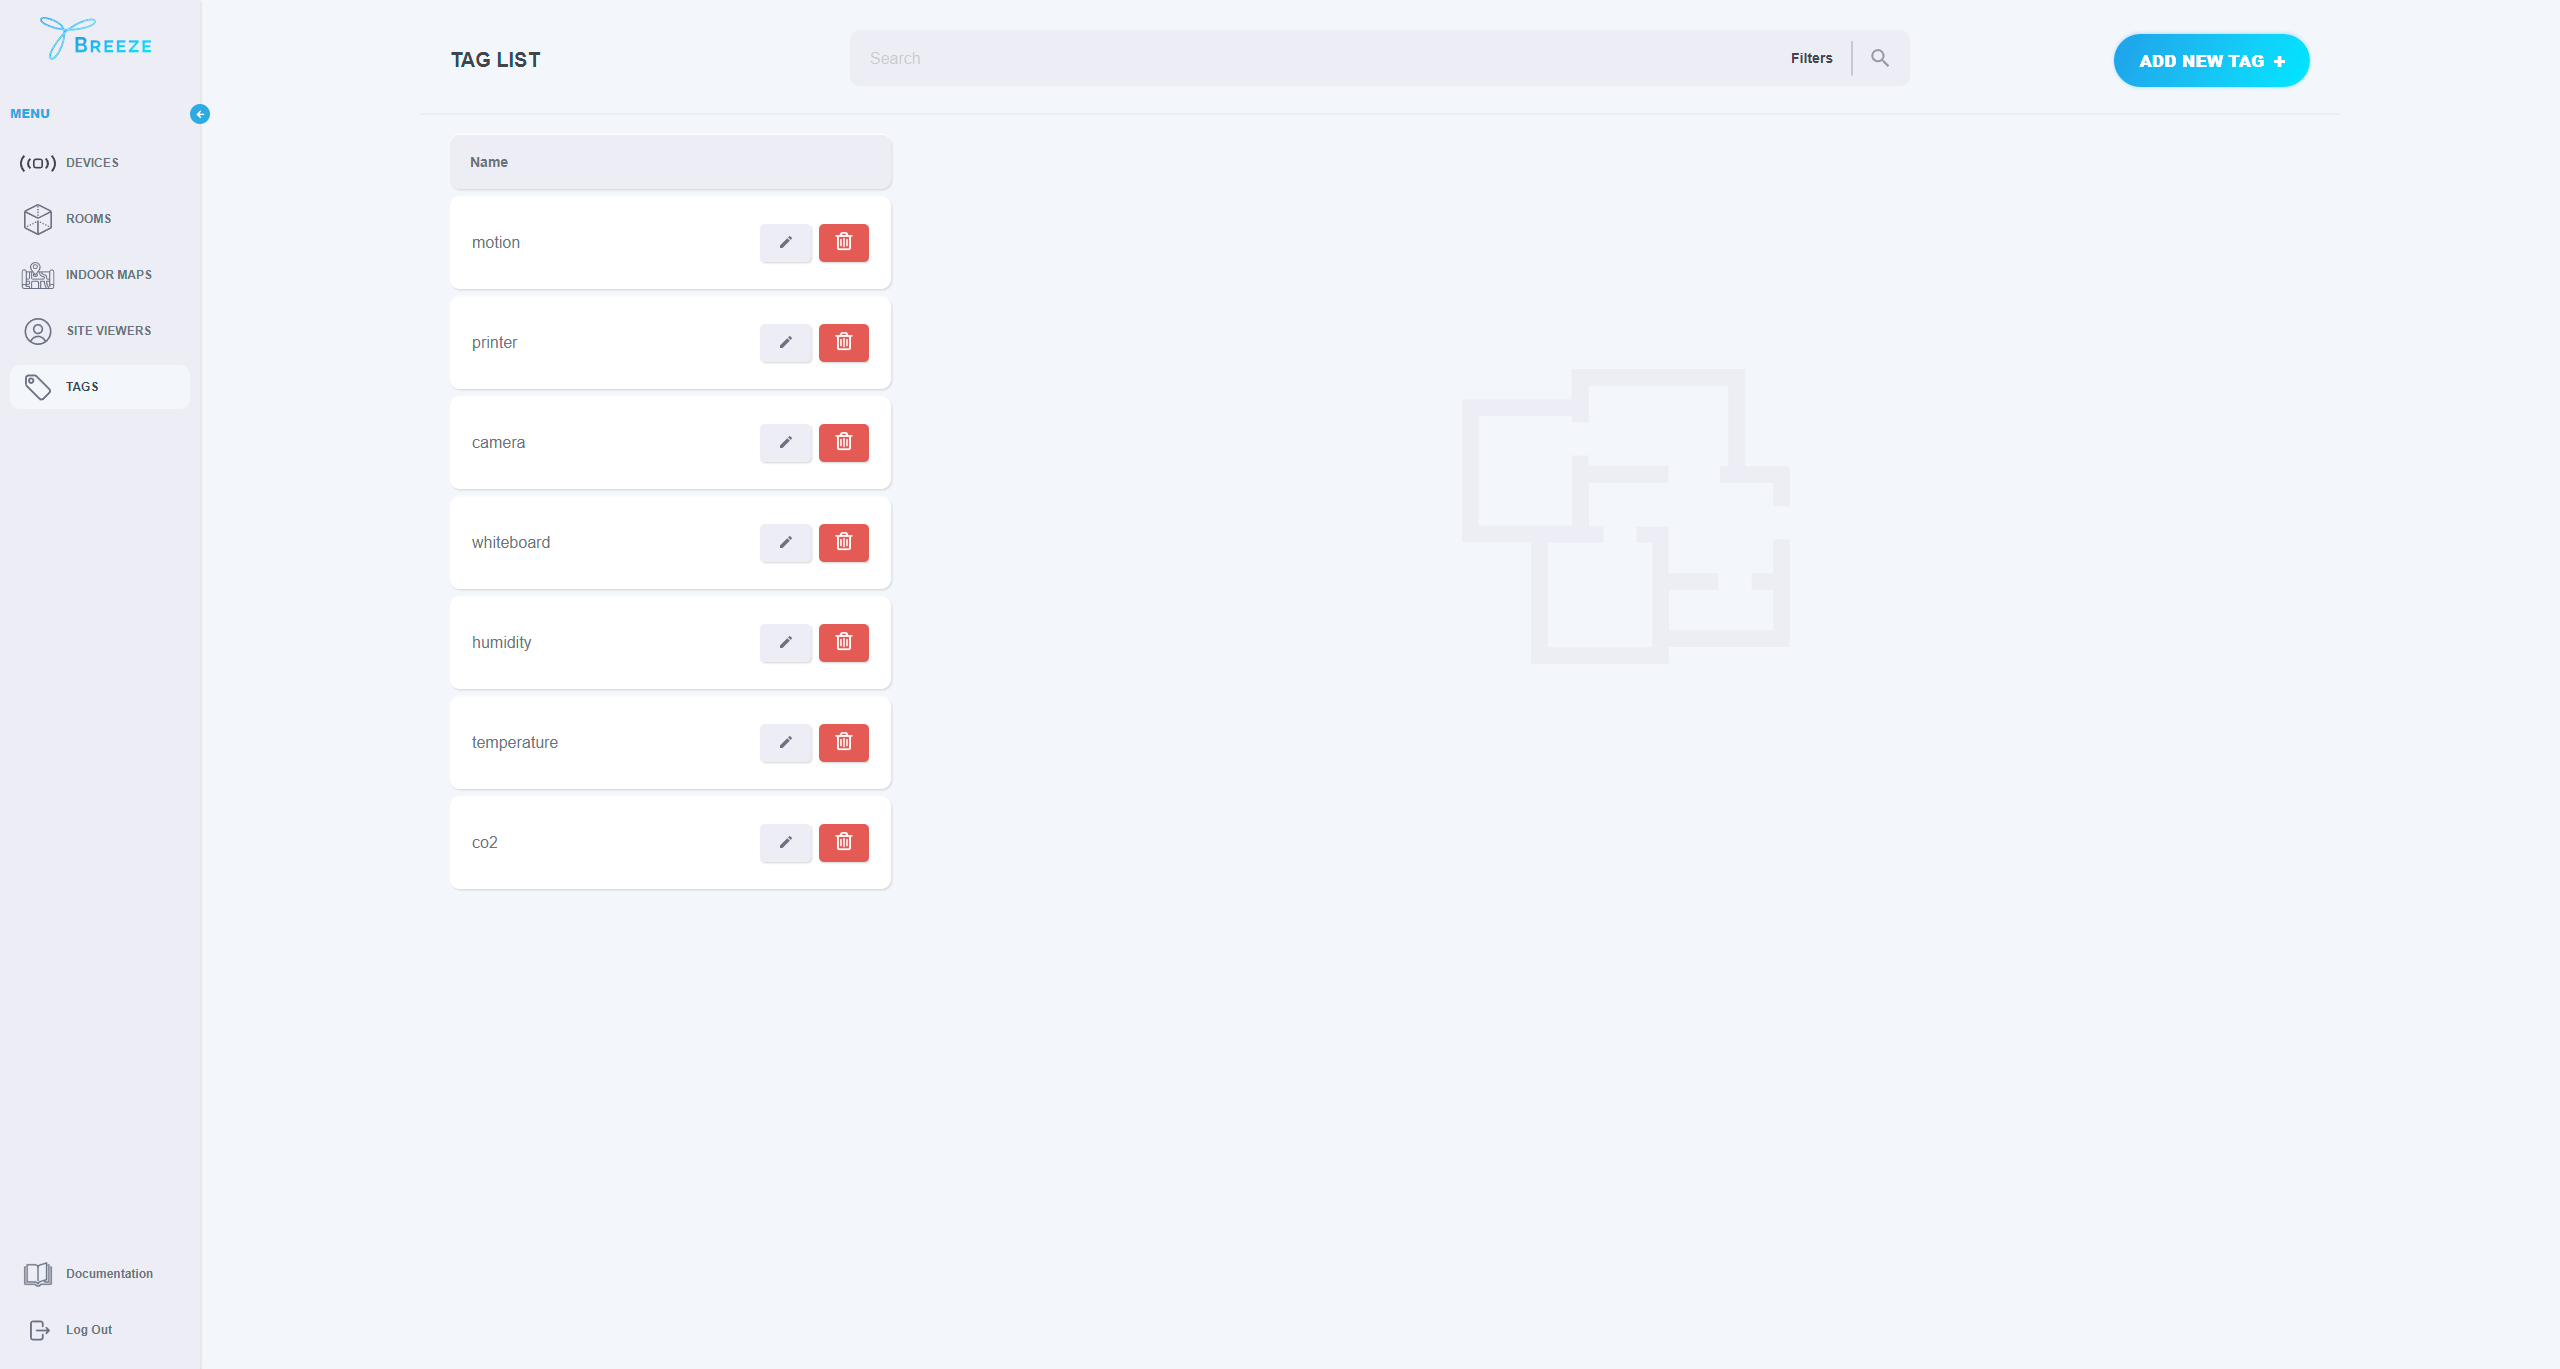
The “TAGS” page contains the list of tags added to the application. On this page, the user can add new tags, update and delete the existing ones. You can add an unlimited number of tags and use them to filter your assets. Tags can be assigned to Devices and Rooms when adding or editing your assets in the application.

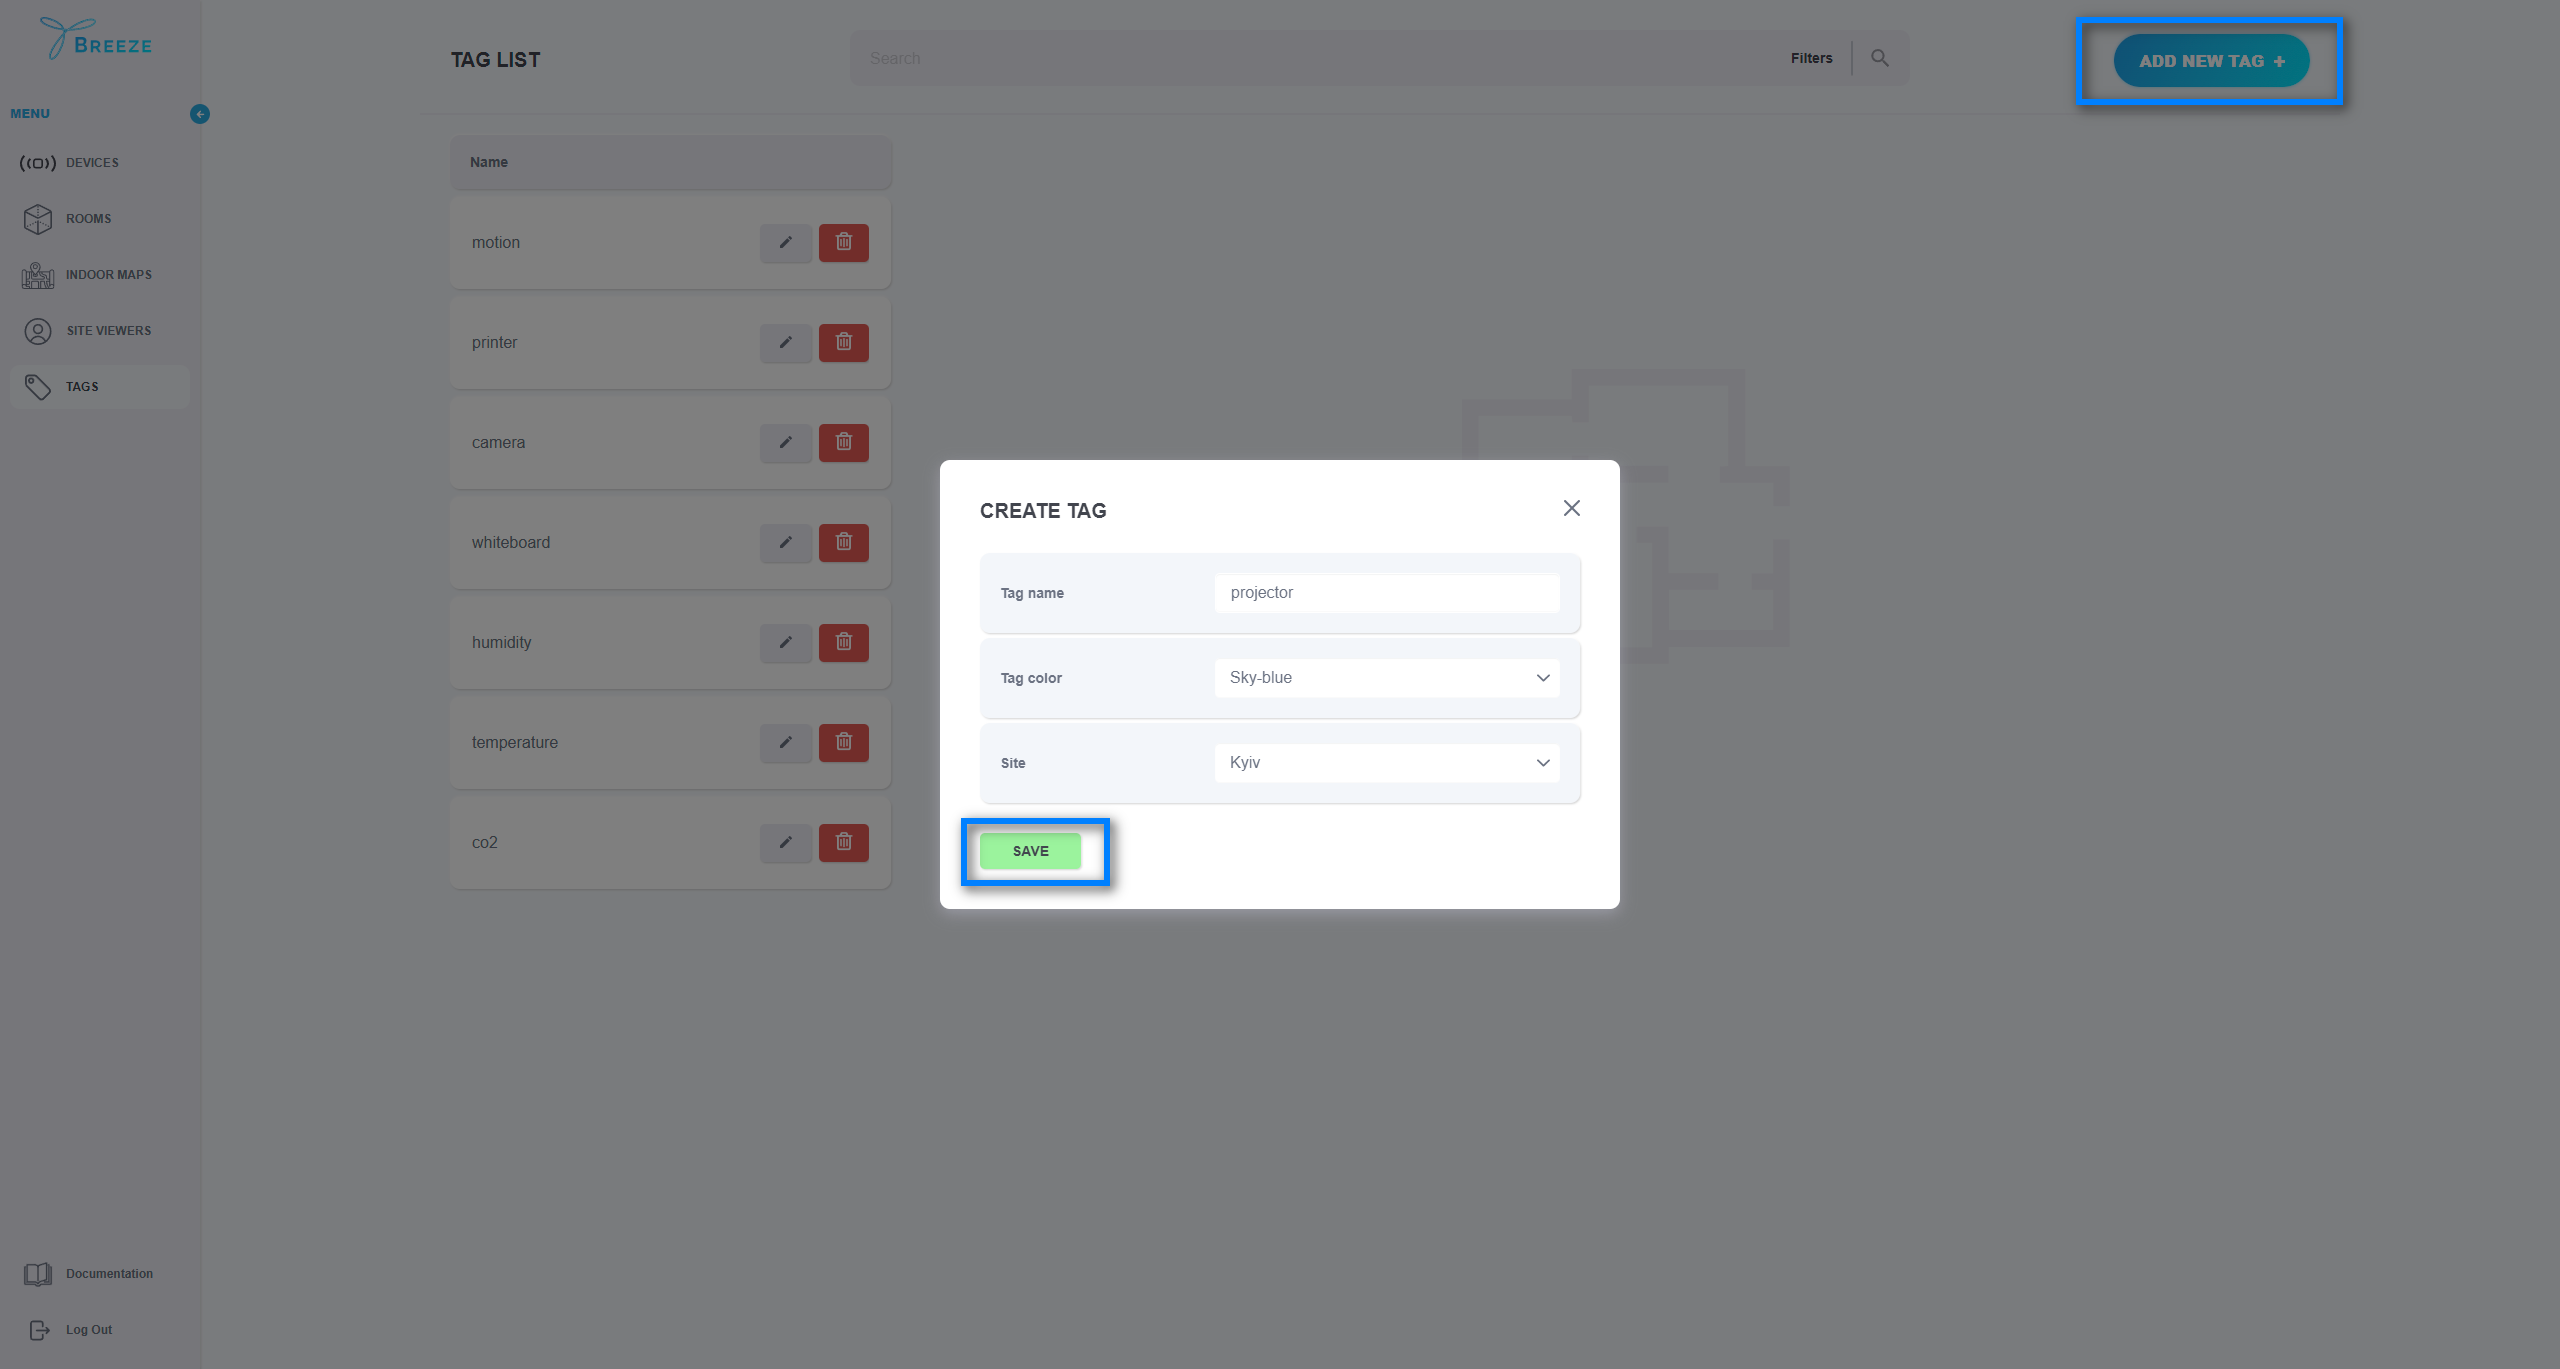
To create a tag, open the “TAGS” page and click on the “ADD NEW TAG +". In the new window, fill in the tag name, select a Site where the tag can be applied (in case you have access to several sites), and pick a color. Once done, click on the “SAVE” button.

In case you need to update your tag or delete Tag, simply select the corresponding option next to the item you would like to edit or delete.
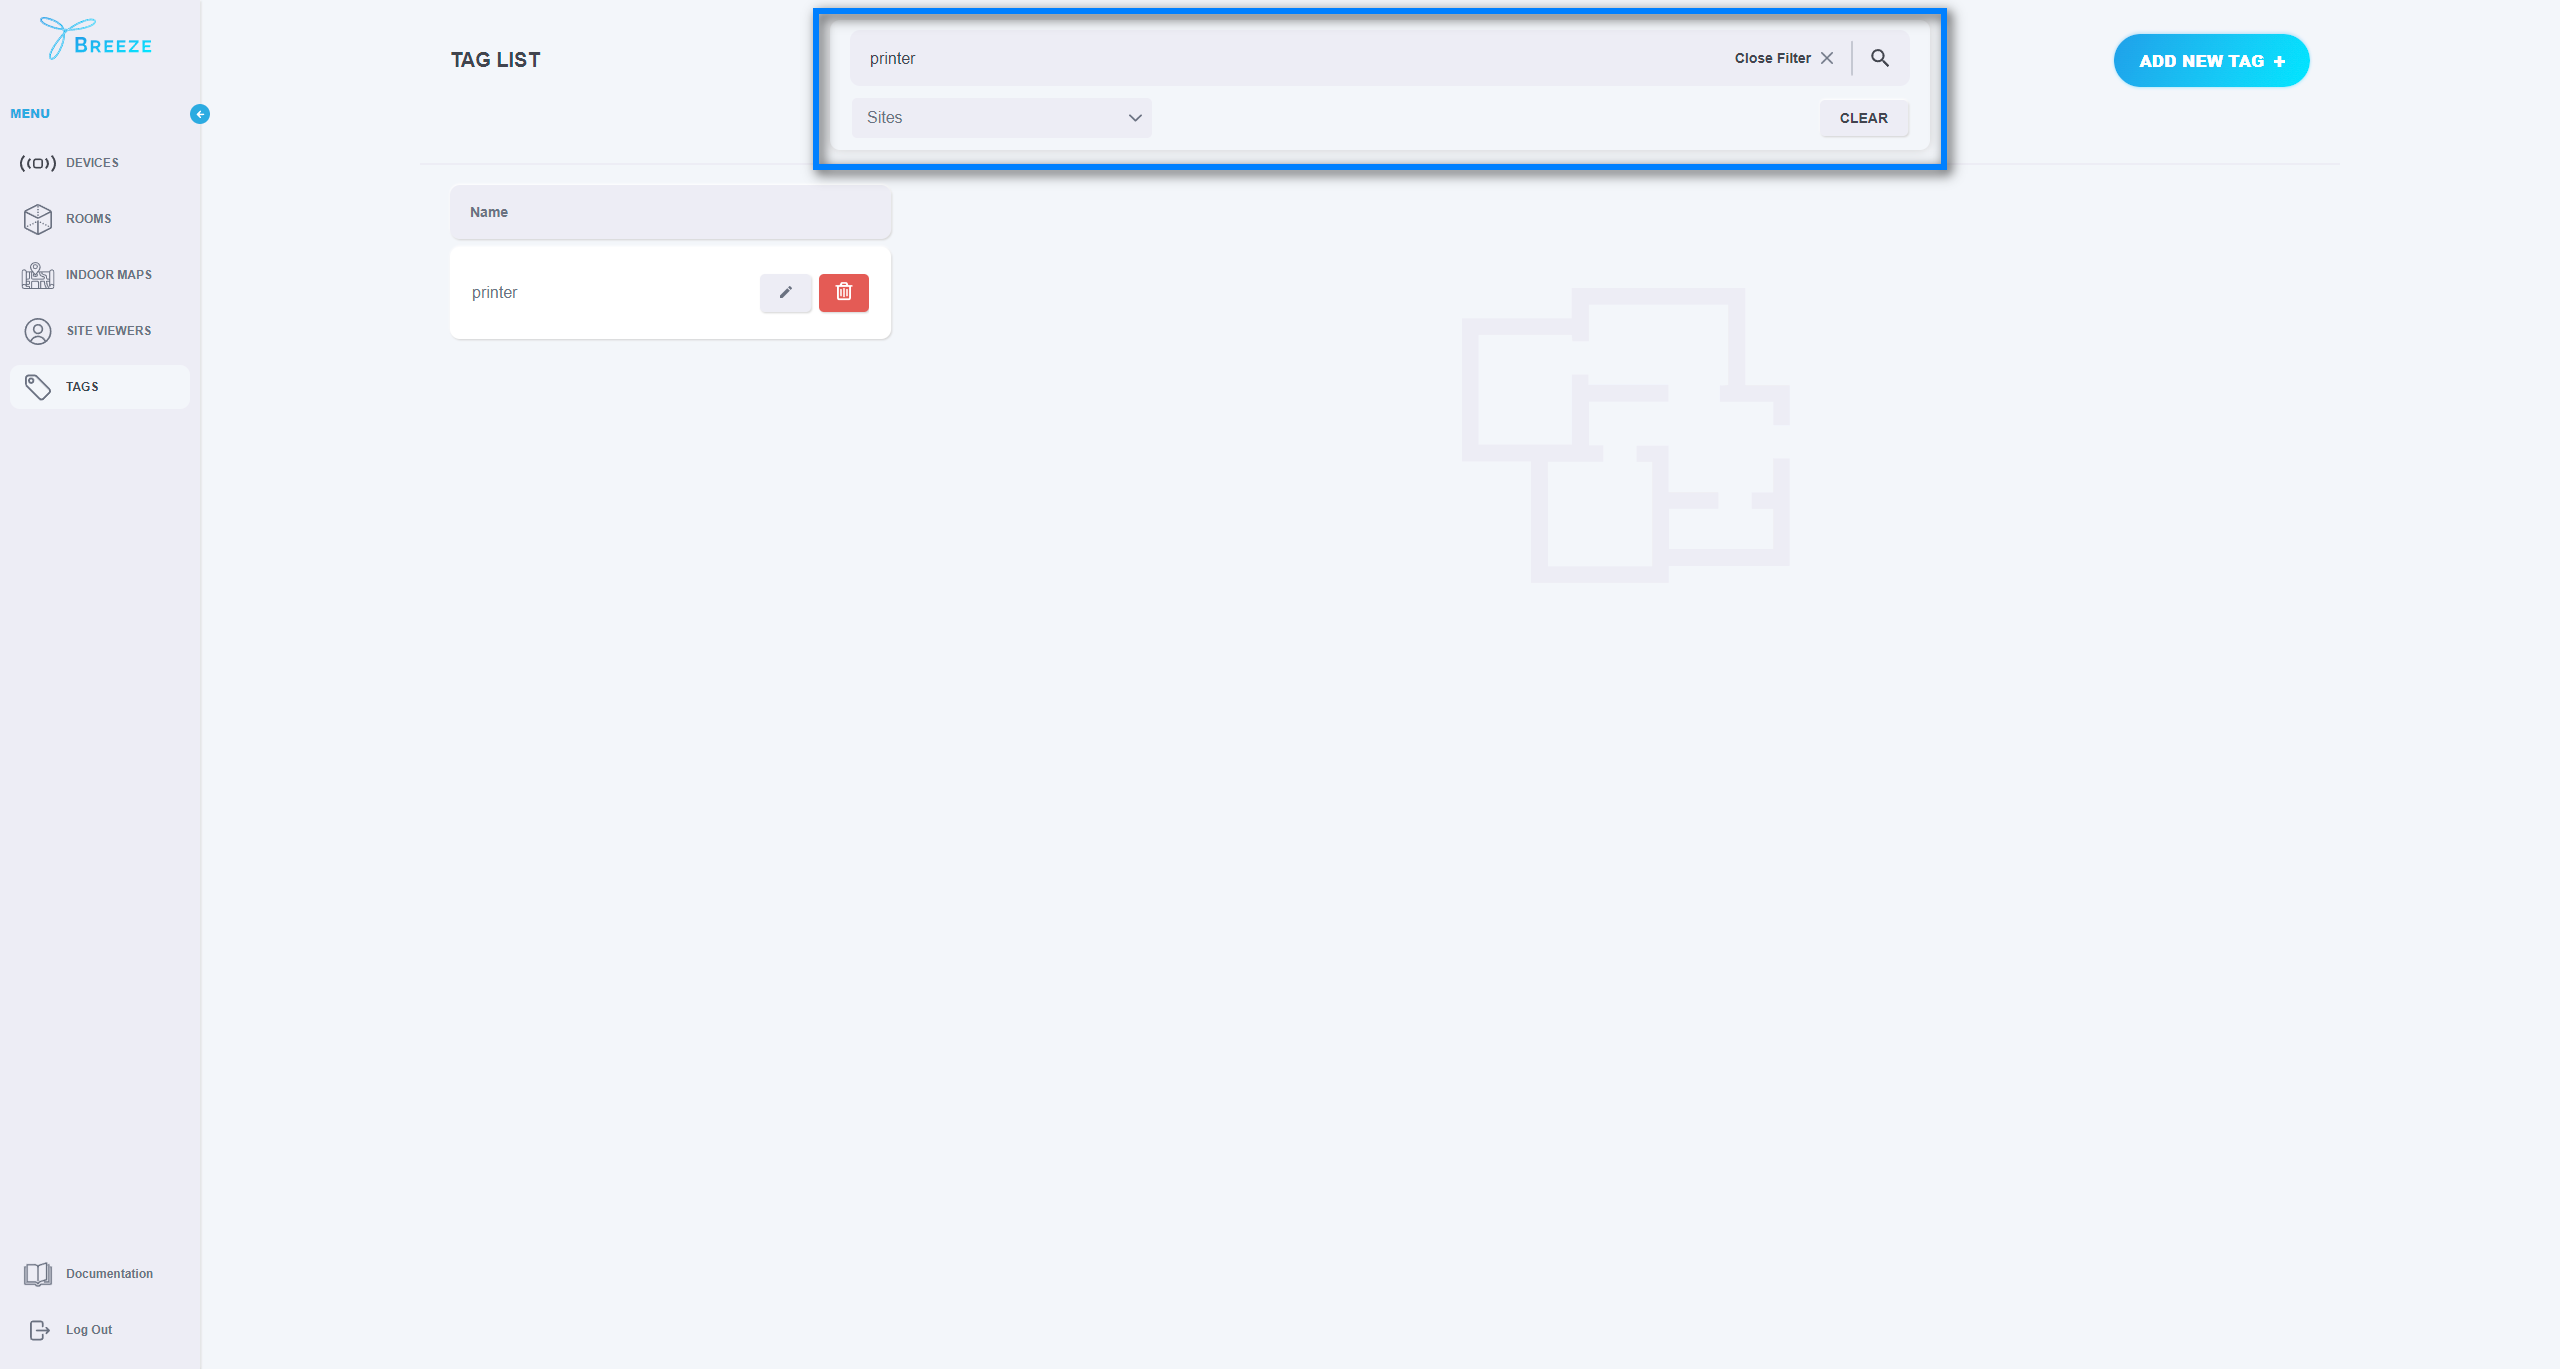
Once Tags have been added to the application, they can be searched by Tag name. Also, they can be filtered by Sites.

